

The National Institute of Certified Floor-Covering Inspectors (NICFI) is a
non-profit association of independent floor covering inspectors. NICFI members are expert flooring failure analysts and expert witnesses in flooring problems and failures.
NICFI members are experienced in the inspection and failure analysis of
woven carpet, broadloom carpet, resilient tile, rubber tile, cork tile, ceramic tile, resilient sheet vinyl, vinyl composition tile, LVT, hardwood, laminate, solid vinyl,
and specialty flooring materials.
NICFI members attend the annual NICFI Convention in Dalton, Georgia, to increase their knowledge and update their skills. The Annual Convention includes updates on indicative field testing
procedures, tools, products and product defects. The NICFI is the only Non-Profit Association in the Flooring Industry with membership comprised solely of Certified Floor Covering Inspectors.


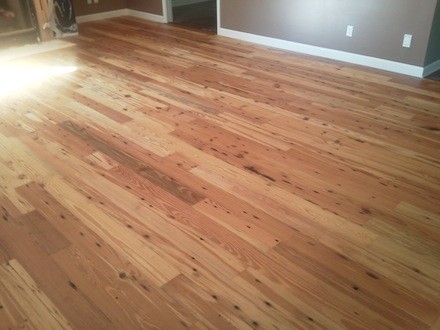
PHOTOS
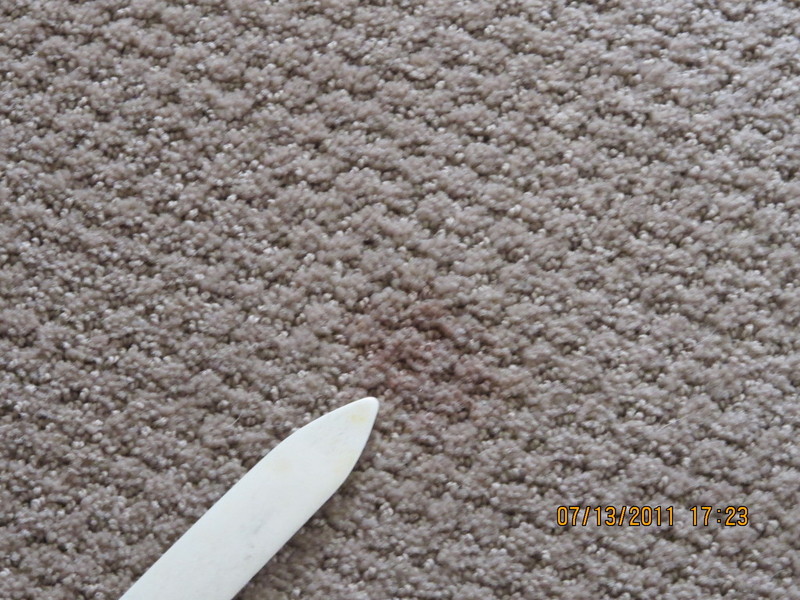
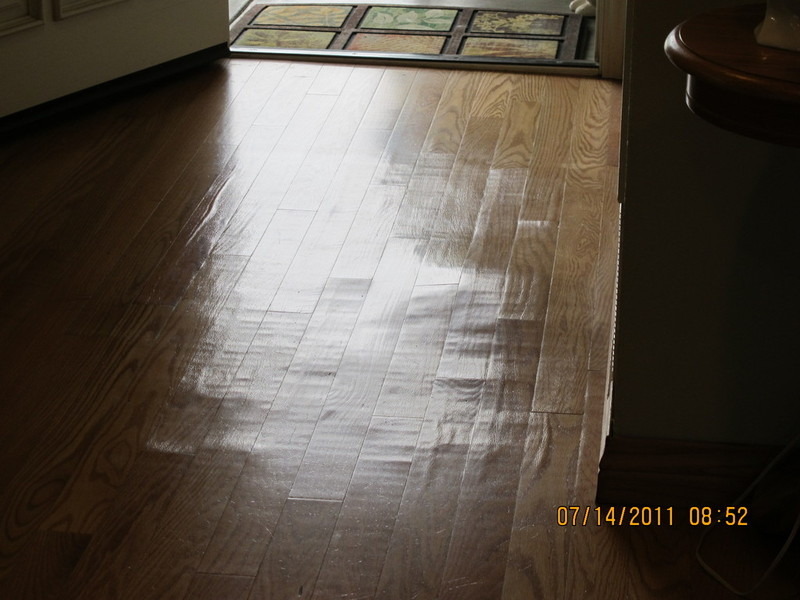
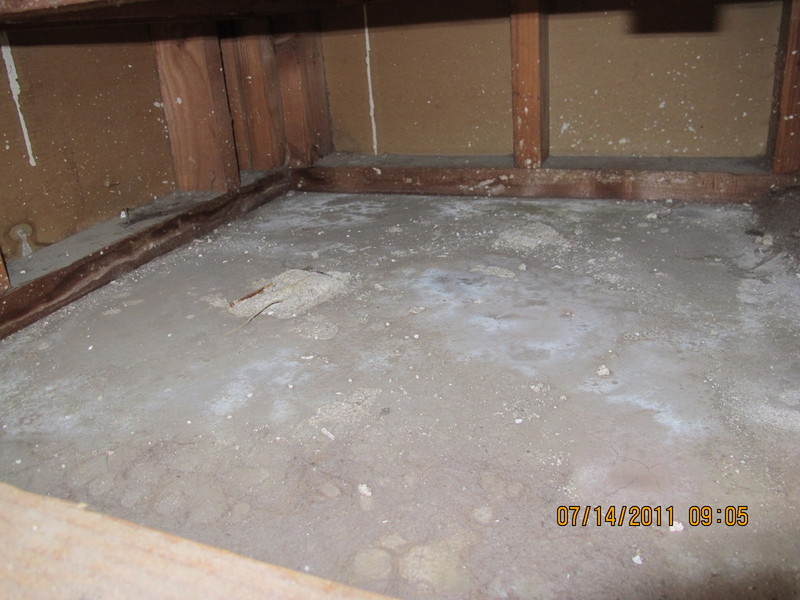
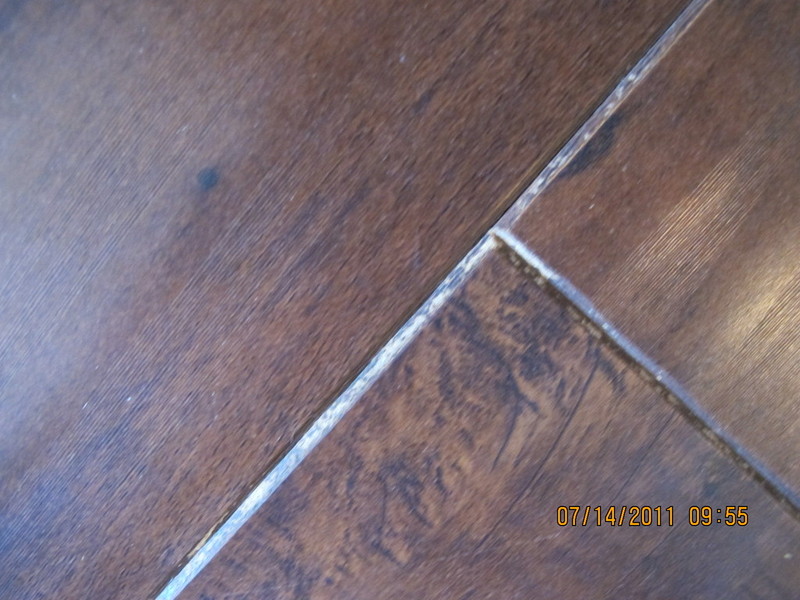
IS THIS YOUR COMPLAINT?


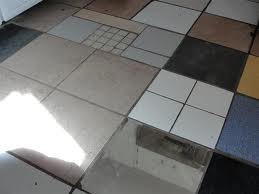


VINYL TILE

CONTENTS BELOW INCLUDE:
- SOLID VINYL TILE
- SEAL OFF CUT-BACK RESIDUE
- MASTICS & MOISTURE
- MAINTENANCE FOR VINYL TILE
- SHRINKAGE
- SATATIC DISSIPATIVE VINYL TILE
YOUR BUSINESS ADVERTIZING AND LINK CAN BE INCLUDED ON THIS SITE
CONTACT ME AT: floorcovering@cox.net
1. SOLID VINYL TILE
SOLID VINYL TILE
Keys to a Successful Installation
The words "Vinyl Tile" and "Luxury Vinyl Tile" get thrown around a lot but if you go by industry standards per ASTM, there are only two products in the category of "Vinyl Tile": Vinyl Composition Floor Tile (VCT) and Solid Vinyl Floor Tile (SVT}. Today we will be discussing the installation of SVT so first let's look at the main difference between the two products. ASTM F 141, Standard Terminology Relating to Resilient Floor Coverings defines "binder content" which is the main difference between VCT and SVT, "The binder consists of polymers and/or copolymers of vinyl chloride, other modifying resins and plasticizers which comprise at 34 percent by weight of the finished tile." Binder is what we call "vinyl", so SVT has to be at least 34 percent vinyl content and tile that is not is VCT, ASTM F 1700, Standard Specification for Solid Vinyl Floor Tile classifies SVT in three categories -
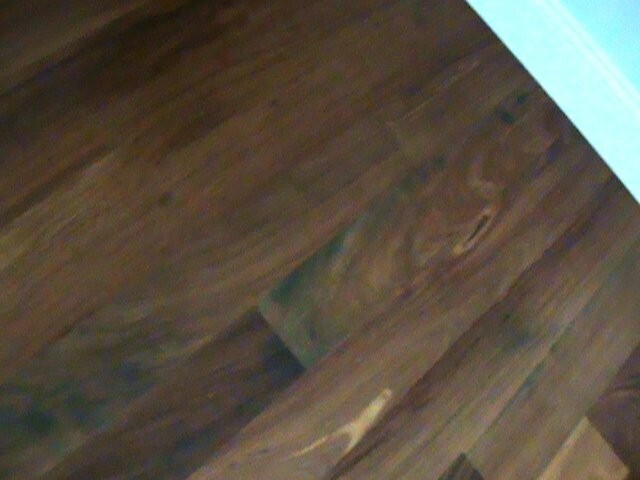
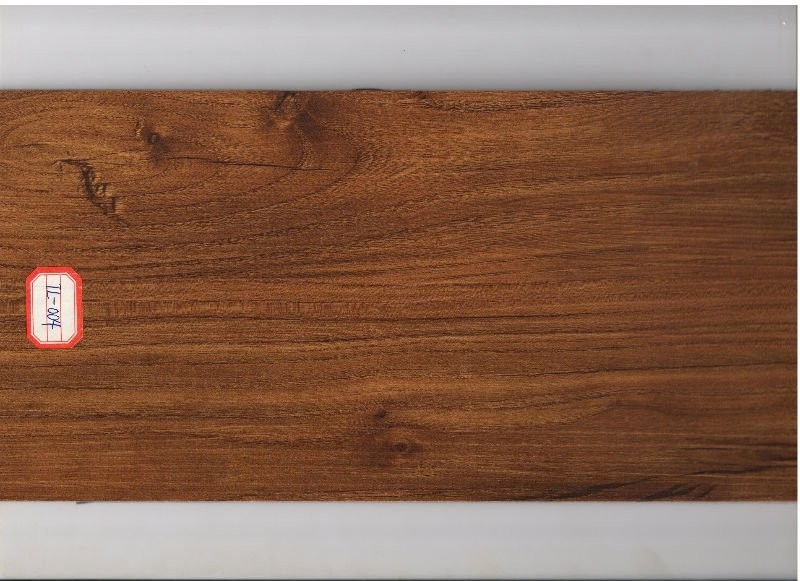
Class 1 Monolithic, which means through color tile with no backing; Class II Surface Decorated, which usually means an "inlaid" type tile with a backing, and with a clear vinyl wearlayer and a backing system,. Class III is the most popular category, and is often called "Luxury Vinyl." These products are the wood look vinyl plank, stone, marble and granite looks that mimic the real thing so accurately. The clear wearlayer comes in many thicknesses. A minimum thickness of 0.020-inch (20 mils) will classify the product as "Commercial." It is important to note that many products sold as "Luxury Vinyl" are not SVT. These products, mostly for residential use, have a backing containing a lot of filler that does not meet the 34 percent vinyl content requirement. These products are actually VCT. Regardless of the composition of SVT, the Installation is different from VCT, and failure to understand that is the cause of many failures. Here are the keys to a successful SVT job, starting with some important steps that have to happen before the installation. Adhesive selection: It is important to know that SVT is not installed the same way VCT is. You can't use "Clear Thin Spread" and put adhesive down over large areas. Most SVT adhesives are either a wet lay or a semi-wet lay installation and in some applications it may be a reactive adhesive like epoxy or polyurethane. Reactive adhesives should be used in very high traffic areas where there is a lot of foot or rolling traffic. Examples would be elevators, lobbies, hospital patient rooms or supermarkets. Floors that get wet a lot or are exposed to cold or heat are other good examples here reactive adhesives will outperform the standard acrylic latex products. So, before the job is even quoted it is important to match the adhesive to the job and quote the job accordingly.
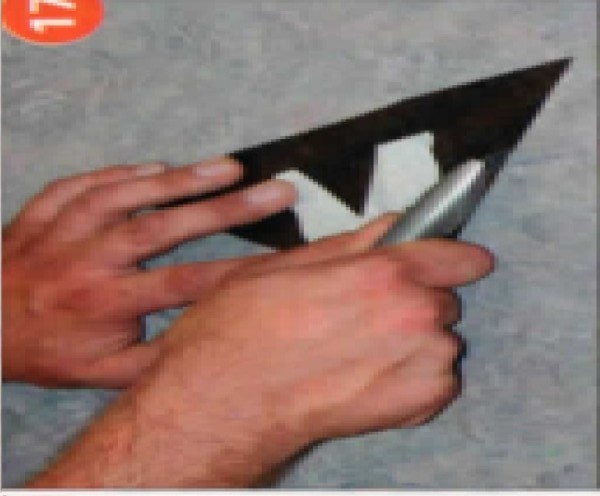
Trowel Notch: You should purchase new trowels with the appropriate notch size. It is often the case that SVT adhesive will be applied with a finer notch trowel than the standard VCT or carpetadhesive. Too much adhesive can lead to failures such as adhesive oozing, tiles shifting or indentations in the finished floor, so do not fail to pay attention to this detail. A good trowel costs no more than 2 cents per square foot and that is an important investment Site Conditions and Moisture
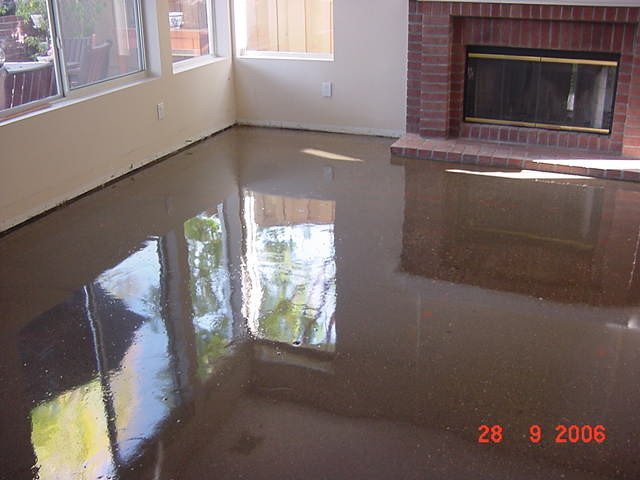
Testing: Make sure you are installing in a building that is climate controlled. The product, the adhesive, the moisture testing and the surface preparation will not be at their best if they are used in very cold or very hot conditions. SVT is not at all "Breathable" so moisture will not pass through it. If you are installing over concrete, make sure that moisture testing has
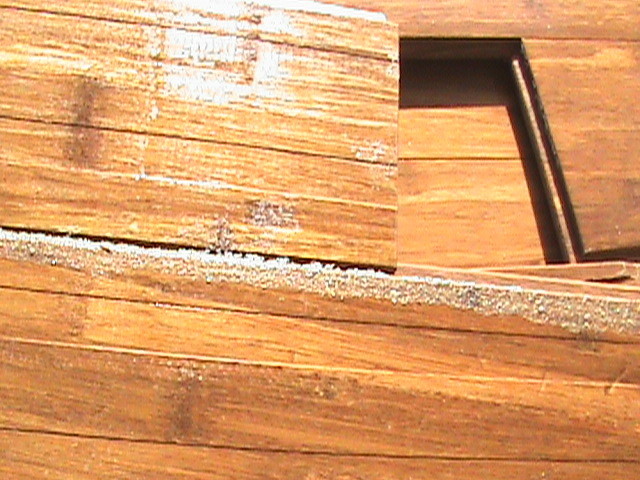
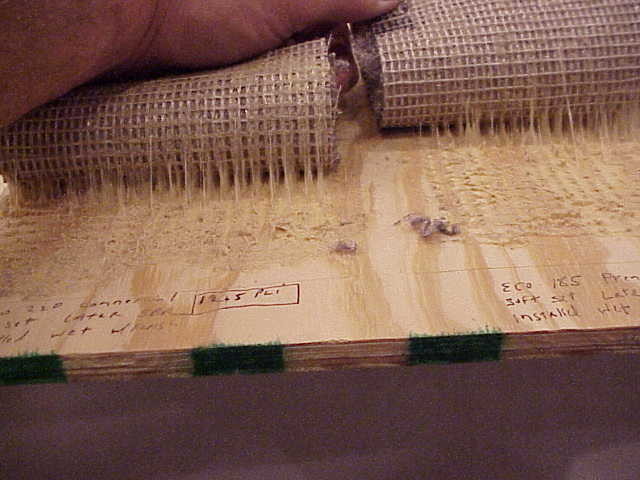
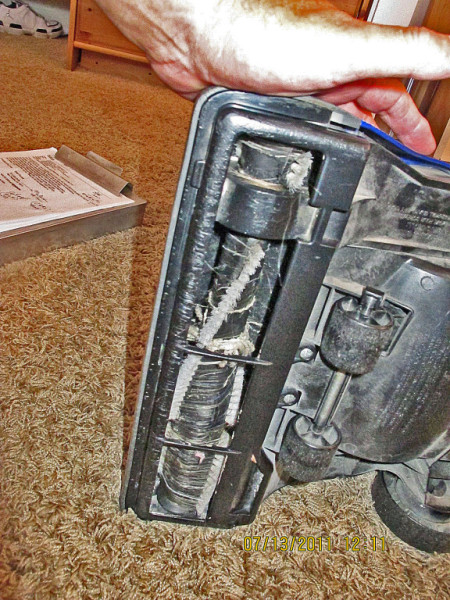
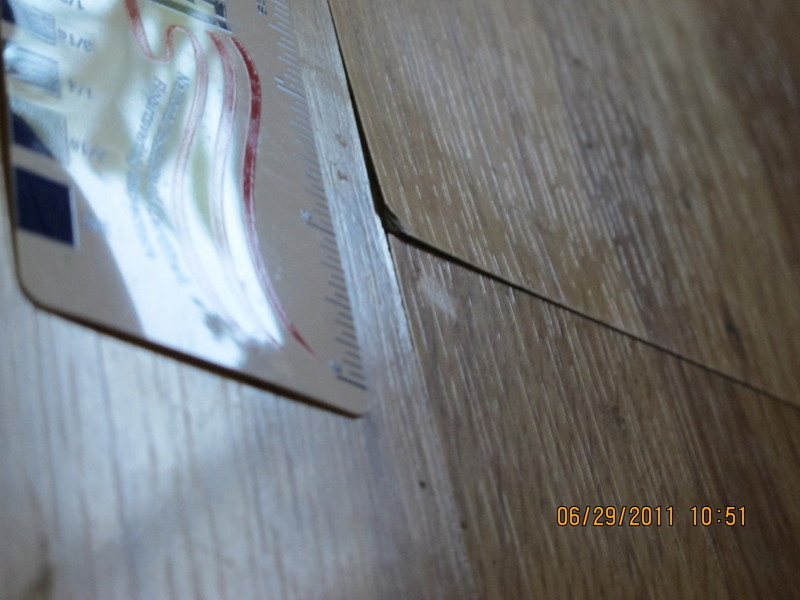
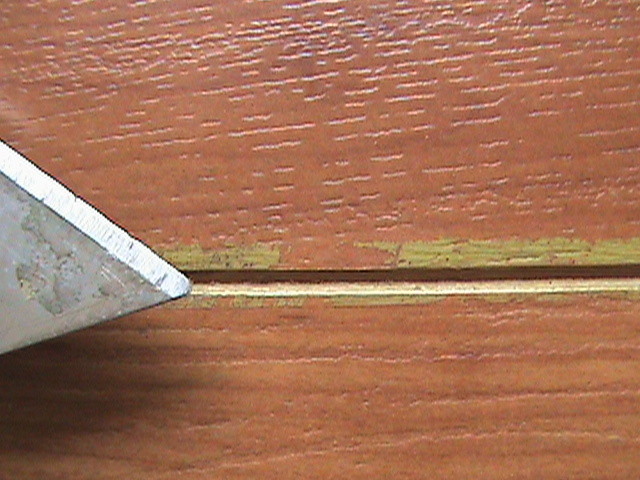
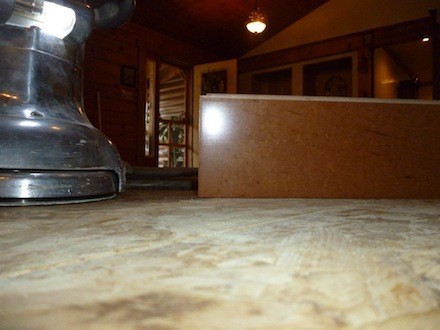
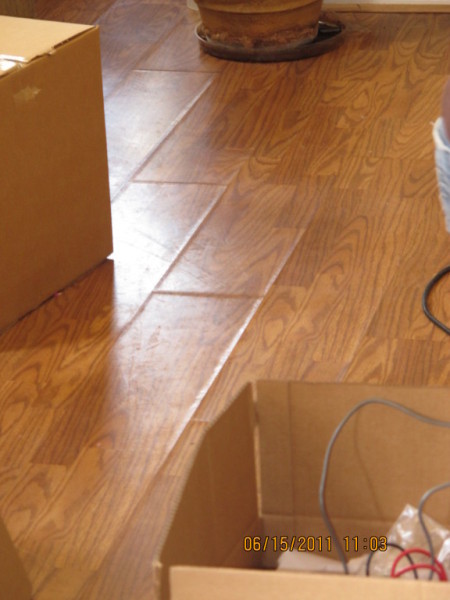
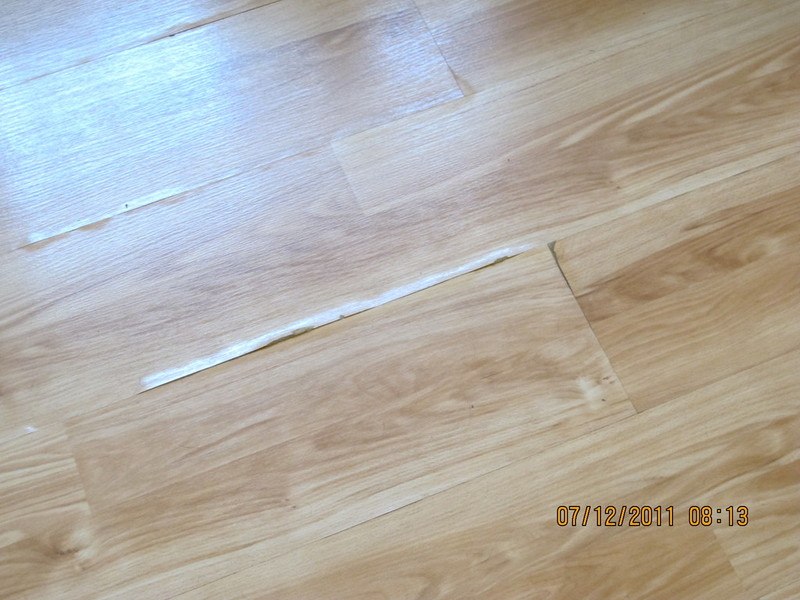
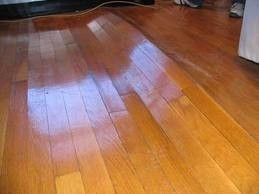
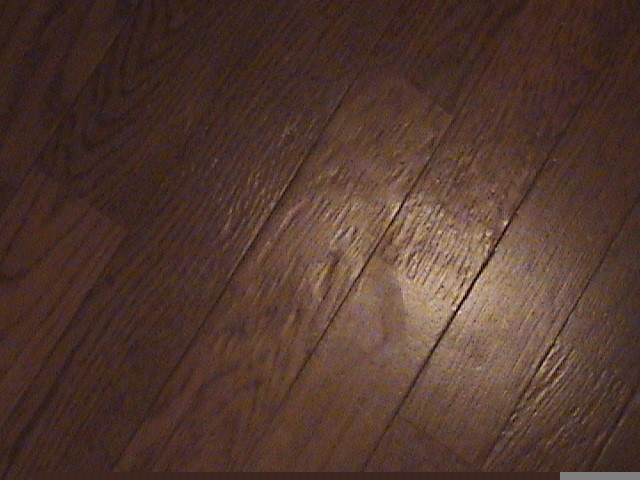
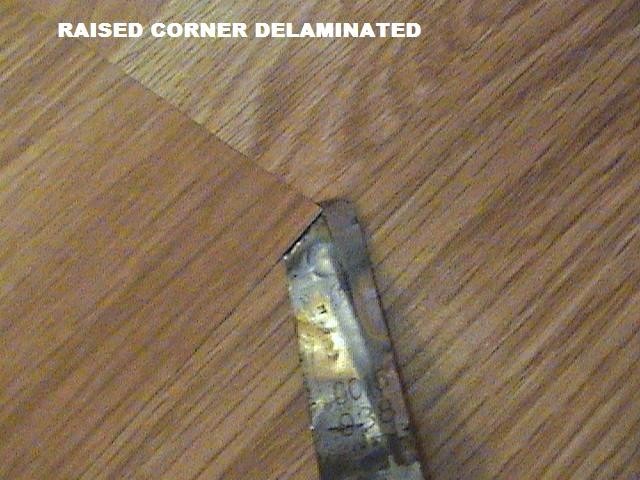
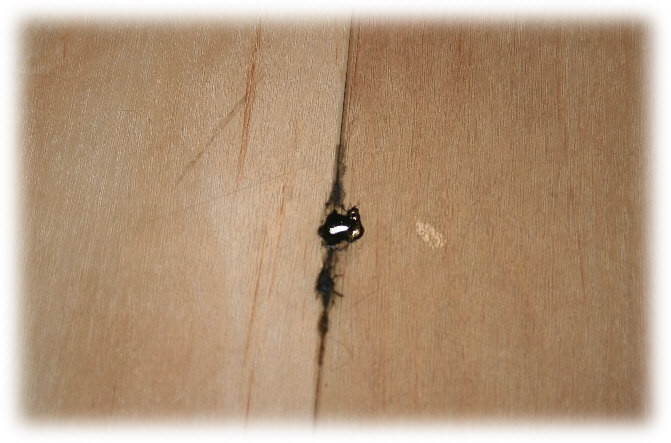
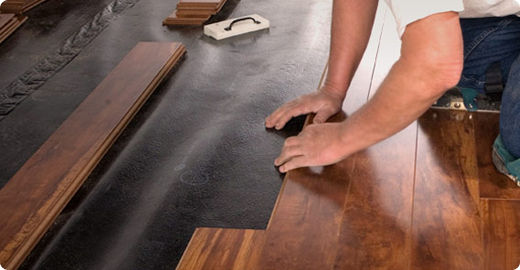
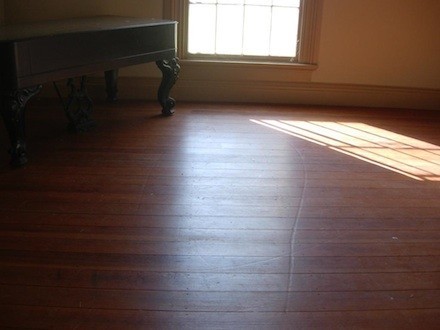
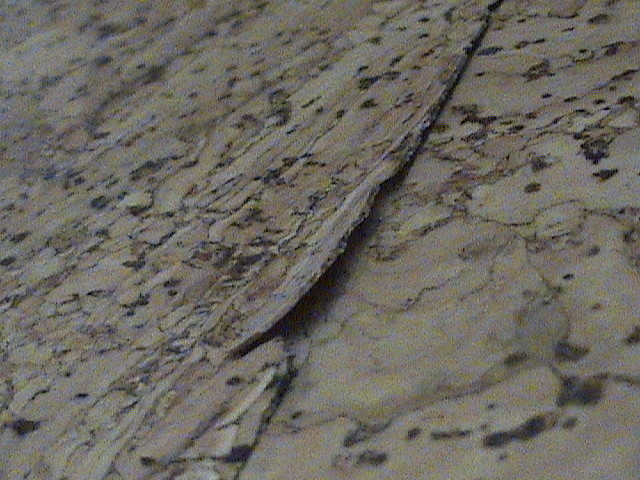
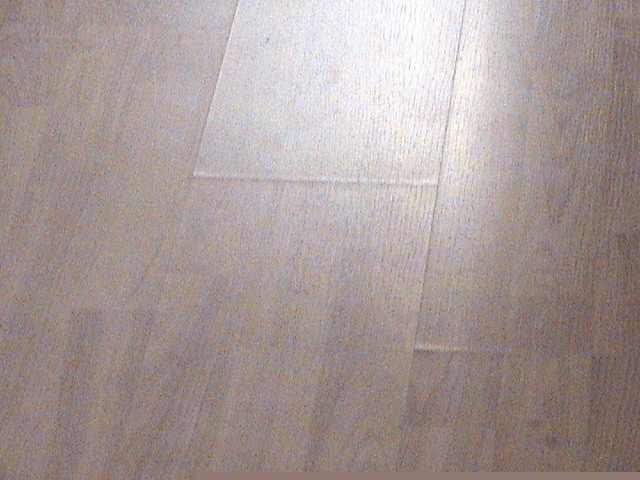
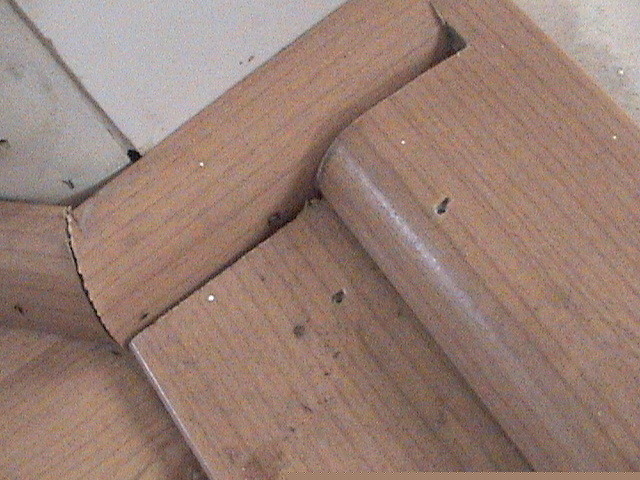
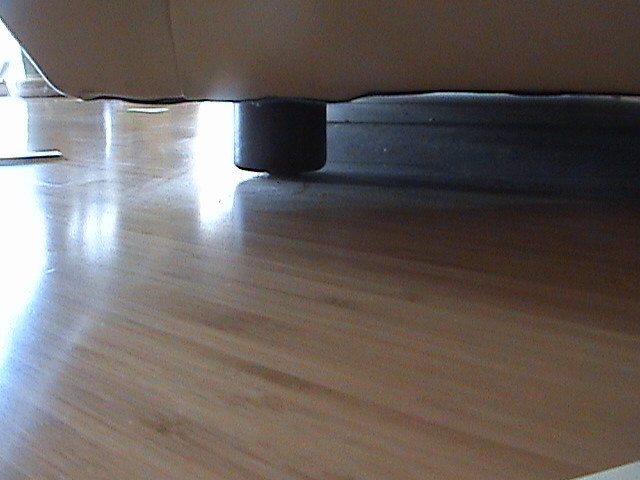
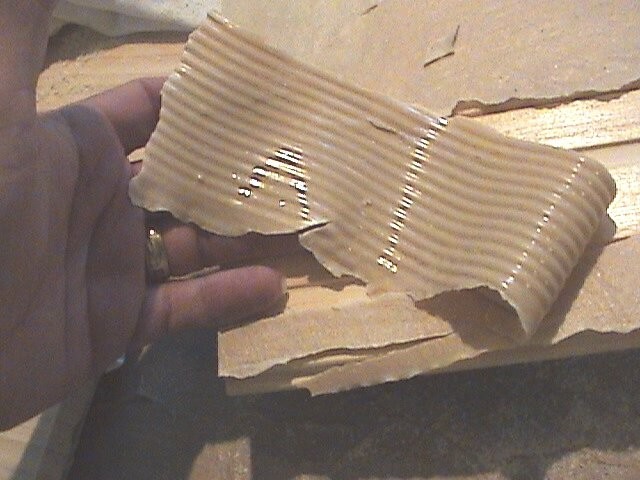
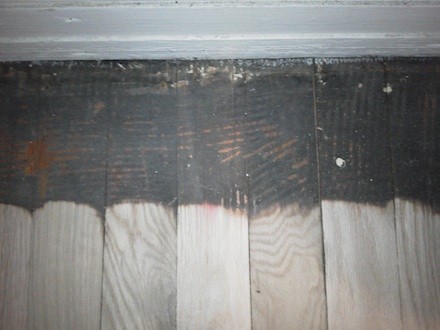
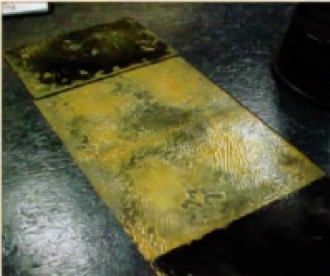
"Clear thin spread" vinyl composition tile adhesive is not designed to hold solid vinyl plank in place. This photo shows the importanceof proper adhesive selection. PHOTO courtesy of Jeff Toiie, ParterreFlooring Systems)
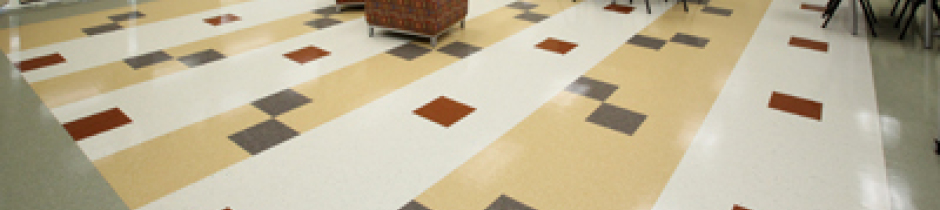
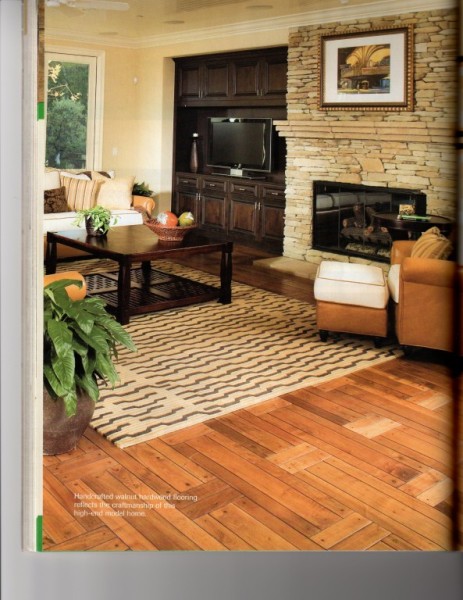
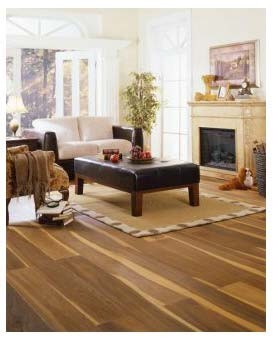
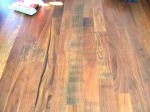
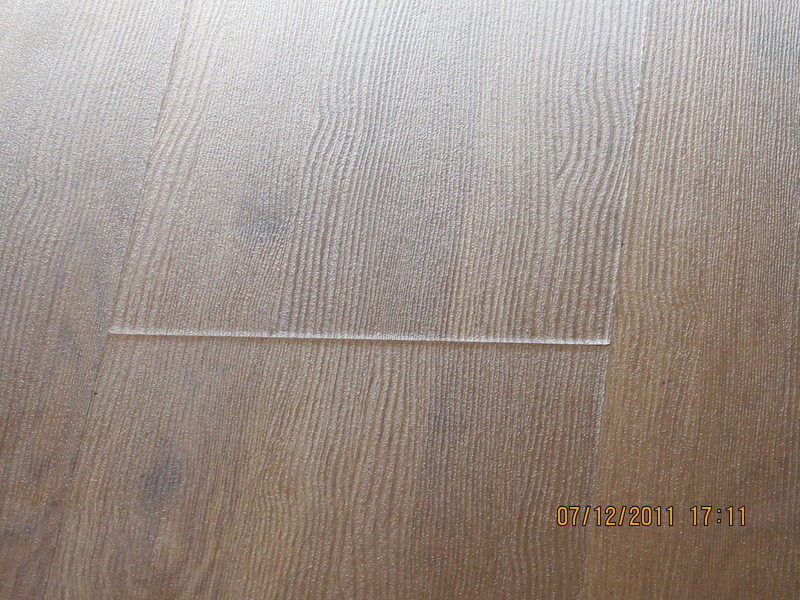
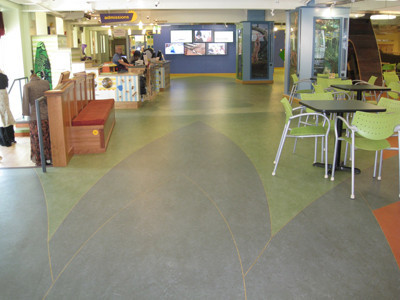
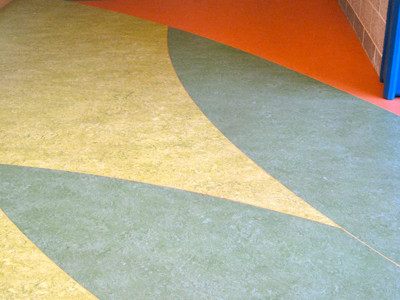
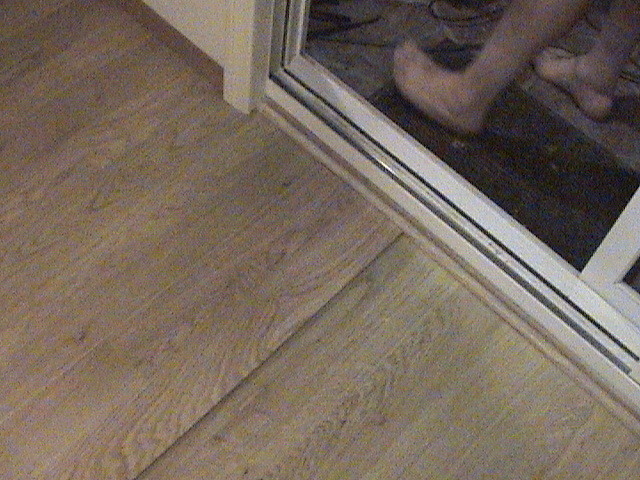
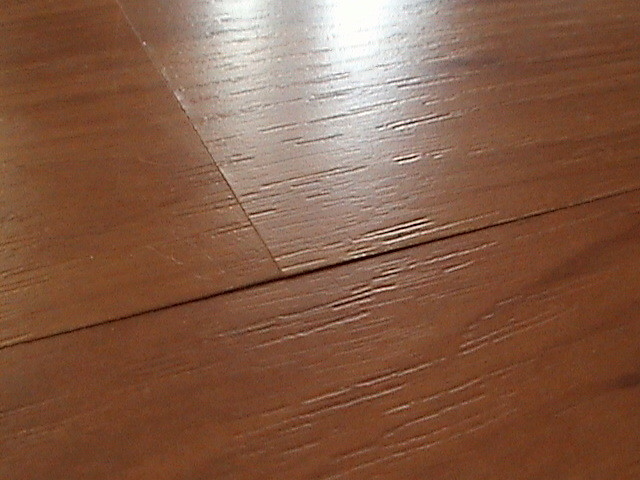
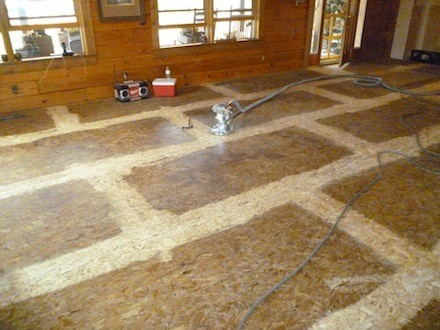
Careful planning and layout by the installer assured the designer that the design she created on paper was accurately recreated on the floor. (Photo courtesy of Mannington) been done and that the slab meets the requirements of the adhesive and/.or the flooring manufacturer.
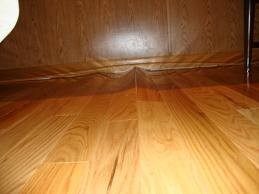
Acclimation: The product itself needs to be acclimated to job site conditions for at least two days before installation. The reason for this is the tendency of vinyl products to react to temperature changes, especially warm to cold. Vinyl products such as SVT, vinyl wall base and vinyl edgings may expand slightly or they can be inadvertently stretched during handling if they are warm, such as when they come in from a hot van. Vinyl has "memory" so if it is installed in this expanded state, it will go down with joints that are nice and snug but may show gaps later in when it goes back to its original size. For this reason, acclimating vinyl products to job site conditions is just as important as it is with natural products such as wood, cork, and laminates.
Substrate Preparation: Because SVT is very flexible, it will conform to any irregularities in the substrate, so floor prep is the third key to success. Take extra care to be sure the substrate is smooth by installing the proper underlayment or patching compound to smooth the existing surface. This is especially true on smooth SVT and is most critical on dark color SVT with a smooth surface. This is a good example of knowing the product before you install it. Textured resilient flooring of all kinds is more forgiving of slight irregularities in the substrate then smooth products are, so it may take a little extra time for surface prep with these smooth products. In addition to commercial use, SVT that is installed and maintained correctly can be a good choice for residential use as well.
Adhesive Open Time: Before you start to spread adhesive, make sure you are comfortable with the required amount of open time so that you can lay out the job and spread the right amount of adhesive at a time. Leaving too short of an open time may cause poor bond and more chance of tile shifting or adhesive oozing up between the tiles. Allowing too long an open time may mean the tile might adhere initially but the long term bond strength will not be good. Open time can be affected by temperature and humidity so it should be checked on a job by job basis. In dry warm weather the open time may be shorter and in humid weather it may be longer. Adhesives with a shorter open time requite that the installer spread small areas of adhesive at a time.
Spreading the Adhesive and Rolling: If you are used to installing VCT, you are experienced in “dry" adhesive, where large quantities are spread using a 1/16-inch square notch trowel, and allowed to "tack up" so they are dry to the touch and do not transfer to the back of the tile. It is very rare that SVT products are installed using this type of adhesive because the nature of SVT is that it is not as stable as VCT so it needs a harder setting adhesive such as a "wet lay" acrylic or a reactive adhesive, which often are applied using a smaller trowel notch such as a 1/32-inch notch. "Wet lay" adhesives must be spread in small areas at a time, covered within the recommended open time (usually 15-20 minutes), and rolled with a 100-lb roller. If the tile is lifted periodically, there should be transfer of adhesive to the back of the tile and the trowel ridges should be flattened out. If these types of adhesives are left open to the air for too long a time period, they lose their adhesive characteristics and must be scraped off the floor. If they are not rolled, the tile sits on top of the adhesive but is not fully adhered. In both cases, there may be enough tack to hold the tile down but the bond will not be nearly as strong so the floor may develop gaps over time. If the floor fails on a wet lay installation, the cause can be diagnosed by lifting a tile. If trowel ridges are visible and/or there is no adhesive transfer to the back if the tile, it's a good bet there was too much "open time" so the adhesive "skinned over", or the floor wasn't rolled. Another type of SVT adhesive is a "tacky lay" type, where the adhesive left open to the air for about 30 minutes, or long enough that it develops some tack, but not long enough where it turns clear like a clear thin spread VCT adhesive. The best way to tell if this type of adhesive is ready is to touch it lightly with a finger. If you get a "smudge" on your finger it is not ready. If you see lines from the trowel notching then it is ready. Set the tile and roll it with a lOOlb roller.
After Installation: Once all of the tile is laid, roll the entire floor with a lOOlb. roller one more time in both directions. Check for any loose or popping tiles and if there are any, weigh them down so the tile and adhesive will be in full contact with each other when the adhesive sets. This weight can usually be removed after 12 hours or so. Check the flooring and adhesive manufacturer's recommendations for how long to protect the floor from traffic. When in doubt, prevent all foot traffic for the first 12 hours and allow light foot traffic from 12 to 24 hours. As far as rolling traffic and furniture, that may depend on the adhesive. Generally, I would recommend preventing rolling traffic for 48-72 hours after the tile is set.
Protection: If there will be construction on the floor after installation it should be protected from damage. Tools, ladders, carts and the like can make permanent indentations if they are allowed on the floor while the adhesive is still wet. Wait 24-48 hours for the adhesive to set up, then sweep the floor and cover with brown Kraft paper and 1/4-inch or thicker panels of plywood or hardboard. Don't use colored paper because it can stain the floor if wet and don't use plastic because it may hinder adhesive drying. Also, don't put the panels directly on the floor because they may scuff or scratch St. Put papet down first.
Floor Care: Floor care is usually not the installer responsibility but advice about floor care may be. Before you answer the question "how do I clean the floor?" make sure you know the answer. There are a variety of different cleaners recommended for different floors, so don't just say "any floor cleaner from the supermarket". If you don't know, say "sweep and damp mop with plain water until you get the manufacturer's floor care instructions. Like a lot of products we cover in "Let Talk Resilient," SVT is a high end producthat takes a little longer to install but done correctly make may be one of the most beautiful floors you ever install.
2. SEAL OFF CUT-BACK RESIDUE

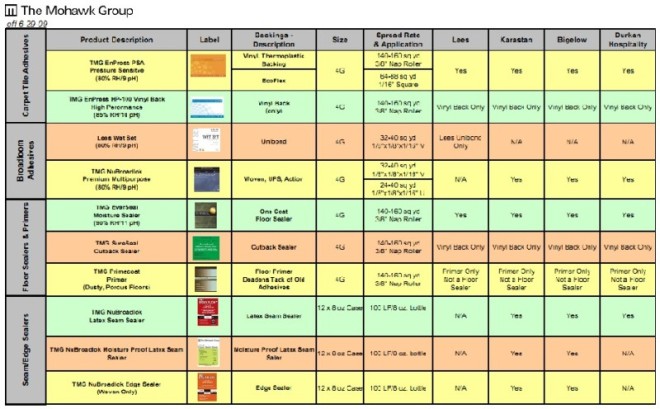
The Mohawk Group SureSeal Adhesive / Cutback Sealer
The Mohawk Group – Lees, Karastan Contract, Bigelow Commercial, and Durkan
Mohawk Group SureSeal is a light-colored high strength acrylic based compound formulated to isolate
cutback and other types of old adhesive residues. SureSeal will also improve dusty and porous floors to
provide a clean surface for better adhesive bonds. It contains “zero calculated” VOC’s and does not contain any known hazardous materials.
- One-coat application
- Concrete (above, on, or below grade)
- Plywood (APA grade hardboard and approved flooring grade underlayment)
- Also approved for use with Mohawk Group EnPress PSA Adhesive for Encycle backings
- Safe to use in occupied spaces
- Low odor, Non-toxic
- Use over old cutback*, multi-purpose and pressure sensitive adhesive residues
Directions: Existing adhesives must be mechanically scraped down to a bare residue flat with the
substrate. Do not use solvent or liquid cleaners to remove old adhesive. Floors must be clean, dry and
free of any other concrete sealers, curing compounds, wax, oil, paint or any foreign matter that will
interfere with a good bond.
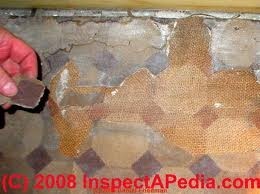
*Cutback may contain asbestos fibers and should not be dry sanded or scraped. When removing excess, wet with water to prevent any dusting or treat as per local regulations.
SureSeal must be applied over a solid surface. Soft adhesives, excess residue, or any surface that does
not support the film will result in a failure of the product.
The installation site must be acclimated with HVAC in operation. The floor and room temperature, as well as the SureSeal, must be between 65° and 95° F, and the humidity between 10% and 65% for 48 hours prior to, during, and after the moisture testing and installation. Patching of subfloor must follow all manufacturers’ application and curing instructions prior to applying SureSeal. Patch must be a good quality cementitious material, not gypsum based. Perform a bond test with the SureSeal over any patching compound before general application of either. Do not use SureSeal in combination with any other sealer or encapsulant.
Apply SureSeal with a 3/8 - inch nap paint roller, as an even coat over the entire surface of the floor.
Make certain to keep the application roller wet with material. Only one coat is required, at an application rate of 315 - 360 square feet per gallon. Allow SureSeal to dry for a minimum of 4 hours, until completely dry and hardened to the touch. Clean up spills with soapy water; dried residues may require the use of a solvent remover. Containers must be kept tightly closed when not in use.
Limitations: Not for use where the concrete tests higher than 80% RH according to in-situ Relative
Humidity Test ASTM F2170, or if the moisture vapor emission rate (MVER) exceeds 6 pounds per Calcium Chloride Test ASTM F1869. The pH of the concrete must not exceed 10.0 before applying this product.
Shelf Life: 1 year from date of manufacture in unopened container. Protect from freezing.
This product is not photochemically reactive as defined by California Rules 102 and 443.
VOC content is below that established by California SCAQMD Rule 1168. Rev: 03/19/09t
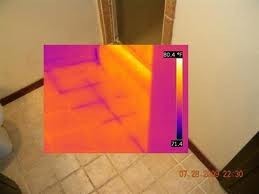
3. MASTICS & MOISTURE
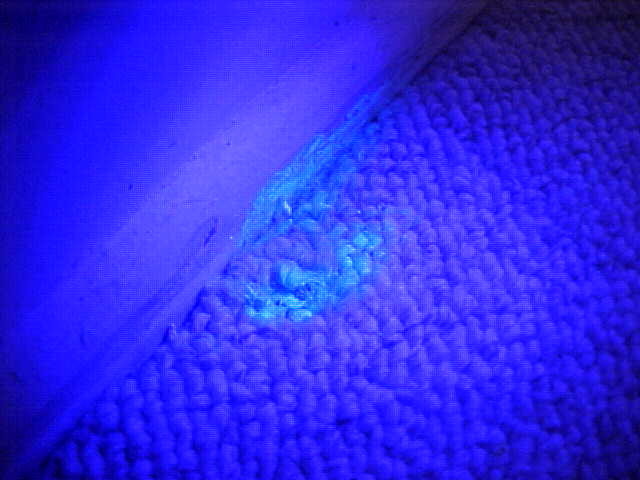
HOW TO DEFEAT MOISTURE PROBLEMS, FLOOR COVERING ENEMY NUMBER ONE
BertYanceyJMFCo. ConSeal
Porous by nature, concrete absorbs moisture from outside sources and moves it upward by way of interconnecting pores created during the curing process. This upward movement of moisture through concrete has been a continuing source of major problems for the floor covering industry, typically resulting in staining, efflorescence, mildew, separation of adhesive and the floor covering from the slab. Historically, solutions have been very expensive and/or labor intensive. Hot tar and felt, cold stick products, sheet vinyl membranes and epoxy paints and coatings of various types have all been used with some degree of success, but none seem to be truly effective when moisture and hydrostatic pressure are constantly present in the slab. The main reason is that they are top coatings. Thus, they adhere to the surface of the concrete and are subject to moisture and pressure from below. This causes them to separate from the concrete, just like the floor coverings they are supposed to protect. Modern technology has developed an effective method of moisture protection. It's a water based penetrating treatment for concrete applied quickly and easily with a paint roller or sprayer that is absorbed into the concrete. The process impregnates the pores with a gel, forming a moisture barrier within the concrete, rather than on the surface. It is effective below as well as on grade and is compatible with all types of mastics, adhesives and floor coverings.
Howard PriestDependable Chemical Co.
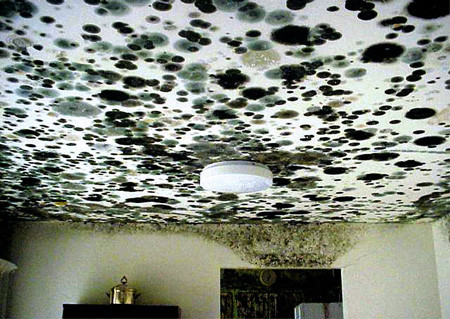
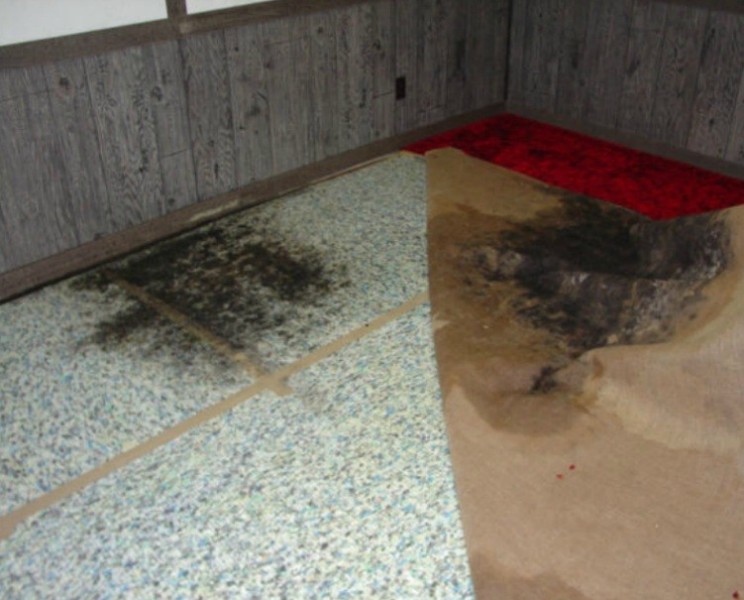
The moisture problems not generally addressed or understood by our industry are self-induced problems. For example, the underlayment board might not have waterproof glue in the laminates which can cause swelling when moisture is drawn into the joints or raw surface areas from the fluid in the patch or adhesive.To avoid this, stir together equal parts of alcohol and clear shellac in a clean container. Then brush coat the joints, hammer head indents and sanded or planed surface areas before patching or spreading adhesive. A sort of reverse moisture problem can occur if you don't allow the patch to dry completely before applying adhesive. What happens is that some of the adhesive is drawn into the damp patch causing a poor bond of vinyl to the floor. This points up the need for installers to allow enough time for the patch to thoroughly dry before applying adhesives. A misunderstood moisture is mildew. Floor patch gets most of the blame for causing mildew, when in fact, most stains or discolorations are actually not related to either the patch or adhesive.
Roger SalamonMidland Corp.
Successful installations are the result of careful initial planning and use of proper materials. Every care must be taken to anticipate those unexpected moisture problems which cause a job to fail. One important approach to controlling moisture is by the use of a latex floor/wall primer. Consider the facts — it dries quickly, has no offensive odors or hazardous fumes and easily cleans up with water. There are three situations that require the inclusion of the primer. First, on new or dusty concrete, the primer forms a surface film, penetrates the surface pores and provides a solid bonding surface for the subsequent application of adhesive. This is especially important where self-stick tile is installed. As for dust, the primer ties it down permanently, forming a rigid bondable surface which is capable of accepting a permanent covering. Secondly, when applied to plywood sub-surfaces, the primer prevents adhesive migration from the tile to the plywood surface. Most self-stick tile failures, whether vinyl or wood, can be averted by priming. The same applies to sheet goods installed on plywood in areas adjacent to hot air registers and near exit/entrance doors. Finally, on new dry wall surfaces over which mastic is to be applied, primer will prevent the dry wall surface from absorbing the resins in the mastic which cause the mastic to dry out and the tile to become loose. Priming will also keep unwanted outside moisture from getting in behind the tile, protecting the adhesive bond as well as the wall itself.
Robert DempseyCongoleum
Moisture is unquestionably among the most serious problems relating to just about any type of floor covering installation, and resilient is no exception. The reasons why moisture can be a problem for resilient installations are many. First, mildew or an alkali condition associated withthe moisture can affect the color integrity of the floor covering. Second, moisture can have an effect on the bonding ability of the adhesive used in the installation. No resilient manufacturer is likely to recommend the use of its product in an area where a known moisture problem exists without eliminating it. And no one product is likely to solve a moisture problem all on its own. Moisture is a complicated problem, and solving it can involve taking a combination of measures. Therefore it's imperative that you determine if a moisture problem exists, determine the cause of the problem, and then select the measure or combination of measures needed to solve the problem. Installations over bare slab, either on or below grade are most prone to complications due to moisture. There may be no apparent problem on casual inspection, but it's best to really analyze the surface with an adhesive mat test or a calcium chloride moisture test. If a slab surface does show evidence of a moisture problem, the installer might be tempted to simply use one of the many liquid or silicone sealers available on the market. That might be a mistake. Chemicals in some sealers could discolor the resilient over a period of time, and can cause significant bond failures. There are many new waterproofing agents on the market. It's a good idea to get a written warranty from the manufacturer. It's best to try to get to the cause of a moisture problem. For example, one common problem is caused by roof drainage downspouts. If a downspout empties too close to the foundation, the drainage water will eventually migrate into the slab. By diverting the drainage away from the building, the cause of the moisture can be eliminated. You can go ahead with the installation once the cause of the moisture is eliminated and the moisture significantly reduced. Some resilient floors have features that address normal moisture transmission that might remain, and are formulated to resist discoloration due to mildew or alkali.
4. MAINTENANCE FOR VINYL TILE

WORLD FLOOR COVERIN G ASSOCIATION MAINTENANCE OF VINYL COMPOSITION (WITH OR WITHOUT ASBESTOS) AND ASPHALT TILE FLOORS
CAUTION:
- DO NOT DRY BUFF, SPRAY BUFF OR BURNISH VINYL COMPO-SI-TION (WITH OR WITHOUT ASBESTOS) OR ASPHALT FLOOR TILE WITHOUT PRIOR APPLICATION OF A METAL CROSS-LINKED ACRY-LIC FINISH WHICH IS RESISTANT TO NEUTRAL CLEANERS.
- DO NOT DRY STRIP UNDER ANY CONDITIONS. WHEN WASHING, WAXING OR STRIPPING TILE FLOORS, TRAFFIC
SHOULD BE EXCLUDED FROM THE AREA BECAUSE WET FLOOR SURFACES ARE USUALLY SLIPPERY. THE USE OF IMPROPER WAXES AND FINISHES CAN CAUSE PROBLEMS SUCH AS SLIP-PERINESS AND DIRT ACCUMULATION.
STANDARD MAINTENANCE - GENERAL
Other than sweeping or mopping, cleaning of tile floors must always be per-formed by keeping the surface wet with a neutral liquid floor cleaner. Buffing or bur-nishing of these floor tiles shall be
performed only after three to five coats of a metal cross-linked acrylic finish has been applied to the surface of the tile. The use of a sealer prior to application of floor finish is optional. In
addition, removal of finish shall always be performed by keeping the surface wet at all times during the stripping procedure using a liquid stripper solution. The least abrasive stripping or
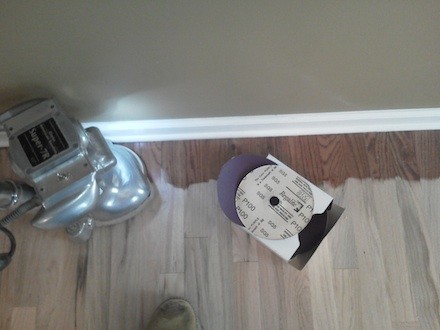
bur-nishing pads and brushes recommended for each specific operation shall be used to main-tain the floor tile. Pads are color coded to indicate their proper use, with manufacturers generally using
the following color code:
Polishing (least abrasion) White or equivalent
Buffing (low abrasion) Tan or red or equivalent
Scrubbing/Stripping(moderateabrasion) Blue or green or equivalent
The most abrasive pads, brown and black pads or equivalent, are not recommended for use on resilient flooring.
GRIT CONTROL Preventing abrasive dirt from being tracked onto the surface of a flooring is cru-cial to prolong the life of the flooring. The use of walk-off mats
at entrances to buildings is an effective way to help prevent scratches and stains caused py tracked-in materials from outside the building. Non-staining mats are recommended and should be the type
that remove deposits from shoe soles and allow the particles to fall below the surface of the matt so they can't be tracked on to the flooring with subsequent traffic. Mats should be clean-ed on a
regular basis consistent with need.
NEW FLOORS Allow sufficient time after installation (at least one week) for the tile to adhere tightly to the subfloor before scrubbing or initial maintenance. In
the interim, maintain with a non-oily dust mop or a clean soft hair push broom. In heavier traffic areas, such as building entrances and cafeterias, damp mopp-ing may also be necessary. Spots of
adhesive can be removed by rubbing with a synthetic pad dampened with a mild liquid detergent. Rinse area thoroughly with clean water and dry.
INITIAL MAINTENANCE After a week, clean with a non-oily dust mop or a clean soft hair broom to re-move all loose debris. Using a neutral liquid floor cleaner as
recommended by the flooring manufacturer, scrub the floor with a commercial scrubbing machine of 170-250 rpm cap-ability equipped with a moderately abrasive scrubbing pad (blue or green pad or
equi-valent) or brush. Brushes are recommended for flooring that have embossed surfaces. Keep flooring wet at all times during the scrubbing procedure but do not flood the floor. Remove gummy
matter or spots of adhesive residue with a putty knife and stub-born spots with a synthetic pad dipped in detergent. Pick up cleaning solution with a mop or wet vacuum. Some manufacturers of
liquid floor cleaners claim rinsing is not necessary after washing a floor. However, in order to thoroughly remove the washing solution from a floor, it is best to rinse the floor with clean water
after washing followed by use of a wet pickup vacuum or damp mop. Note: Automatic scrubbing machines are available and perform washing, rinsing and pickup in one
operation and are recommended for very large areas.
APPLYING FINISH After the flooring has been cleaned, apply three to five coats of a good quality metal cross-linked liquid acrylic finish that is resistant
to water spills and is non-removable by a neutral floor cleaner. The use of sealers on new flooring prior to application of finish is optional depending on the finish being used. Allow
sufficient time for thorough drying of each coat of finish before applying additional coats. Apply finish with an applicator as recommended by the
manufacturer.
SCRUBBING A FINISHED FLOOR Follow instructions as found under initial maintenance using a neutral floor clean-er and a scrubbing machine of 170-250 rpm capability
equippeawith a moderately abrasive scrubbing pad (blue/green pad or equivalent) or brush. Remember to keep the floor sur-face wet with the cleaning solution at all times while machine scrubbing.
Avoid flooding the floor. Remove the cleaning solution from the floor with a mop or wet vacuum. Rinse with
clean water and dry.
RESTORING GLOSS TO A FINISHED FLOOR After a finished floor is cleaned with a neutral floor cleaner, rinsed and dried,
it may be buffed or burnished to restore gloss using a low abrasive pad (tan or red pad or equiv-alent). In high traffic areas, a sparse applica-tion of a diluted liquid finish may be sprayed on the
floor and buffed while wet until glossy. The manufacturer of the finish should be contacted to provide information relating to type of spray Duffing solution, and maximum rpm buffer recommended
for spray buffing.
CAUTION: DO NOT DRY BUFF, SPRAY BUFF OR BURNISH AN UNFINISHED FLOOR OR A FLOOR WHERE THE PROTECTIVE FLOOR FINISH IS THIN OR HAS BEEN WORN OFF. THIS WILL BE
APPARENT IN AREAS OF HIGH TRAFFIC. SUCH AREAS
SHOULD BE RECOATED PERIODI-CALLY. STRIPPING OFF OLD FINISH
Complete removal of a finish from the surface of the flooring is required when dirt and discoloration can no longer be removed when cleaned with a neutral floor cleaner. Too many coats of finish may
cause discolora-tion and will require complete removal in order to restore the original appearance of the floor covering. Stripping should not be done more often than is absolutely necessary. Vacuum
or sweep to remove loose debris. To strip or remove finish, use a finish or stripping solution recommended by the manufacturer of the finish. Apply the stripp-ing solution to 10' x 10' sections or
the floor at a time. Allow to soak for a few minutes before scrubbing. Scrub the floor with a scrubbing machine of 170-250 rpm capability equipped with a moderately abrasive stripping pad or brush,
such as a blue or green pad or equivalent. (See Note following). Keep the floor wet with stripping solution at all times during the scrubbing procedure. Pick up scrubbing solution with a mop or wet
vacuum, rinse and dry.
CAUTION: DO NOT DRY STRIP FLOOR FIN-ISH UNDER ANY CONDITIONS. THE USE OF THE MOST ABRA-SIVE PADS, (BROWN AND BLACK PADS OR EQUIVALENT) ARE NOT
RECOMMENDED IN ANY BUFFING, SCRUBBING, BURN-ISHING OR STRIPPING OPERA-TION INVOLVING RESILIENT FLOORING.
Continue removing finish in this man-ner in remaining areas ot floor. After entire floor has been treated in this manner, inspect for areas where finish has not been removed. Repeat procedure
if necessary. After finish has been completely removed apply three to five coats of floor finish as recommended in Applying Finish section in this document.
NOTE: Special finishes are available for use where qualities such as high resistance to slip and static dissipative electrical
resistance are required. Follow the manufacturers recommendations to apply and maintain these finishes.
OLD FLOOR COVERING Follow directions found under Strip-ping Off Old Finish section in this document to prepare the surface for
application of new finish. Then follow application instructions, cleaning and gloss restoration of finished floors specified earlier in this document.
NOTE: IN INTERIM GUIDANCE DATED JANUARY 25, 1990, THE U.S. EN-VIRONMENTAL PROTECTION AGENCY RECOMMENDS THAT THE SCRUBBING MACHINE OPERATE AT 175-190 RPM WHEN
STRIPP-ING ASBESTOS-CONTAINING FLOOR COVERINGS. ON JULY 20, 1990, THE U.S. OCCUPATIONAL SAFETY AND HEALTH ADMINISTRATION ("OSHA") PROPOSED THAT THE SCRUBBING MA-CHINE OPERATE AT 190 RPM OR LESS,
ALTHOUGH THIS PRO-POSAL IS NOT FINAL HOWEVER, RFCI HAS CONDUCTED MAINT-ENANCE TESTS USING SCRUBBING MACHINE SPEEDS OF UP TO 220 RPM, WHICH SHOW EXPOSURE MEASUREMENTS SUBSTAN-TIALLY BELOW APPLICABLE
OSHA EXPOSURE REQUIREMENTS WHEN THE ABOVE MAINTENANCE WORK PRACTICES ARE FOL-LOWED. RESILIENT FLOOR COVERING INSTITUTE 966 HUNGERFORD DRIVE, SUITE 12-B ROCKVILLE, MD 20850
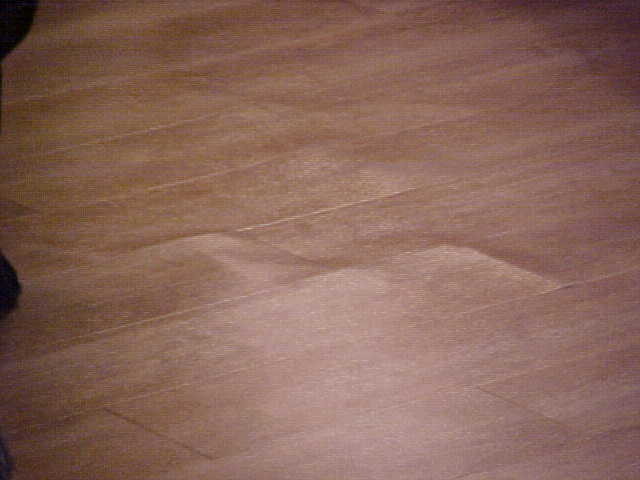
5. SHRINKAGE???
VCT is approximately 85 percent limestone, or calcium carbonate, with a small amount of vinyl and plasticizer, making shrinkage near impossible. Usually tiles are moving around rather than shrink. Tiles typically move because of weakening adhesive along with traffic, pushing them around. Adhesive re-emulsification is normally difficult with plain water. Alkaline moisture can come from more than one source and should be sorted out. Damaging alkaline moisture can come from maintenance or through the concrete.
- Damage from maintenance occurs during the initial maintenance process, but it can also occur years after the installation. In the days of solvent-based adhesives, manufacturers put a thick waxy coat over the VCT to prevent "blocking," keeping the tiles from sticking together in the box. This waxy coating required aggressive stripping to remove the protective coating before doing normal maintenance protocol. Manufacturers went on to improve the product making the protective waxy layer thinner, which would easily wear off during construction. Typically, when products change, the maintenance stays the same. Thus, heavy stripping continued with the newer VCT products which only now required gentle cleansing.
- Stripping weakens adhesive. The no-rinse and no-scrub wax-stripping solvents are particularly damaging. These heavy strippers chemically migrate through the seams, and into the adhesive, dissolving the bond material, turning it to goo. Before initial polish layers have been built up within the seams between tiles, the stripper will quickly penetrate through the seams and begin to emulsify the adhesive. The goo then bleeds out from between tiles and, or softens the adhesive enough to allow tiles to move around. VCT manufacturers typically state that these strippers shouldn't be used at all in initial maintenance procedures.
- Also, manufacturer's sometimes leave small amounts of waxy stuff still clinging to tiles requiring some kind of wax removal prior to initial polishing. With new floors, stripping should be quick and light and no-rinse and no-scrub strippers avoided.
- Stripping older floors can also lead to adhesive breakdown when old polish buildup requires heavy strippers to dwell giving time to breakdown the excessive amount of polish or coating.
The easiest way is to give them time
• Coat —"flood" the floor with 1/8” inch of solution
• Wait until the old polish softens
• Scrub or remove
Waiting around watching polish to emulsify is highly recommended. Do not flood and later return to scrub. Also do not flood the area, allow it to dry, re-flooded, dry, re-flooded and so on. As the stripper works, if given enough time will penetrate the seams and start to emulsify the adhesive. Tiles loosen, move, and then appear to shrink. Sometimes so much cleaning solution accumulates under the tiles and squeezed when rolling the floor. Mostly tiles just move around and the adhesive will bleed through the seams.
- From below, alkaline moisture is vapor emission characteristically coming up from concrete. Moisture moves through concrete as condensation through capillarity.
-
Concrete moisture condenses and dissolves alkaline salts within its matrix and, or up from the earth.
- Moisture clings to the sides of the pores in the concrete always moving upward
- Salts re-deposited on the surface of the concrete substrate where moisture will easily evaporate.
- Salts now on the surface will then emulsify adhesive
Expert evaluation can most always discover and detail the number of issues and their severity. A proper remedy can then be recommended to provide a long lasting product.
VCT does sometimes shrink, and usually in the direction of manufacturing. Some distortion of the color chips will distort in the direction of manufacturing. VCT tiles are typically cut from a sheet. Tiles cut from the middle of the sheet are most square and least likely to distort. Tiles cut from the edges of the sheet are more likely to distort. Labeled boxes may tell whether tiles are cut from the middle or the edge of the sheet. Tiles can distort if the pallets are stacked to high or stacked improperly. Lack of acclimation can also result in a dimensional change after installation.
6. SATATIC DISSIPATIVE VINYL TILE
Understanding Grounding Standards: Motorola R56 and ATIS-0600321-2010
Unnecessary confusion exists over which ohms resistance rating is correct for grounded static control flooring used in end user operational equipment environments. The root cause of this confusion is the misapplication of flooring requirements used in electronics manufacturing and explosives handling with the recommendations of compliance/standards organizations overseeing telecommunications and data center environments. The purpose of this post is to clear up this confusion by providing information and links to appropriate industry resources and standards organizations. (Please note: ESDA document ANSI/ESD S20.20-2007 is not referenced. S20.20 is intended for program managers involved with the design and implementation of a static control process in ESD protected areas as part of a comprehensive program in electronics manufacturing environments.) This article focuses on non-factory, end user operational equipment concerns like networked offices, data centers and emergency dispatch call centers.
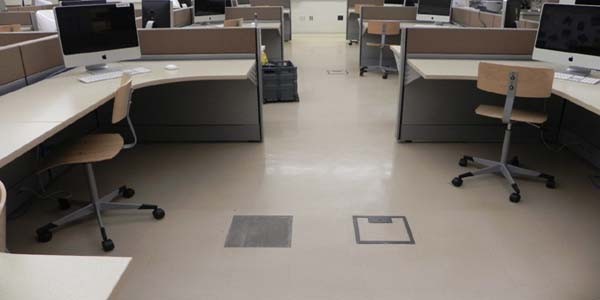
The Construction Specifier in their September issue, we examined FAA, telecommunications and computer industry grounding, lightning, electrical surge and safety standards. The research yielded information that lays to rest outdated assumptions about the proper electrical specifications of floors – particularly carpeting - installed in environments where static sensitive operational equipment is used. Many ESD flooring distributors incorrectly assumed that conductive flooring measuring between 2.5 X 10 E4 and 1.0 X 10 E6 was acceptable for end user environments. This static prevention strategy was borrowed from unrelated requirements involving the mandatory use of conductive flooring when handling explosives and flammable materials. This assumption and the applicability of explosives grade flooring for installation in end user environments – spaces often accessible to the public - is incorrect and poses unnecessary risks. Conductive flooring does not comply with the pertinent grounding standards for telecommunication equipment end user spaces. According to five different authorities/standards organizations, there is consensus in the recommended ohms resistance range for the type of flooring discussed here. The overlap or consensus opinion consists of a recommended ohms range above 1.0 X 10 E6 and below 1.0 X 10 E9 for end user spaces like server rooms, 911 call centers and data centers.
Motorola R56: The Motorola guidelines have become the recognized standard in the industry and serve as the most complete and rigorous specification for the protection of communication system equipment installed at public safety and commercial wireless communication sites.
"Carpeting or floor tiles within an equipment room or dispatch center, including raised flooring, should have a resistance to ground measurement of between 106 and 109 ohms when measured using the test method of ANSI/ESD STM7.1-2001 or later"
1. Research has shown that conductive flooring offers no advantage over static dissipative flooring in end user environments.
2. When evaluating the ohms ratings, keep in mind that the difference between each ascending exponent is a factor of 10. For example 1.5 X 10 to the 4th = 15,000 ohms --- 1.5 X 10 to the 5th = 150,000 ohms
3. A floor measuring between 2.5 X 10 E4 and 1.0 x 10 E6 is defined as a conductive floor. A floor measuring between 1.0 X 10 E6 and 1.0 X 10 E9 is defined as a static dissipative floor.
Addendum: As part of our research we contacted a member of the Motorola committee overseeing Motorola R56. The purpose of contact was to determine if Motorola might be expanding their electrical resistance range for acceptable static control carpet. The published range since 2005 has been 1.0 X 10 E6 to 1.0 X 10 E9 ohms. There is currently a new draft of R56 in the works. As with other grounding and electrical standards organizations like ATIS and FAA 019e, we were told that Motorola’s acceptable resistance range will remain in the static dissipative range from 1.0 X 10 E6 to 1.0 X 10 E9.
Below is an excerpt of the flooring section as it will appear in the new draft:
Motorola R56 Appendix C
PROTECTING AGAINST ELECTROSTATIC DISCHARGE (ESD) IN EQUIPMENT ROOMS AND DISPATCH CENTERS
C.3.3 FLOORING
Carpeting or floor tiles within an equipment room or dispatch center, including raised flooring, should have a resistance to ground measurement of between 106 and 109 ohms when measured using the test method of ANSI/ESD-S7.1-2005 or later. Existing flooring that does not meet this requirement should be treated with a topical solution such as an antistatic floor wax or spray solution. The effectiveness of antistatic solutions is temporary and varies with floor material and relative humidity. Flooring resistance should be monitored every two weeks minimum to verify conformance to the above requirements. See ATIS-0600321.2010, section 4.2 and ANSI/ESD-S7.1-2005 for more information.
When ESD protective flooring is used, the following should be observed:
• ESD protective flooring shall be installed per the manufacturer's recommendations.
• ESD protective flooring and floor coverings should be installed, grounded, and tested by trained installers.
• Personnel entering the equipment room or dispatch area should wear ESD dissipative footwear or dissipative foot straps. The footwear should provide dissipative resistance values of less than 3.5 ´ 107 ohms as measured according to the measuring requirements within ANSI/ESD STM97.1-2006 or later. The footwear should also provide dissipative resistance values of less than 1.0 ´ 109 ohms as measured according to the measuring requirements of ANSI/ESD STM97.1-2006 or later.
When ESD protective flooring is not installed at a dispatch position or equipment room, an ESD protective floor mat should be installed at the work areas. When ESD protective floor mats are installed, the following should be observed:
• The floor mat should provide dissipative resistance values between 106 and 109 ohms when measured using the test method of ANSI/ESD-S7.1-2005 or later.
There are two main question areas to help determine the right static control flooring recommendation:
- What is the electronic industry supplier environment? Are they actively handling static sensitive electronic parts and sub-assemblies (as opposed to using them)?
- What is the end user environment? Is the organization reliant on electronic systems that may be affected by static discharge events?
Electronic industry supplier environment organizations make, handle, test, store and repair electronic parts. A static event in these types of spaces would damage or destroy the part, assembly or final system. Grounding is achieved by wearing conductive heel straps or special shoes in conjunction with a grounded static control floor. In other words, personnel need to be grounded in any operation in this environment.
Generally, organizations handling and producing static sensitive parts designate certain areas as “ESD safe areas” or static free zones; an ESD safe area requires vigilant compliance with personnel grounding procedures as well as numerous other protocols for preventing the generation and accumulation of static electricity. The processes in these environments are usually governed by international standards like ANSI/ESD S20.20-2007.
Conductive Epoxy Coatings
ESD/STB Epoxy Coating
About ESD/STB
ESD/STB is a solvent free two-component, high-filled, conductive epoxy coating composed of un-pigmented epoxy mixed with specially graded, colored quartz crystals. Excellent ESD values and
durability. Low maintenance costs
Suitable Area
ESD/STB coating is especially suitable for the area where there is heavy traffic, strong mechanical impact and need high standard ESD protection.
ESD Specifications
ESD norm EC (EN) 61340-5-1/2 Resistance to ground: Less than 10 MΩ
System resistance: Less than 35 MΩ Body charging (walking test): Less than 100V
General Specifications:
Normal thickness: 3 mm (customized thickness is available) Color: Standard Dark Grey (Customized color is available) Surface structure: Slightly anti-slip Mechanical properties: ready upon
request Chemical Properties: ready upon request
The term “reliant upon electronic systems” means that the operation does not involve active handling, testing or assembly of electronic sub assemblies. These operations are electronic systems end user environments requiring sophisticated electronic equipment to accomplish their mission.
These spaces are often called Mission Critical Environments: examples include data centers, R & D labs, 9-1-1 call centers, hospital ERs, MRI suites, communication centers, flight towers, control rooms. These spaces utilize operational electronic systems which are manned by personnel who will not use special footwear. A static problem in these spaces would lead to an event that would impact either the equipment, operational mission or both. Examples of these types of problems include: data corruption, system lock-up, dropped phone call, unintended signals in a system.
In these applications, the static control floor must be fault tolerant (See my recent blog entry on fault tolerant design.) The flooring must prevent the generation of static without the added benefit of special footwear; conversely the anti static floor must prevent static despite the use of static generating footwear.
Best flooring solutions for electronic industry end user environments
Most static control flooring will not inhibit static without the use of special footwear. That said, there are two flooring materials that perform very well despite this obvious deficiency and that Staticworx recommends for electronic industry user environment applications:
- EC ESD RUBBER
(WITH CARBON CHIP CONDUCTORS)
- ESD CARPET TILE
(with conductive fibers wrapped around nylon tufts and conductive backing. Not the same as low
kV or computor grade carpet)
How to Ground SD Monolithic Seamless Epoxy Coating Floor
Graphite particles used create a conductive matrix within the liquid. When applied over any surface, insulative or otherwise, the Groundworx cures into a homogeneous ground plane in all directions. Continuity is achieved across all points of Groundworx regardless of the electrical properties of the surface underneath it.
However, the “Groundworx ground plane” still needs to be grounded once every 1000 square feet using our copper ground strips. The strips are 2 inches by 24 inches in length. They can be attached to the floor using glue or double-sided tape. Part of the strip touches the floor and the other end of the strip should attach to an electrical box, a piece of conduit, building steel or a metal stud that is in continuity with the AC or building ground. (See article: Best Way to Ground ESD or Static Dissipative Flooring) When applying the Groundworx, make sure you coat over the portion of the copper strip touching the floor. This is the only necessary step for grounding a Groundworx floor.
Polyurethane is an insulator and a static generator
Polyurethane (PU) coatings are used by luxury vinyl tile (LVT) manufacturers. A coating of PU helps reduce the use of waxes and sealers on flooring installed in retail spaces, hospital corridors, shopping malls etc. Unfortunately PU is a non-conductive coating so defeats the purpose of the conductivity of the tile. That’s why they shouldn’t be used on floors that are intended for low static generating applications. This coating would insulate access to the conductive, carbon matrix sealing it inside the PU, keeping the tile from eliminating static effectively.
The PU coating would increase the electrical resistance of the tile leaving the floor unable to meet ANSI/ESD
S20.20-2007 ESD standards. PU is an extreme static antagonist making it a major static generator; a
floor coated with PU would allow for the accumulation of high static charges on people when they walk on the floor with any shoes. If you think maintenance will be a major problem in your
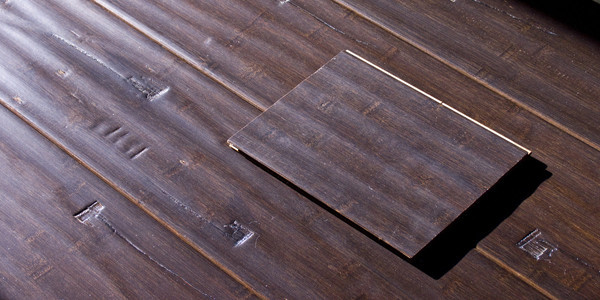
facility, you should at least consider a precision milled ESD tile with high vinyl content. These tiles are commonly called solid vinyl tile (SVT.) The surface of SVT can be buffed and returned
to its original appearance regardless of age, traffic or soiling. The properties run all the way through the thickness of an SVT tile so you never need to worry about abrasion affecting performance.
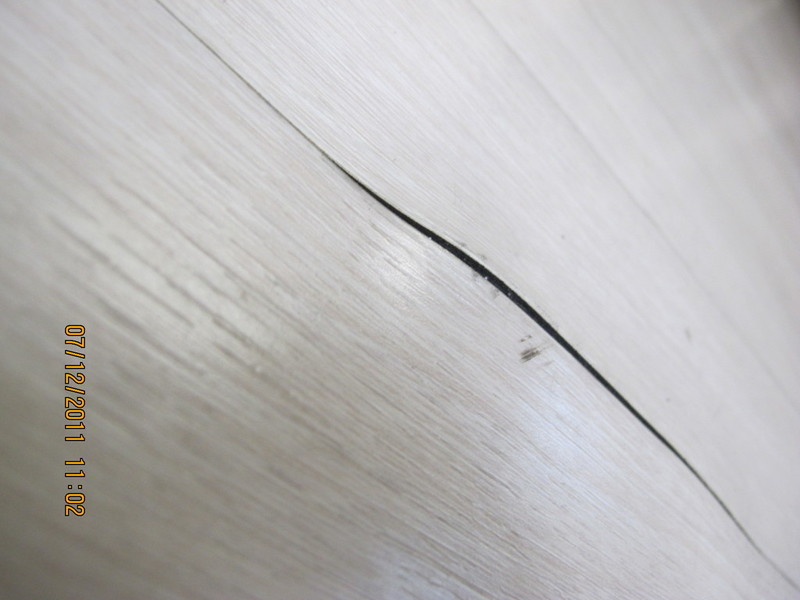
The precision milling ensures a tight gap-free installation. Tight seams prevent that ugly dark line that
often appears in between VCT tiles.
EC rubber flooring, unlike vinyl, doesn’t have any pores that could trap dirt in the first place. And, conductive rubber is the only floor that will reduce static on people wearing standard street shoes. All other resilient ESD flooring requires the use of static protective footwear. EC Rubber is the most fault-tolerant ESD flooring available.
Fault-Tolerant Anti Static Flooring
Wikipedia defines “fault tolerant design” or “fail safe design” as “design that enables a system to continue operation, possibly at a reduced level…rather than failing completely”.1
For most environments, the hazard of static to equipment and/or operations is a risk that cannot be taken. Fault-tolerant ESD flooring is intrinsically anti-static: the end user won’t need to do anything after it is installed except walk on it while it allows for the most user errors. Fault-tolerant ESD flooring allows for the most flexibility in an environment while keeping that environment safe:
- People can wear the wrong shoes but still remain protected
- Waxes, polishes, and sprays need not be applied or monitored
- Ambient humidity, temperature, traffic, and the age of the tile are taken out of the equation
In mission critical environments, like labs, call centers, healthcare and cleanrooms, there is no room for static or the human error that can bring static if high maintenance ESD flooring is used. Based on the application where the ESD flooring will be installed consider the following elements when evaluating the selection of anti-static flooring:
- Footwear: Will the shoes worn in the environment be standard “street shoes” (insulative) or will they be specialty footwear (conductive)?
- Volts (kv): What is the acceptable amount of human body charge-allowable in the environment?
- Static decay: Upon contact with the floor, how quickly does the charge leave the body?
- OHMs: What is the floor’s measurable ability to conduct electricity?
Confusing Terminology
Section 09 61 36 of The Construction Specifications Institute (www.csi.com) calls this kind of floor a Static-Resistant Flooring Treatment. That makes sense; the purpose of the floor is to resist static. But wait; would it also make sense to control static? Control as in eliminate, mitigate, inhibit. There appears to be another CSI category (09660) called Static Control Flooring. What’s the difference between static control and static resistant? Before you answer that question here’s another CSI category: 09 65 33. This category is called Conductive Resilient Flooring. (Info courtesy of www.aecinfo.com) That’s three descriptions for what seems to be the same thing.
The construction Specification Institute isn’t the only source of confusion in this dilemma of identifying technically sound walking surfaces that can eliminate static on human beings. Try using the www.google.com search engine to find your solution. Start out with words that make logical sense in a search for something that should prevent static. Try the words “antistatic flooring.” The first thing you will notice is that Google will ask you, “did you mean anti static flooring?” So try searching anti static flooring instead of searching the way you originally spelled it. Now you get different search results than you did using the first spelling. Ditto if you hyphenate anti-static instead of spacing the two words. Now things really get really blurry. You’re looking for “something” that the construction industry can’t describe consistently and the worlds of Google, Bing and Yahoo can’t seem to spell right. And worst of all, you are only looking at antistatic. You haven’t even searched other descriptive synonyms like conductive, static dissipative, grounded, static-free, ESD safe, ESD flooring, shock resistant, static mitigating or non-static and low static generating. Some Internet searches even resort to application-oriented strategies in the hopes that they can whittle down the possible options based on suitability. They’ll plug in words like like: data center flooring, hospital operating room flooring, cleanroom tile, MRI suite flooring or flooring for handling explosives.
- Permanently prevent static on people who are standing or moving
- Be certifiable to some standard that verifies safety and performance
- Meet the requirements of the space, environment and application
Once the site description is known, should be it resilient, carpet, paint, wax, rubber, vinyl, epoxy, urethane, HPL, or maybe matting can be confusing.
Static Dissipative (SD) flooring requires changing the chemistry of the flooring compound through the use of chemical additives. Static dissipative floors are defined by a property called electrical resistance, which is measured in ohms. The important parameter for describing a floor is the static control flooring resistance to ground or path to ground. In order to meet the qualification of static dissipative, a floor must have an electrical resistance to ground of ≥ 1 X 10⁶ (one million ohms) AND < 1 X 10⁹. Static dissipative should never be confused with the terms Conductive or Antistatic (sometimes hyphenated as anti-static).
- Static dissipative properties are not permanent and cannot be bought with a lifetime warranty. They migrate out of the flooring material after extended use. After several years, static dissipative flooring loses its static dissipative properties.
- Static dissipative flooring will not meet all the requirements of static control performance standards. For example, static dissipative rubber cannot meet the ESD requirements of ANSI/ESD S-20.20 for system resistance.
- Static dissipative flooring does not reduce static quickly enough to meet the needs of Class 0 or explosives and munitions handling.
Static conductive flooring attracts and routes static electric charges away from valuable electronic equipment. Inherently conductive carbon is added to the flooring compound when it is manufactured, creating electrically conductive pathways within the flooring.
- Static conductive properties are permanent and are bought with a lifetime warranty.
- Static conductive flooring will meet all the requirements of static control performance standards, ANSI/ESD S-20.20.
- Static conductive flooring does reduce static quickly enough to meet the needs of Class 0 or explosives and munitions handling.
How does an ESD floor route the static charge to ground?
Pathways in the flooring drain the charge through, into conductive adhesive, and on into copper stripping where the charge dissipates to ground.
Is ESD rubber flooring more expensive than vinyl?
ESD Vinyl is about 60% of the cost of ESD rubber. Installation, labor, freight, etc. would be the same for either floor. Rubber has a lower cost of ownership.
Computer Grade 3.5 kV Carpet and ESD Carpet Are Not the Same
Low kV carpet cannot be grounded because it is not made with conductive materials. It is made with anti static additives. These additives are temporary and their performance is diminished by foot traffic and general abuse. Low kV carpet will not reduce static electricity when the relative humidity is low and all anti static properties disappear after several months of wear and maintenance.
Low kV carpet will not generate as much static electricity as standard carpet. Low kV carpet reduces the shock hazards associated with walking on standard carpet. The typical human threshold for feeling a static zap is 3.5 kV, or three thousand five hundred (3500) volts. Most low kV carpet will inhibit static sufficiently so that people do not feel painful shocks. However, these marginal static control carpets do not guarantee safety for electronic equipment, which can be affected by discharges as low as 100 volts--far below the discharge level perceptible by humans. Additionally, the static control properties on low kV carpet decay overtime.
ESD, conductive carpet is comprised of conductive fibers which are capable of safely conducting electricity to a ground source, such as an electrical conduit. Most conductive fibers contain carbon, graphite or stainless steel. Conductivity is a permanent property--independent of humidity, maintenance or abuse.
Understanding electrical resistance and grounding
Understanding the relationships between electrical resistance, grounding and static control performance would have enabled the GC to avoid a costly error. With this basic knowledge, he would have
realized that he was not buying a carpet tile with permanent electrical properties verifiable with a simple ohm meter, but rather an anti static coated product that temporarily prevents people from
getting shocks.
As defined in ANSI/ESD S20.20-2007 for system resistance, there is an ideal range regarding electrical resistance for ESD flooring systems: see the graphic below. If the carpet is not electrically conductive, it is not possible to ground the carpet regardless of the type of adhesive used. In this case, the carpet was actually insulative – the opposite of electrically conductive. Therefore, static charges have no mechanism of dissipating through the carpet to ground no matter what adhesive is used.
Conductive flooring is only as good as its weakest link. If any link in that chain is broken or inadequate, the system will not prevent static problems.
Low kV carpets have no conductivity – they are insulators. Insulators cannot be grounded, nor can they dissipate static charges. Static accumulations on any person walking on or any item rolling on an insulator cannot be prevented. Static can only be dissipated through a floor with conductive pathways. Therefore, an effective static control carpet tile must have conductive properties in the carpet tufts, the carpet backing, the adhesive and the ground connection.
ESD Flooring 101: The Non-Technical Answer to Dissipative vs. Conductive
Pretend for a moment that instead of controlling the flow of static electricity, you are trying to control the flow of water.
Let’s think about the way water flows through a funnel. To control the flow of water, a funnel collects the water in a storage
area and redistributes it through a smaller diameter bottom. By shrinking or increasing the diameter of the funnel orifice, we could either increase or restrict the amount of water that will
“discharge” from the funnel. You could say that the exit of the funnel provides resistance to the flow of the water. The smaller diameter orifice slows down the water flow compared with just pouring
the water out of a container.
If we were to compare the electrical concepts of “conductive” with “static dissipative” using a water flow analogy: a conductive floor would equate to allowing the funnel to restrict only 10% of the
water flow while static dissipative flooring would equate to restricting over 90% of the flow.
Ninety-percent restriction is too much resistance. If the funnel is getting refilled periodically, it is likely that 90% restriction will not empty the funnel fast enough to keep up with the
periodic refills. That is essentially what happens when a person walks on a high resistance static dissipative floor. Think of a charged person as the storage area of the funnel and think of the
floor as the orifice of the funnel. The right floor should be able to drain static off the person at a sufficient rate to prevent the person from accumulating too much static. You could say that
excessive static on the person would be the same as the top of the funnel over flowing.
If the floor – like the small diameter funnel – can not drain static as quickly as a person can generate static, the person will discharge static charges to electronic equipment instead of to the
floor.
Understanding static dissipative epoxy vs. conductive epoxy?
There are numerous misconceptions and misapplications of ANSI/ESD S20.20. Very few flooring suppliers understand this document
and as a result they make improper recommendations. Without a complete understanding of S20.20, the wrong product could be purchased and installed. Is the supplier stating that the floor meets the
resistive properties referenced in 20.20 or that the floor will meet S20.20 as part of a system? These are two very different performance parameters and only the second reference matters.
S20.20.” ANSI/ESD S20.20 is a process document – not a specification. Flooring does not meet S20.20; it meets recommended parameters derived from standard test methods referenced in S20.20. For
example, S20.20 references not one but 3 standard test methods:
- ANSI/ESD STM 7.1: Floor Materials--Resistive Characterization of Materials. Any flooring material must measure below 1.0 X 10E9 ohms to ground. However, the flooring must also comply with the 2 parameters listed below:
- ANSI/ESD STM 97.1 Floor Materials and Footwear--Resistance in Combination with a Person. The recommended maximum system resistance is 3.5 X 10E7.
- ANSI/ESD STM 97.2: Floor Materials and Footwear Voltage Measurement in Combination with a Person. The recommended maximum voltage allowed is 100 volts.
Many flooring manufacturers state that their floors will meet ANSI/ESD S20.20. What they actually mean is that their floors will always measure less than 1.0 X 10E9. That fact has nothing to do with
using a floor in a program that must meet the 2007 revision of S 20.20 because the floor is one part of a bigger picture. The full picture involves the combination of the floor, people, ground
connections and controlled footwear. Hence the need for standards 2 and 3 referenced above.
Needless to say, it would be very difficult for a flooring material measuring in the upper static dissipative range (> 5.0 X 10E7) to be part of a total system measuring less than 3.5 X 10E7. The
math just doesn’t work. Adding a person and footwear will increase the total system resistance to ground. Furthermore, it has been demonstrated that most static “dissipative coatings” are incapable
of keeping body voltages from exceeding 100 volts. Since the premise of ANSI/ESD S20.20 is preventing body voltages above 100 volts, it is impossible to state that a static dissipative floor
measuring less than 1.0 X 10E9 will meet ANSI/ESD S20.20-2007.
A warranty stating compliance with ANSI/ESD S20.20 is not sufficient.
A floor should never be evaluated in isolation. It must always be qualified as part of an overall system that includes all variables including the person and the controlled footwear. When the system
is evaluated, the only way to confidently meet the recommended parameters of ANSI/ESD S 20.20-2007 is to install a floor measuring less than 10,000,000 ohms to ground.
Static Control, Anti Static, and ESD Vinyl Tile Floors |
|||
DuroStat SMT |
ESD Vinyl Tile for Quality Control Areas; Electronics Manufacturing; Office Areas near static control manufacturing; Warehouse spaces for ESD sensitive materials; Medical Testing facilities with ESD sensitive equipment. Access Floors; Airport Control Towers. |
||
TractionStat |
ESD TractionStat Tile is a semi-dull permanently ESD conductive <106 ohms vinyl industrial flooring product. |
||
UltraStat |
Conductive tile designed specifically for demanding manufacturing environments such as clean rooms, computer rooms, telecommunication installations, and healthcare facilities which require low outgassing. |
||
PolyStat |
ESD tile great for use in clean room environments and operating rooms. Also effective in the medical, electronics, and software industries. Also,it comes in attractive colors that not only protects your hardware but beautifies your surroundings. |
||
ZeroStat |
Zerostat ESD vinyl tile is the choice for controlling Electrostatics in printed circuit production, computer control rooms, process control, survey rooms, switchboard assembly, lithography and printing industry, health care/ special areas, and most clean room environments or anywhere sensitive electronics are utilized. |
||
UltraTile Dissipative |
UltraTile Dissipative tile is a homogeneous, permanent anti static resilient flooring manufactured using the latest technology. |
||
UltraTile Conductive |
UltraTile Conductive tile not only provides a new level in ease of installation of static conductive flooring but also superior hygiene by eliminating potential contamination and breakdowns of conductivity. |
||
EuroStat |
Quality Control Areas; Electronics Manufacturing; Office Areas near static control manufacturing; Warehouse spaces for ESD sensitive materials; Medical Testing facilities with ESD sensitive equipment. Access Floors; Airport Control Towers. |
||
UniStat |
ESD sheet vinyl recommended for cleanrooms, electronic or semi-conductor manufacturing, on access flooring, in laboratories, airbag and munitions manufacturing, telecommunications and switching rooms, pharmaceutical manufacturing environments, radiology, isotope decontamination rooms and any environment where rapid discharge of electrostatic charges is required. |
||
ElectraStat PU |
3-LAYER Vinyl ESD Flooring. Ultimate static safe work surface for electronic assembly areas. |
||
|
|||