

The National Institute of Certified Floor-Covering Inspectors (NICFI) is a
non-profit association of independent floor covering inspectors. NICFI members are expert flooring failure analysts and expert witnesses in flooring problems and failures.
NICFI members are experienced in the inspection and failure analysis of
woven carpet, broadloom carpet, resilient tile, rubber tile, cork tile, ceramic tile, resilient sheet vinyl, vinyl composition tile, LVT, hardwood, laminate, solid vinyl,
and specialty flooring materials.
NICFI members attend the annual NICFI Convention in Dalton, Georgia, to increase their knowledge and update their skills. The Annual Convention includes updates on indicative field testing
procedures, tools, products and product defects. The NICFI is the only Non-Profit Association in the Flooring Industry with membership comprised solely of Certified Floor Covering Inspectors.


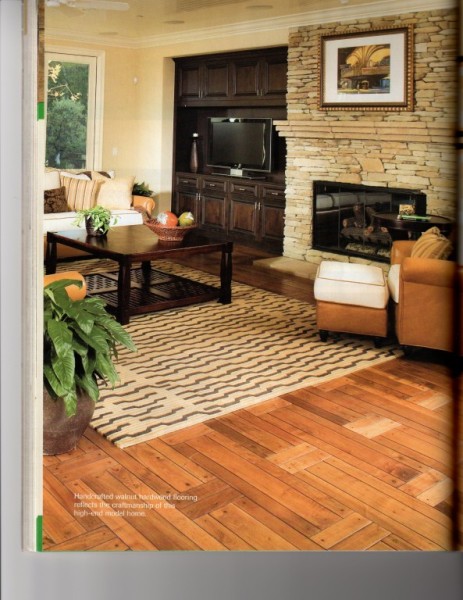
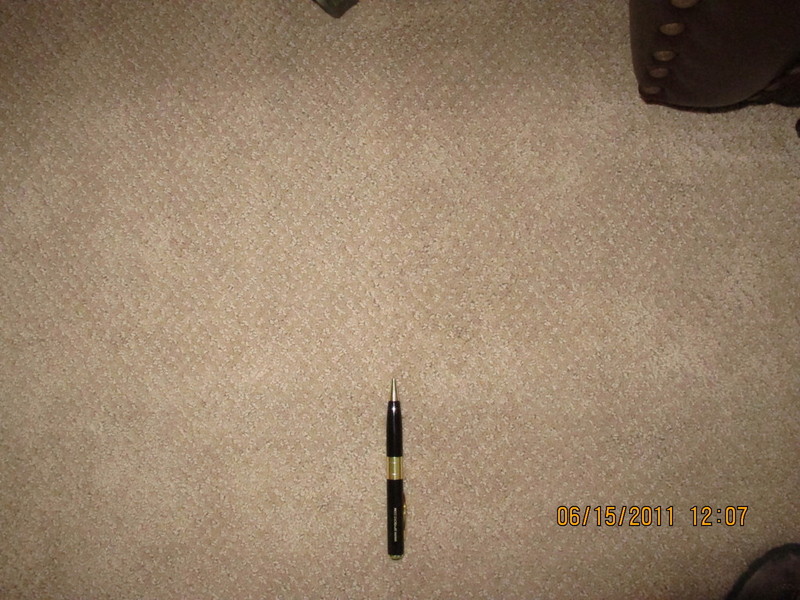
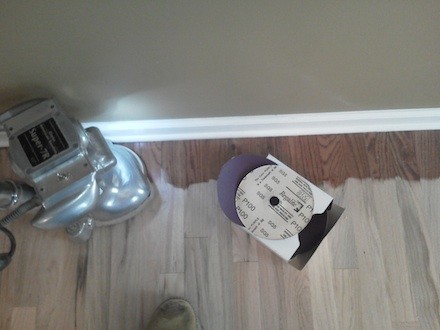
PHOTOS
IS THIS YOUR COMPLAINT?


FINISHING

http://www.youtube.com/watch?v=rGJIFHhpE88&feature=player_embedded#!
http://www.youtube.com/watch?v=0Tt-SGltms0
- REFINISHING ACRYLIC IMPREGNATED
- MAPLE DENSITY CHARACTERISTICS
- SUDDEN STREAKS
- JATOBA
- TOXIC WOODS
- EXOTIC WOOD FLOORING
- GENERAL FINISHING
- "IPE" BRAZILIAN WALNUT
- TAUPE DOPE
- APPLICATORS
- Hot Weather FINISH PROBLEMS
1. REFINISHING ACRYLIC IMPREGNATED
REFINISHING ACRYLIC IMPREGNATED
Impregnated Refinish
There are often misconceptions that site-applied urethane finish will not stick to acrylic impregnated flooring, but that simply isn’t true. Older acrylic impregnated floors typically had a linseed oil topcoat finish or a UV-cured urethane finish; newer acrylic impregnated flooring has a UV-cured 100 percent solids urethane with aluminum oxide. Any of these floors, whether they are the older oil-finished product or the newer aluminum-oxide flooring, can be screened and recoated. One important difference is that in this case, you need to screen off all the topcoat finish so that you are down to just the acrylic impregnated surface. And be sure to follow the manufacturer’s recommendations for which finish to use (waterborne urethane finishes for high-traffic areas are typically recommended).
One thing you can’t do with many acrylic-impregnated wood floors is resand them with a drum sander. Older solid acrylic impregnated floors can be sanded, but newer products with thinner wear layers can’t. Although it is harder to sand through the veneer of an acrylic-impregnated floor than it is with a typical wood floor, the wear layer is still too thin for drum sanding.
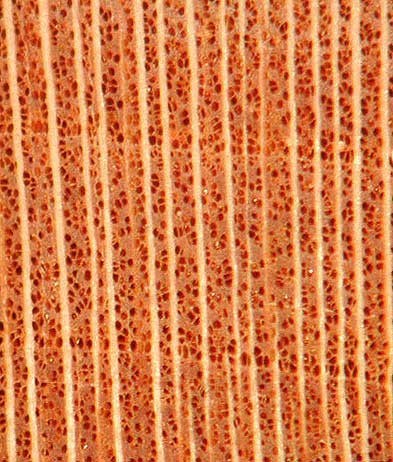
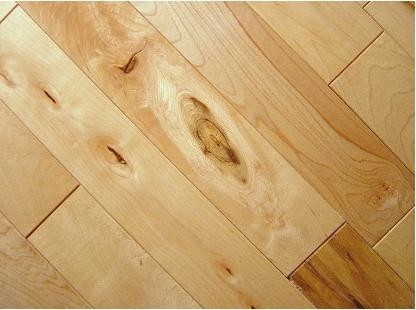
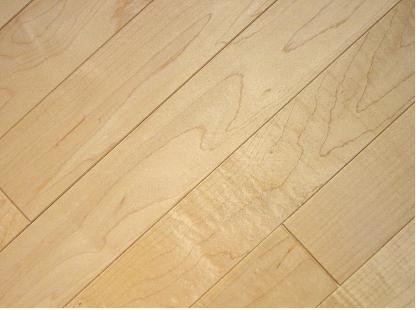
2. MAPLE DENSITY CHARACTERISTICS

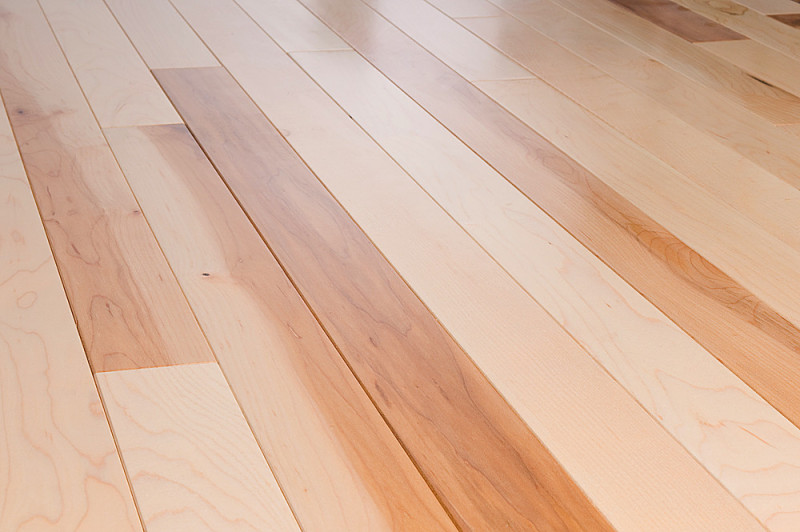
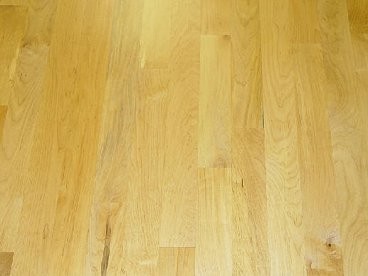
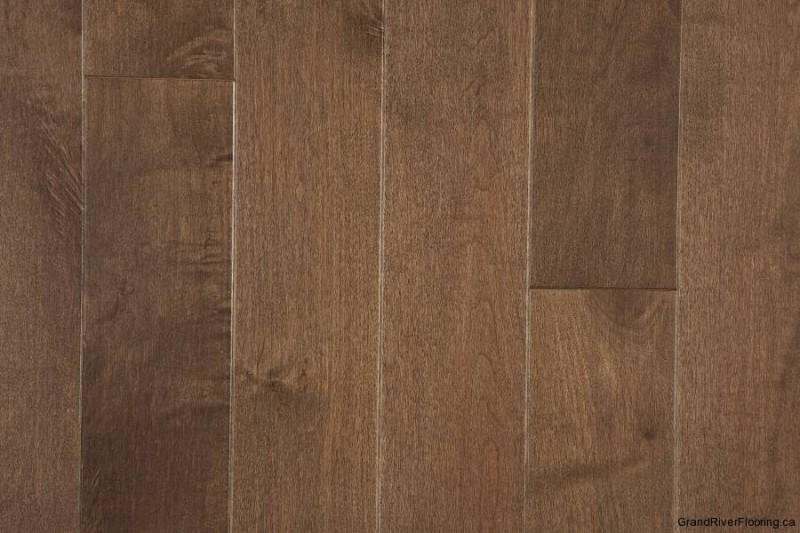
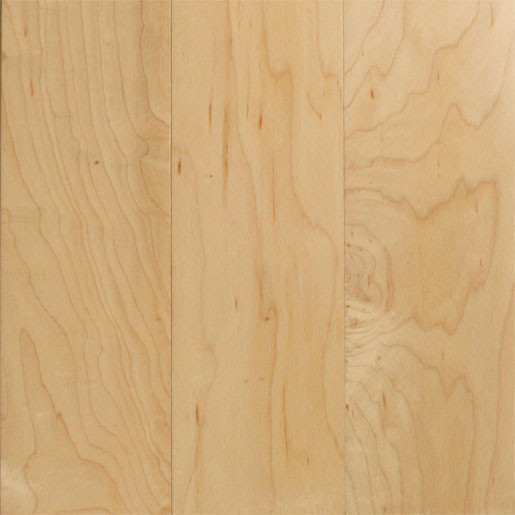
Maple is the wood of choice for many homeowners and designers to complement lighter designs desired today. The depth or thickness of the finish, the density of the wood, and the direct lighting the floor is viewed in, can be an issue when we use low sheen finishes. Maple is light in color, requires no staining, and is considerably harder than oak.
- Maple is harder than oak but it will still dent from high heels and from misuse.
- Maple is less stable and will expand and contract more than oak and will develop cracks in winter though not as noticeably as with white stained oak.
- Maple has a unique finishing challenge because of its density. This is achieving a smooth, uniform, low-sheen finish without streaks.
Streaks in the final finish coat can appear as a problem when numerous heavy coatings are applied. Streaks can be more or less noticeable depending on the sanding procedure used, the type and number of coats of finish used, and the sources of light in the room being coated.
Today there is more use of belt type sanding machines, and these tend to sand smoother than traditional drum sanders with the same grade of sandpaper. When we take into consideration smoother sand paper being used, the concern grows. This is been done as a result of white and pastel floors, waterborne finishes, and in some cases. There is a tendency to sand maple and other dense or exotic woods smoother than we should to remove scratches. Sanding screens are used to achieve a smooth, uniform floor surface as a base for stains and finishes. Most now screen their floors as the final step. Screening leaves a smoother surface than drum sanding and will more close grain (cells), regard-less whether it is oak or maple. 15-20 years ago, we used 80 or 100 grit on the drum and edger, then hand sanded the edges to remove scratches. We now use 100 or 120 grit screens or finer, even in edger disks. Abrasive manufacturers are now selling more 150, 180 and even 220 grit screens. Sanders sometimes see this as a cure-all to fix less than perfect sanding and/or finishing on the job. The flatter and finer sanding, the more finish coats will stay up on top of the wood, and the more sanding or finish application procedure can be noticeable. Applied heavy, the finish will not penetrate into an extra smooth floor. It also may account for high and low grain texture and dimples in cracks or soft grain. Belt sanders will sand smoother than drum sanders and more 120 grit or finer belts are used than ever. Abrasives are being improved to sand finer, smoother, and to last longer. This can be an issue if not taken into consideration when sanding dense woods as maple or Brazilian cherry. Some stains and finishes are becoming thicker or higher in viscosity to comply with the VOC laws in many states. Reading the MSDS's to understand exactly what version these type products are used is a good idea and can save some negative issues.
Other dense woods and many exotic woods like Brazilian cherry can have the same characteristics. Most streaking issues occur with satin or matte sheens in waterbased or in polyurethane finishes. Rarely streaks show up on semigloss and almost never in gloss finishes. Low sheens are achieved by adding flatting paste to a gloss finish during manufacturing. More is required to make gloss into semigloss, and twice as much to make satin or matte sheens. The large amount of matting paste, plus the density or lack of grain in the maple, can create uneven sheens and cloudy appearance. Matting paste should be distributed evenly in the finish, stirring thoroughly with a flat stir stick before and during use. When the applied finish is dry, additives refract light that hits the surface, giving an appearance of semigloss, satin or matte. Low sheens, applied too heavy, can appear cloudy or hazy. The more coats of satin or matte finish, the more noticeable matting paste can become. Many manufacturers recommend gloss for the first one or two coats and satin for the final coat. The procedure will result in a cleaner, crisper appearance. The only way to repair streaking or uneven appearance, short of a complete resand, is to apply a thin, uniform coat of a higher sheen product.
The key to final-finishing maple is using 100 grit paper on the drum or belt sander without screening, and then applying thin uniform coats of finish. Recommending semigloss finish also on ash can head off problems, showing that a true professional understands how finishes work on different woods.
Bill Price
Served for many years on the board of directors of the National Wood Flooring Association and as an instructor in the Hardwood Flooring Installation School in Memphis.
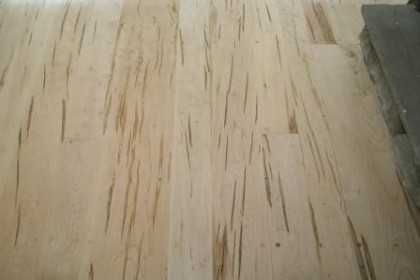
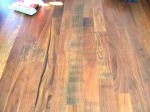
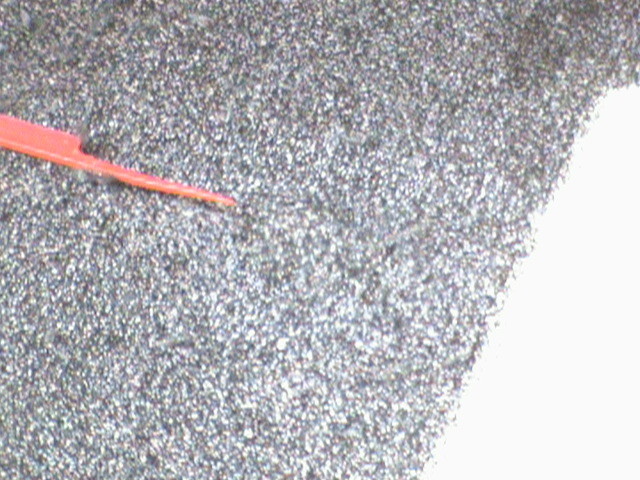
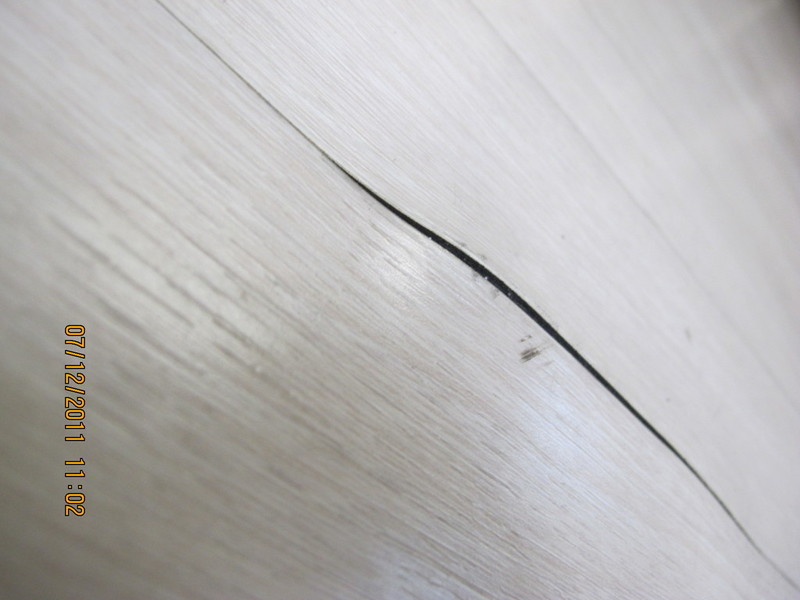
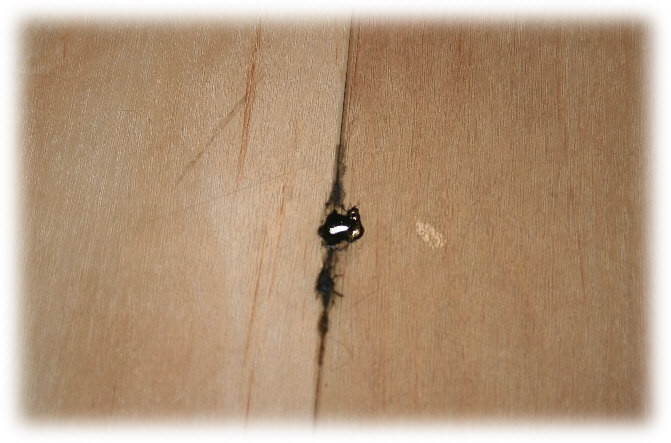
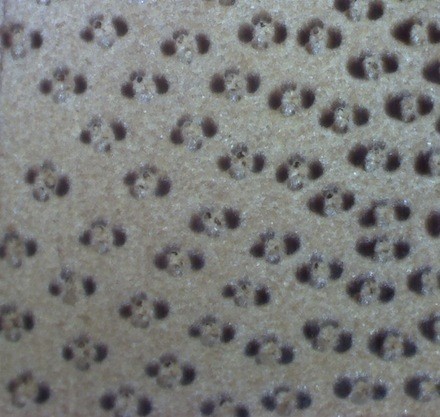
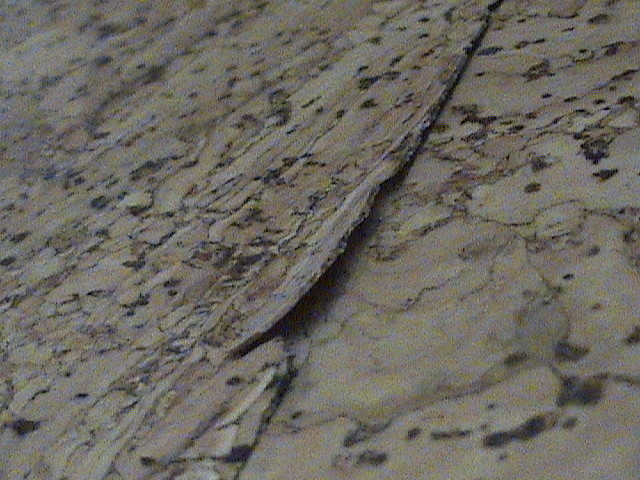
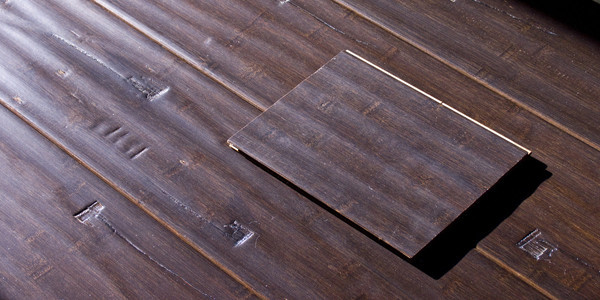
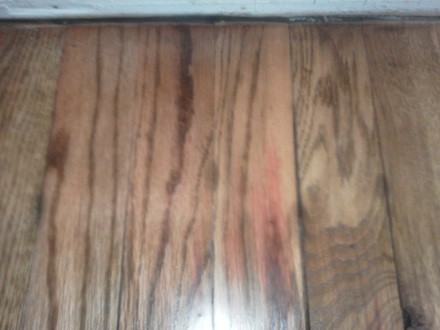
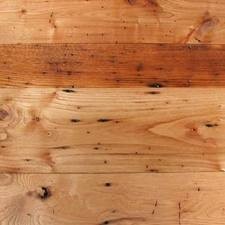
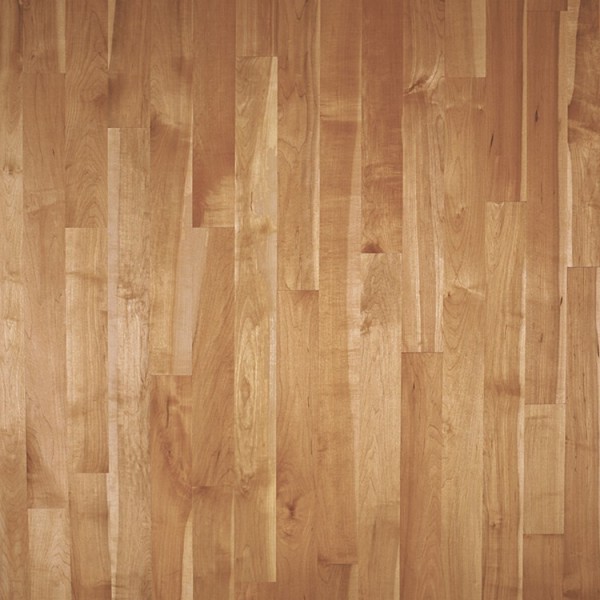
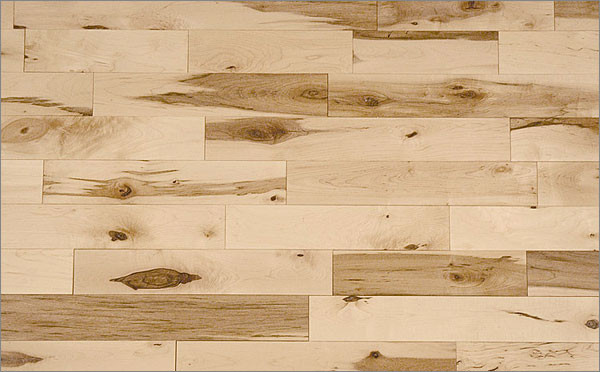
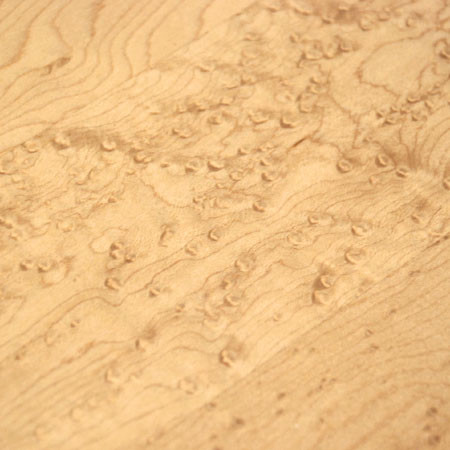
The unusual streaking in our Ambrosia Maple wide plank flooring occurs when Ambrosia Beetles enter a Maple tree, bringing a fungus with them that spreads up and down the tree, following the vessels in the wood. The result is a distinctive gray to brown streaking against the creamy white Red Maple wood, accented by the “eyes” of the beetle tunnels. Ambrosia Maple is sometimes called “ghost” maple because the eyes of the beetle tunnels appear ghostly against the streaks. The streaks are truly natural and unique character markings, and they do not affect the structural integrity of the wood.
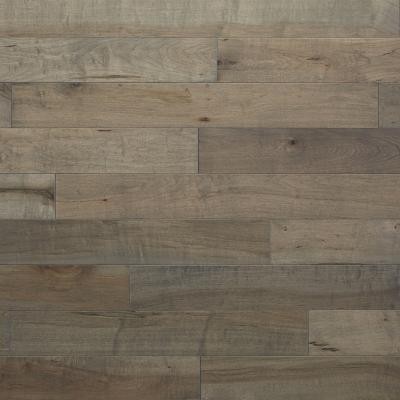

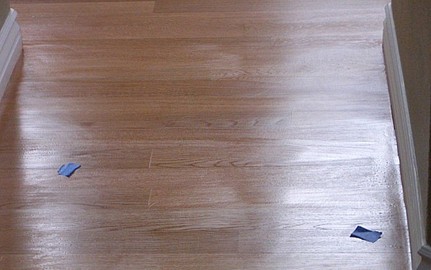
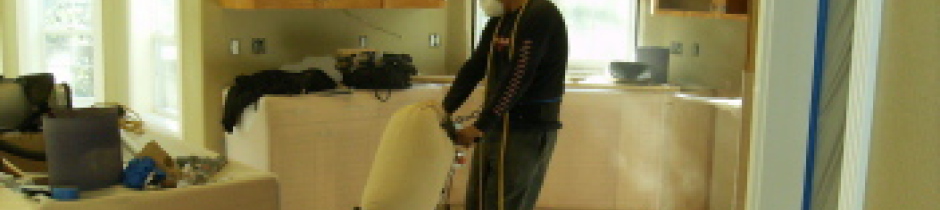
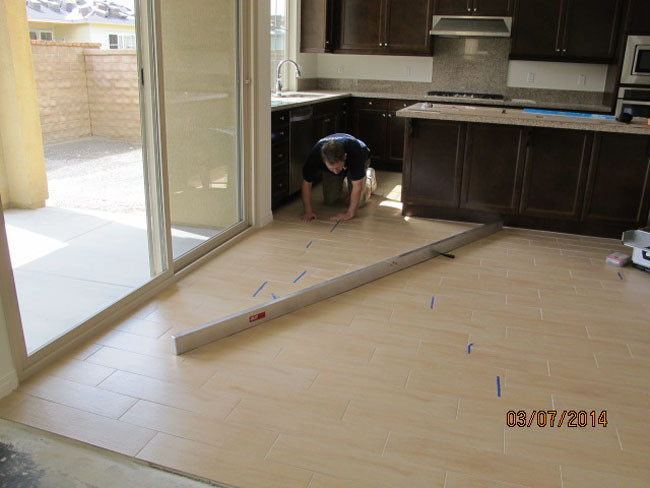
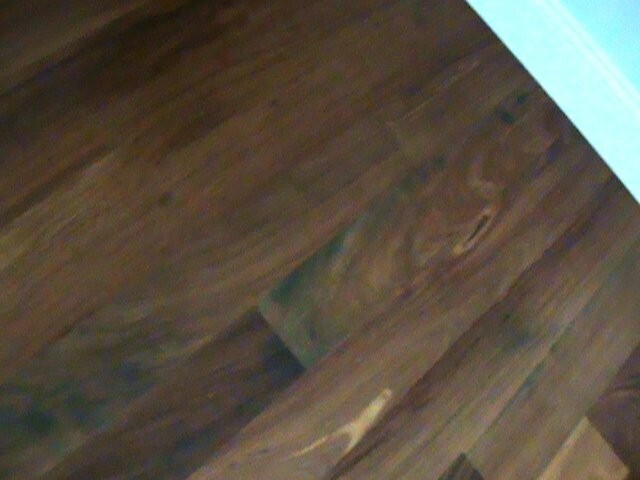
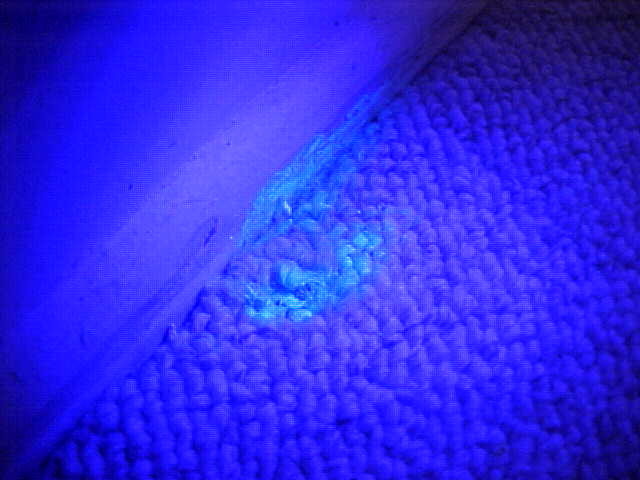
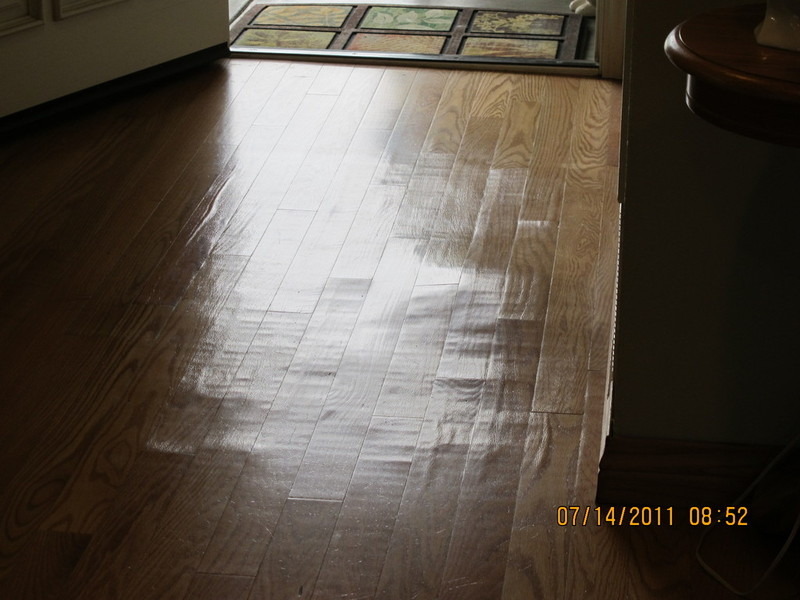
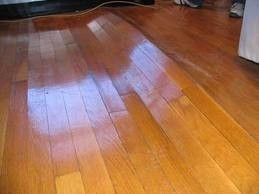
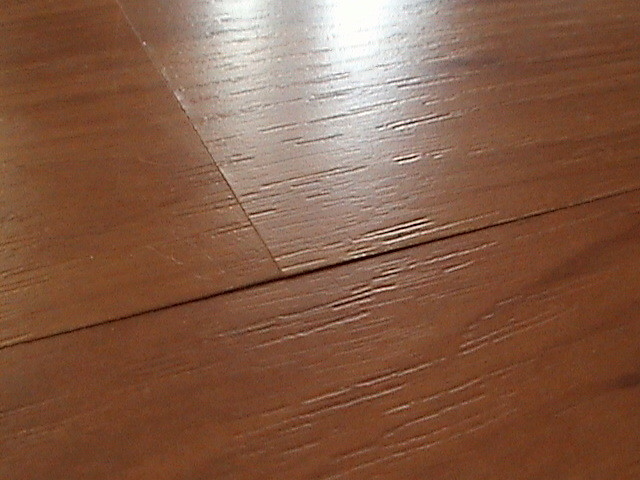
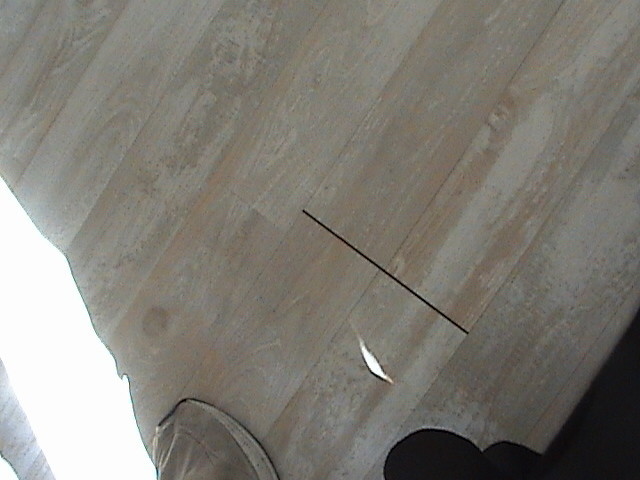
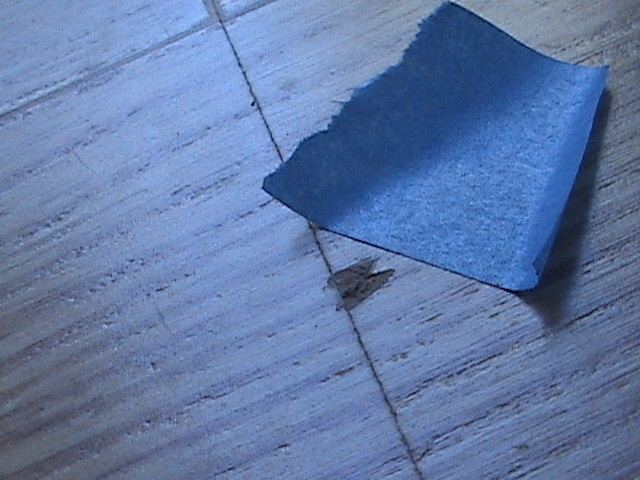
Sudden Streaks
waterborne finish
Mike Sundell: Consultant
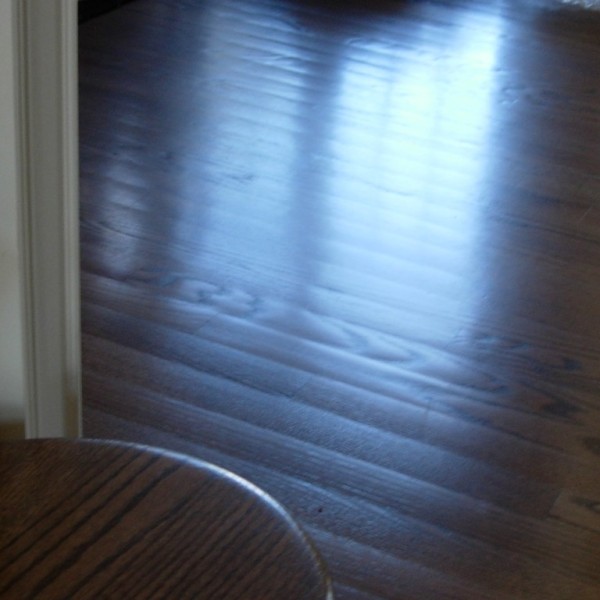
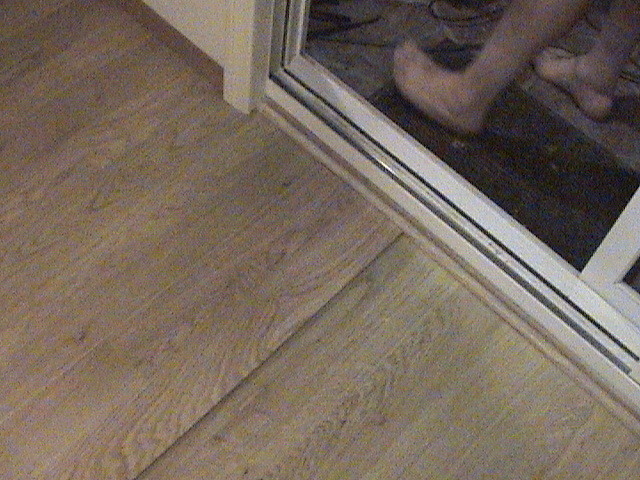
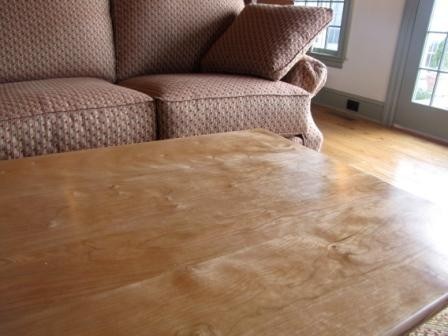
Streaks happen when you use an applicator or a technique that leaves these blemishes in the finish. They are made worse by fast setting conditions. For example, if the wood flooring in front of the patio doors was hot from having sunlight on it, the heat can “cook” the finish, causing it to set too quickly. Some things to keep in mind to prevent streaks are:
• Make sure all applicator pads are clean and soft all over; even a couple of hard hairs can leave distinct lines in the finish.
• When the sun is shining onto the floor, cover the window or coat when the sun is not on the floor.
• To prevent air movement, close up the area where you’re coating. After the finish has flowed correctly, ventilate the job site.
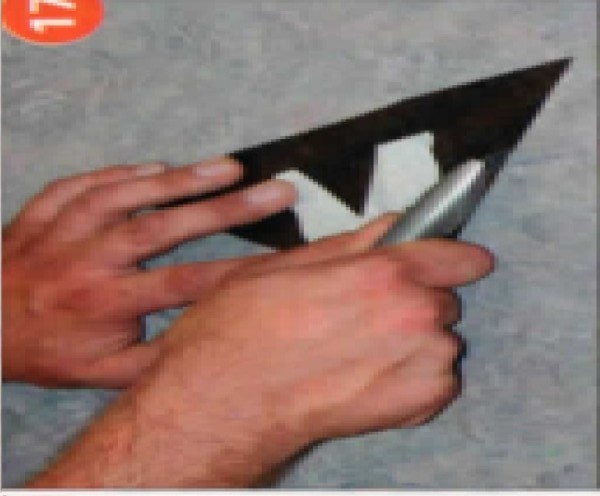
• Be careful with your applicator technique. When using a T-bar applicator, do not lap over more than 2 inches under fast setting conditions. Never leave lines across grain where possible, and apply the finish heavy enough that the finish stays wet long enough to flow out on the floor.
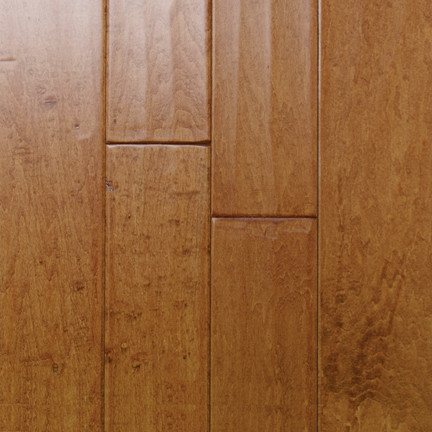
4. JATOBA - BRAZILIAN CHERRY
Jatoba / Brazilian Cherry
Uses
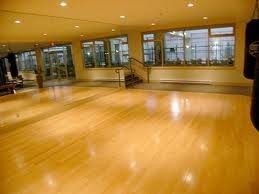
Jatoba wood, is often used in flooring but also ideal for stair treads, athletic equipment, tool handles, railroad ties, gear cogs and wheel rims. Can also be used for carpentry, cabinet making and
general woodworking joinery.
I have sold it to clients as a cheaper substitute for teak, when it is the appearance you are looking for and don't necessarily need the oily, rot resistant characteristics of teak. Jatoba and teak can look very similar.
The Tree: Leguminosae
Family
Jatoba (Hymenaea courbaril) grows to an average height of 120 feet with diameters of 2-4 feet. Jatoba is often referred to as Brazilian cherry although it is not a cherry wood, and has been called
Locust or Courbaril in different areas of South America. It grows in most of the South American islands as well as Mexico, Brazil and Peru.
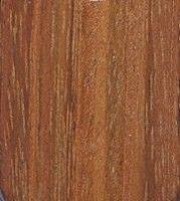
Wood Description:
The wood is an attractive burgundy, deep red, or orange tone, and some of it can even have dark black stripes highlighting a strong visible grain pattern. It can exhibit quite a large colour
variation from one board to the next.
The heartwood varies in colour from a salmon red to an orange brown when it is freshly cut which darkens to a red brown when seasoned. The sapwood can be wide and is much lighter in colour - either white or pink and sometimes gray and does not darken to the deep red-orange tones common with the heart wood..
It is not as porous as mahogany but harder and denser.
Brazilian wood has a natural luster, with a medium to coarse texture. It has no obvious taste or odor. The heartwood is rated as only moderately resistance to attack by fungi and marine borers. Although the books might suggest the wood is relatively stable once it has been dried properly, my experience might suggest that every so often you'll get a few pieces of wood that really don't want to behave... they don't like to be glued and if they can twist, they will.. it is not one of the easiest woods I have used, but the gorgeous colours do warrant an extra bit of effort.
Weight: 56 lbs. per cubic foot.
Finishing:
Jatoba sands and finishes easily. Polishing can create a wonderful luster. It stains well.
Machining:
Moderate steam bending rating. Can be hard to work with, having severe blunting effect on tools. It is moderately difficulty to saw and machine because of the wood's high density and toughness.
Experts recommend a reduced cutting angle of 20 degrees, and the use of carbide cutters as much as possible. The wood's interlocked grain also causes some difficulty in planing.
Again the books suggest that Jatoba has good gluing properties, but because I have had problems I'd always error on the side of caution and uses waterproof PVA glues like the helmitin 805, or Titebond III that seem to have more holding power and use standard laminated parasites recommended for oily woods.
Brazilian Cherry wood nails badly and must be pre-bored before nailing. The screw-holding ability is considered good. Although jatoba turns well, the grain can be somewhat powerful and require sharp tools to avoid tearout.
5. TOXIC WOODS

Edited by: Bruce Campbell
For centuries, it's been fairly common knowledge that some woods could hinder your health. As far back as 60
A.D., the Roman historian and naturalist Pliny the Elder described a case where four soldiers actually died after drinking wine from hip flasks made of yew. Of lesser gravity was the experience of a
few German sawyers in the early 1700s. It seems they developed chronic irritation of the nose and eyes, as well as headaches, from sawing bald cypress.
What are your chances of a reaction to wood? Statistics say that only 2 to 5% of all people develop an
allergic sensitivity to one or more compounds found in wood. But, if you handle a lot of potentially toxic species, and work with them long enough,you increase your chances of an allergic reaction.
And, with sufficient exposure, some woods bother almost everyone.
Any dust, including wood dust, mildly irritates the sensitive mucous membranes of your nose and eyes, making
you sneeze and tear. The dust of some woods such as western red cedar and rosewood can be especially bothersome. However, other woods, called irritants, can make you even more uncomfortable, with a
rash that classifies as either irritant dermatitis or allergic dermatitis. The rash usually has a uniformly red, swollen area that may erupt in blisters, and typically first shows up on the webs of
skin between your fingers. Irritant woods include black locust, cocobolo, ebony, oleander, satinwood, sequoia, and yew.
However, for you to get an allergic-type rash, you first must be allergy-prone to one of more of the chemicals
found in certain woods called sensitizers. And, it may take repeated contact for your body to develop a great enough allergy for it to react (the so-called "latency period of as little as five days
and up to 6-8months). If you do eventually get a reaction, the rash will look like poison ivy - red with small, individual, itchy bumps. Sensitzer woods include cypress, balsam fir, beech, birch,
elm, greenheart, mahogany, maple, myrtle, redwood, sassafras, spruce, walnut, willow, western red cedar, and teak.
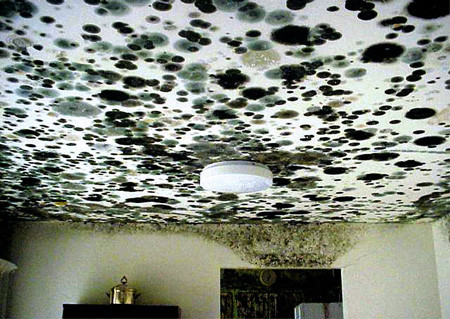
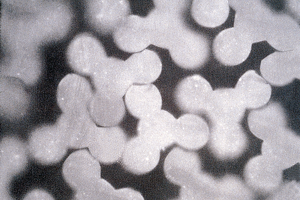
In addition to the actual wood dust, molds frequently trigger reactions, too. One that actually grows in wood
happens to be extremely potent: Cryptostroma corticale. This mold lives happily between the bark and sapwood of many hardwood trees, especially favoring maple and birch. It's responsible for the
marbleized spalting that woodturners prize, and for "maple bark stripper's disease," a condition with all the symptoms of a severe respiratory allergy.
If you have an aspirin allergy, be wary of willow and birch. Both of these species possess significant
concentrations of salicylic acid (the predecessor of aspirin) and very sensitive individuals might only need casual exposure, such as a whiff of sawdust, to react.
Never say "no" to a dust mask. Among woodworkers, the chances of developing nasal and sinus cancer run about
5-40 times greater than non-woodworkers. Although researchers haven't identified the exact cancer-causing compound (primarily because the disease has a latency period from 30 to 50 years), some
evidence points to dust from wood with high tannin content, such as chestnut, oak, redwood, western red cedar, and hemlock.
If you are sensitive to wood dust, work in a well ventilated area (this also reduces the risk to mold), avoid
unseasoned wood as much as possible, and wash or shower frequently. If you develop persistent rashes or respiratory problems, contact your physician or dermatologist. (source of above: http://www.city-net.com/albertfp/toxic.htm)
There is an interesting list of Internet sites at http://www.davidillig.com/awg/safety.html where you can find additional information.
The chart below is a blend of information from two sources. The first is an article which appeared in American
Woodturner in June 1990 (originally posted to rec.woodworking by Bruce Taylor (I took it from the Ohio Valley Woodturners Guild http://w3.one.net/~ovwg/Tips-Toxicty.html). The second is an article prepared by Roy Banner, a woodturner from Torrance, California who almost lost his life in 1989 to anaphylactic shock
after turning pieces of exotic wood (see http://www.mimf.com/archives/toxic.htm ). Roy has assembled his data over the years from
various sources. I can't judge with any authority the validity of the information and it's up to the you to further research any wood yourself. Take this as a jumping off point. You might also want
to check out The Botanical Dermatology Database at http://bodd.cf.ac.uk/BoDDHomePage.html although I found it pretty hard to
follow, technically.
A final note; this data does not take into consideration the added effect of formaldehyde in plywood, treated
woods, sodium compounds in white pine to prevent blue stain, etc. Also, I am not aware of any work to study the interactions of woods and chemicals such as oils, glues, stains, etc. Bottom line -
ensure good ventilation and good respiratory protection when you work in the shop.

Index of Meanings

[1] Cancer of nose and sinus: Statistics show that woodworkers have a 40 per cent greater chance of nasal
cancer than the general population. However, the majority of statistics on nasal cancer are based on data from 1920-1960 when the furniture industry became highly mechanized with little or no dust
control methods.
[2] Irritant or Sensitizer: Woods are either an irritant which cause a reaction fairly rapidly after exposure
and will cause a similar reaction repeatedly, or sensitizers which may have a latency period of hours or months and may require repeated handling before reaction occurs. Sensitizer's are the more
severe, because once you're sensitized, you're sensitized for life and the reactions only get more dramatic.
[3] Potency: This is the potential of the wood or sawdust doing harm and would vary with the individual. i.e.,
those who are allergy prone might think twice about working with wood classed as extremely potent.
[4] Risk: This is a qualitative assessment of the risk of a given wood doing serious harm. It is derived by
combining the Potency and Incidence measures as follows:

6. EXOTIC WOOD FLOORING
Sanding & Finishing Exotic Wood Flooring
By Kim M.
Wahlgren
February/March 2000
Fifty years ago, almost every new house in the United States had the same type of wood floor. For the most part, homeowners had the option of oak strip, or … oak strip. It seems like every week a new specie is imported from the far-flung reaches of the globe. Even in the most traditional oak strip markets, at least one or two imported species have made an appearance. Like almost every other industry in the world, wood flooring has gone global, and savvy contractors need to keep up with the times.
Not surprisingly, wood flooring from other continents can present some challenges not usually found in the lumber from our own backyards. It may be so hard that it burnishes instead of sands, or the finish you're accustomed to using every day may turn the wood a funky color. The dust of some species may make you violently ill. You need to be aware of these and many other details before going out to tackle your first exotic species job.
Background Checks
Working with exotics requires special considerations before the job is started. First, get client approval on wood you intend to use with the finish that is to be applied. Samples should be made for a job of any species of wood, whether domestic or imported, but it is particularly important with exotics, many of which look significantly different depending on the finish applied and may not be compatible at all with certain finishes. Also, some woods such as teak and Brazilian Cherry / Jatoba are very photosensitive; with age and exposure to light, their color will change considerably. Be sure to show both a sample of the new wood and a sample of aged boards. This helps the client select matching trim and cabinetry and also helps avoid surprises a few months down the road. If the client suggests staining the floor, try to steer him toward a species that is naturally the color he wants. Staining an exotic defeats the purpose of buying a more expensive, unusual wood, and, like maple, many species simply don't take stain well. Not infrequently, contractors use red stain on Brazilian Cherry in an attempt to meet designer or customer expectations, but this stain will fade over time.
In addition to color, there are several other appearance issues about which the client should be educated. One is dimensional stability (or lack thereof). All woods demonstrate some movement with changes in humidity levels, but many imported woods show more drastic changes—and therefore bigger cracks—than a typical American Oak strip floor. Climate control is especially important for these woods. Also, the dark colors of many exotic species show imperfections in the floor more than lighter species of wood do, so more than ever, try to downplay the misconception that a wood floor will have a perfect piano-top finish.
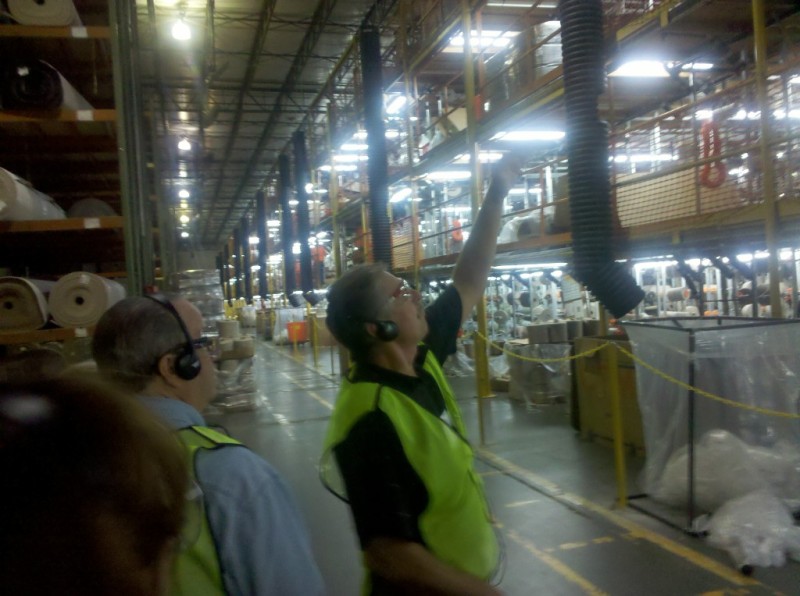
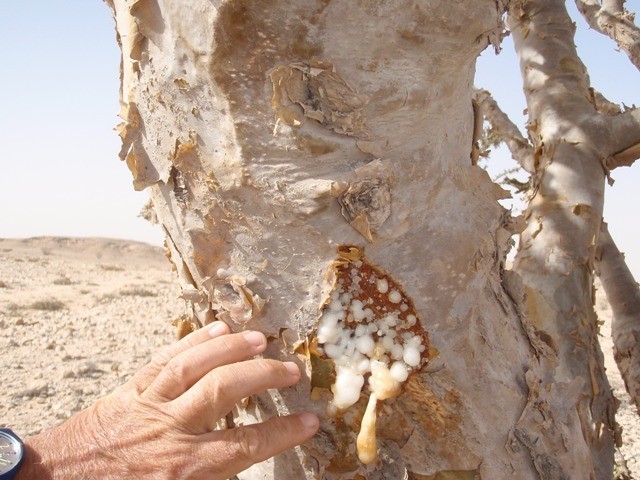
Working with exotics may also present a health risk for the client. The wood itself is inert, but the dust of many imported woods can cause skin or respiratory irritation, or more severe allergic reactions. The safest bet is to make sure the family is out of the home when an exotic species is being sanded, even if it's only in one room. Hanging plastic and using dust containment systems help limit the dust, but the finest dust still settles on walls and throughout the home, even after the job is done. The dark color of many exotics will make the dust especially visible—Santos Mahogany, for example, will leave a trace of red dust on walls. The dust of some species may even stain wall coverings and window treatments. Brazilian walnut/ipé may leave green stains. To be safe, be sure that all surfaces are covered. People with respiratory problems or severe allergies may want to wait to reenter the home until a professional cleaning crew has been through the house.
Finally, remember that by using exotic woods, you are offering a product that many contractors can't or won't work with. Be sure your charges are commensurate with your special skills and products.
Hard, But Not Fast
Just as the home owners need to be aware of the potential health problems with dust, so do the workers on the job site. Respiratory protection should always be worn, and as little skin as possible should be exposed. MSDS (Material Safety Data Sheets) should be present on the job site for each imported species. Contact the wood supplier for any safety information it may have regarding the wood, as well as recommendations for sanding and finishing.
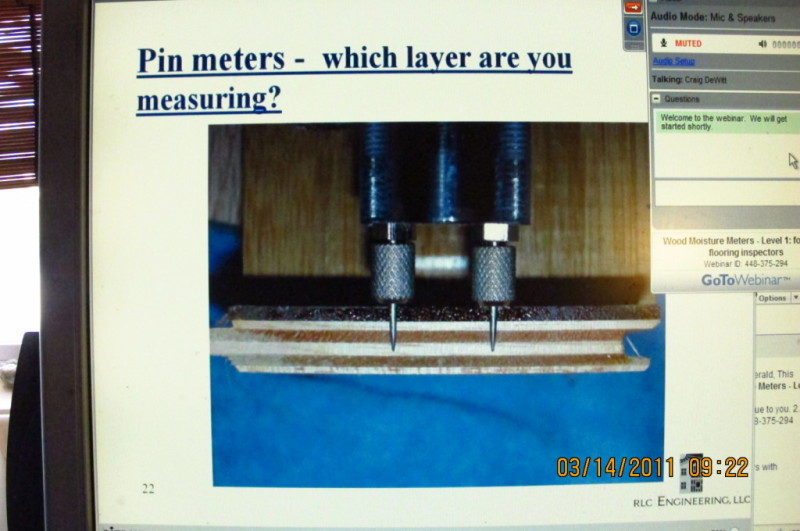
Before sanding even begins, check the moisture content of the floor. It should have been acclimated appropriately before installation (exotics may take weeks longer than domestic species to acclimate), but check at this stage, also. The moisture content of the floor will affect how it sands—the drier it is, the easier it will be. Don't attempt to sand wood with a moisture content that is too high. Also, to ensure your readings are correct, adjust your moisture meter for the species you're working with.
If the moisture content is within an acceptable range, sanding can begin, but keep in mind that sanding an exotic species may be an entirely different animal than the oak you're used to. For example, the most common imported species, Brazilian Cherry / Jatoba, has a hardness rating that is 82 percent harder than northern red oak. Most exotics, if not 82 percent harder, are significantly harder than oak and require special considerations.
Be careful when selecting the first grade of abrasive—don't make the common mistake of beginning with too fine a grit, which will simply smooth off the tops of the imperfections in the floor. Many professionals now recommend that the first cut with the big machine be done on a 7 to 15 percent angle off the direction of the flooring. The angle helps cut the floor flat; then the floor can be straight-sanded again with the same grit of paper. Not skipping a grit in the grit sequence (going with a sequence of 40,60, 80 and 100, for example, instead of 40,60 and 100) may be necessary to get out the scratches left by the previous grit. With these very hard, dense woods, abrasives quickly become dull, and they may begin to burnish the floor instead of sanding it. To successfully flatten the floor, sandpaper and screens must be kept sharp (they will need to be changed frequently), and the floor must be cleaned thoroughly between each cut.
Oily imported woods such as Australian Cypress and Teak from Southeast Asia also require a healthy stockpile of abrasives. Although the woods are not very hard (teak is soft enough that it may even show wheel marks from the big machine), they make a gooey mess of abrasives as their oils and sawdust load up the sandpaper and screens. Beginning with a rough-enough grit should minimize loading. Again, keep the abrasives sharp by changing them frequently. The knots in Australian cypress may cause the floor to become dished out around them, so using sharp paper is critical to avoid leaving little bumps all over the floor. Attempting to sand such species with too fine a grit will exaggerate the dishing effect, as well.
Dishing out is also a common frustration when working with borders and inlays. Within one medallion, the species can vary greatly in hardness and grain direction, yet they somehow need to all be sanded to the same level. Experienced sanders achieve that by cutting on an angle with the big machine and using a hard plate to flatten the floor (orbital sanders and three-disc style machines also work well with various species and grain patterns). Many contractors get in trouble by concentrating too much on screening, which tends to dish out soft grain. A better method is to flatten the floor with a hard plate and then screen the field, only briefly touching on the borders and inlay. Next, go back over the inlay and borders by hand-scraping and hand-sanding.
Using filler on imported species can require some extra thought. Just because that filler matches the color of the floor today doesn't mean it will tomorrow, next month or next year. It's up to you to know how photosensitive the species is and find a filler that will match the floor's color in the long run. That may mean buying a custom color. Or, some contractors use the old time method of mixing their own lacquer oil filler with dust from the actual floor—ensuring that the filler will darken or change color just as rest of the floor will.
Using dark stain can highlight every gouge and edger mark on an oak floor, the naturally dark color of many exotics tends to show every sanding imperfection. Additionally, unlike an oak floor, many imported woods have very little grain definition, leaving little to disguise errors by a sloppy sander. Check with finish manufacturers for which grit to end on—oil-modified finishes will typically require a lower grit than water based finishes, which need a smoother, more burnished surface.
Be Sure They Agree
Before you even think of putting finish on a species you haven't worked with before, it is vital that you test it on a sample (ideally, you already did this to show it to your customer). Weird reactions between different types of finishes and certain species of exotic woods are not unusual. Some pitfalls to watch out for include the finish taking an exceptionally long time to dry, the finish changing the color of the wood, or the finish not having a uniform sheen.
Finish manufacturers always frown upon using different companies' products on the same floor, and it is especially risky to mix products when dealing with touchy exotic woods. To be safe, use the "system" approach of the same company's sealer and topcoat finishes (and follow their directions carefully). No matter which finish you're using, always use a sealer. Also, factor in extra drying time after each coat. Most exotics are very dense woods and don't absorb finish as readily as most domestics do.
Which type of finish to use is entirely up to the contractor—four people who work with exotics every day may swear by four different types of finishes. However, all finishes have their own considerations that need to be taken into account.
Some contractors feel that oil-modified finishes are best at highlighting the rich tones of exotic species, but caution must be taken with dry times—species such as Brazilian Walnut / Ipé have been known to take an entire month to dry when coated with oil-modified finish. Making that sample can help you determine how much time is necessary for a successful job and if the color is appealing. Occasionally oil modified finishes will cause a reaction changing the color of the wood; for example, Brazilian Walnut / Ipé may turn blood red when coated with polyurethane.
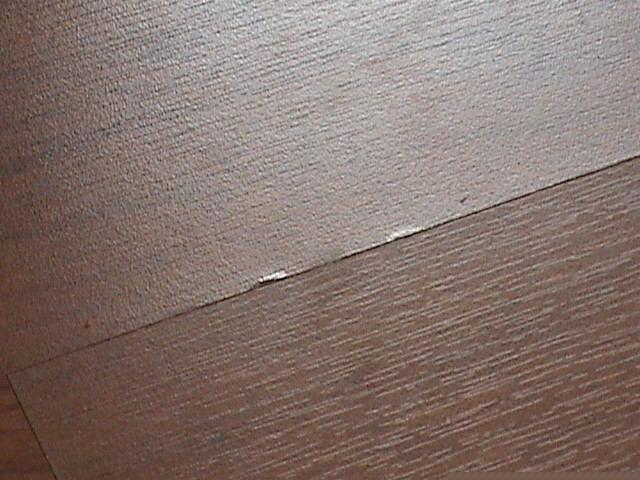
The most common exotic, Brazilian Cherry / Jatoba, is frequently coated with oil modified polyurethane, but you may want to be particularly careful about such jobs. Occasionally, coating Brazilian Cherry with poly causes white spots or specks to appear, and sometimes the end joints between boards turn white. To prevent this, some contractors buff in a clear oil sealer or neutral stain, then use several coats of satin polyurethane buffed in with a white pad.
Some contractors prefer to use water based finishes on exotics, believing that the water-based products, especially those with a UV blocker, tend to hold the color of the wood better. Dry times will also be shorter with these products. Finishers should be particularly careful when applying water base over dark woods, such as Merbau or Santos Mahogany, because areas with drips, puddles or extra finish may show as darker areas on the floor. If you would like to use an amberizer to give the look of a poly in a water base, try it on a sample first—amberizers are designed to be compatible with the colors of lighter American woods as opposed to the dark shades of most imported species, and may not give the effect you are looking for.
Moisture-cure urethane products are used with success on many exotics, and are noted for bringing out rich colors in the woods. Again, check dry times. Also, test to see if the product looks uniform on the species you want to use. For example, most contractors will use only a gloss-sheen moisture-cure on dark woods because the satin sheen's flattening agent tends to show applicator start and stop marks.
Like oil-modified and moisture-cured finishes, conversion varnish finishes bring out rich, deep colors in the woods (each type of finish will change the color slightly, however, so make a test and be sure to not use different finishes on different areas of the same job site). Low sheens in conversion varnishes work particularly well over exotics.
Some woods may cause problems. Many contractors get in trouble by concentrating too much on screening, which tends to dish out soft grain with any type of finish. Oily woods, such as Teak, may need to be treated with the appropriate solvent (ask your finish manufacturer what to use) before being coated. Or, many finish manufacturers recommend that the floor simply be screened and then cleaned and coated immediately afterward, before the oils in the wood have a chance to work back up to the surface. On Australian cypress floors, the knots may stay sticky after the rest of the floor has dried.
Just as sanders need to take extra precautions when working with multiple species in borders and inlays, finishers should be aware of the products they're working with. Some exotics—including Padauk, Purpleheart and Jarrah—may "bleed" their color onto neighboring woods when finished. The dust of those species is spread onto the boards of lighter woods, such as maple or beech, giving them a pink cast. Contractors recommend several methods to avoid this unsightly phenomenon. Some recommend vacuuming extremely well (not tacking, which would pull the dust out across the floor), then using a fine applicator or small bristle brush to apply a light finish coat over just the border or inlay, then coating the entire floor. Some finish manufacturers offer their finish in a spray can that may be used to accomplish the same thing. Using a neutral stain or sealer to first seal the species susceptible to contamination, allowing them to dry and then coating the rest of the floor is also a method that has been used with success.
If at any point in the job the floors need to be covered up, be sure that every square inch of the floor gets covered. Again, many imported woods are very photosensitive, and may later show a line where the edge of the cardboard was laid down three weeks earlier. Likewise, try to do an entire job at once. Don't do half the job and comeback two weeks later to do the other half, only to discover that you now have two differently colored wood floors of the same species nicely contrasted side-by-side. These scenarios can happen with both job-site finished and prefinished flooring.
No matter which species you're working with—whether it's from the Congo Basin of Africa or the jungles of Thailand—the most important thing is to experiment with it in your shop, not on your customer's floor. Exotic species offer some of the most brilliant colors and gorgeous wood available in nature, but it's up to you to make them look fabulous in your customer's home.
Under Your Skin
Most woods — domestic as well as imported — contain chemical
compounds that are irritating to some individuals during cutting or sanding. While wood alone is not hazardous, skin contact with or inhalation of wood dust can be. Installers, because of their
repeated exposure to sanding and sawdust, need to be aware of possible allergic reactions, including contact dermatitis and respiratory problems. Once finish is applied, wood is basically inert.
Respiratory reactions can include sneezing or breathing problems. Contact dematitis can result in itching or, in rare cases, painful rashes. As an individual becomes sensitized to a wood over time,
these reactions can get stronger.
Preventive Measures
• Have good dust-collection apparatus attached to all sanding machines.
• Wear long-sleeve shirts and hats to avoid skin exposure.
• Shower after being exposed to dust to minimize the skin-irritant potential.
• Wear a good dust respirator to mitigate respiratory dangers.
• To test your skin’s allergic reactive potential prior to working with large quantities of dust, perform a skin-patch test. Take a small quantity of fine dust from the wood being used and place it
under an adhesive bandage on the inside of your forearm. Leave it in place for 24 hours and then remove. If any serious skin irritation is present, do not proceed.
7. GENERAL FINISH PROBLEMS
A square foot price quoted over the phone will not work with a refinish . It should be
Advised that refinishing with a surface finish, particularly with an old floor where unidentified products have been used, may have problems because of contaminates. They should be advised that with proper preparation and diligence to detail this is a rare occurrence. Refinishing for this article means to sand the wood flooring to bare wood and apply a new finish. The following list items that need to be evaluated to help avoid troubles with refinishing.
•Type of flooring
•Thickness of sand able surface
•Type of finish on the flooring
•Areas where pet or water stains are present
•Deep dents and scratches in the flooring
•Movement or loose noisy flooring
•Cupping
•Crowning
•Gaps
TROUBLES WITH THE TYPE OF FLOORING AND THICKNESS OF SURFACE
Solid NOFMA Certified 3/4"flooring can be refinished a number of times, 5 to 9 or more times, by a competent sanding occurs, replacing the flooring will be necessary. Try a test area first.
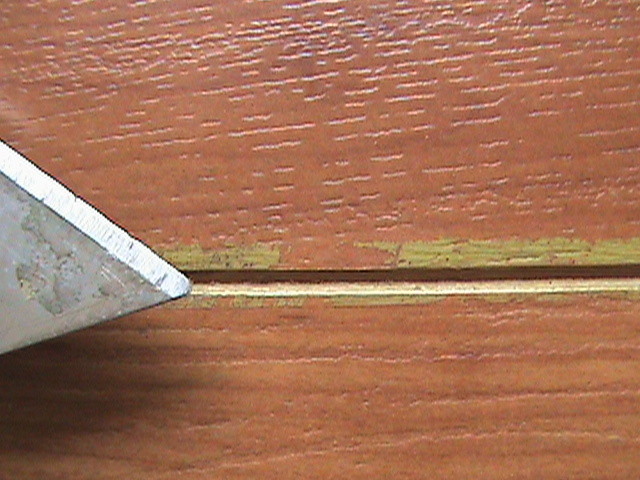
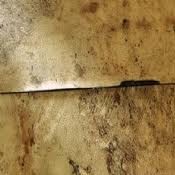
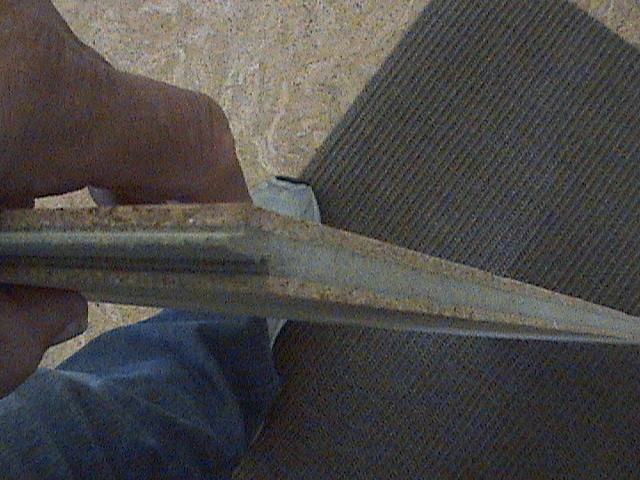
For flooring that has been finished or refinished only 1 o 2 times the wear layer is adequate for a number of additional sandings, some of which maybe aggressive, if required. When the wear layer of the flooring approaches 1/8"either the nails can be exposed or the top of the groove edge becomes weak and can break. To avoid exposing nails or breaking off the groove edge check the thickness of the flooring above the tongue. Check more than one place using a thin blade
Inserted in a gap somewhere in the center of the room or rooms. Checking the perimeter or a heating register may not give a good measure. If the flooring is near the 1/8" you can advise the customer
You will re-sand but not aggressively with the expectation that some abuse, dents scratches etc., will not be removed and nails may show, and if excessive breakage groove edge.
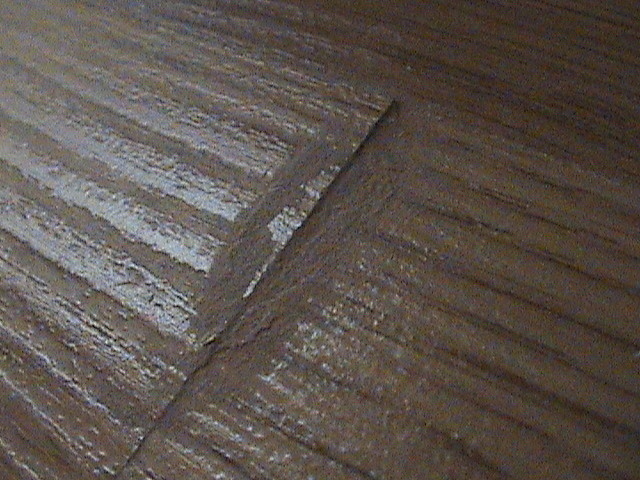
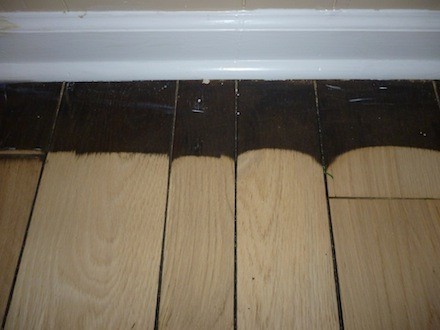
BEVELED OR EASED EDGES ALSO PRESENT A PROBLEM
Should you sand them away which may result in sanding considerable life from the flooring or leave them? All bevels will have to be scraped and sanded for new finish to properly adhere. Also, an aggressive sanding required to remove bevels may result in additional gaps due to the angle of the flooring edge.
TROUBLESWITHTHETYPEOFFINISH
An older seal and wax finish system should probably remain a seal and wax finish since wax from the many years of waxing will likely be present in all crevices of the flooring. Finishing with a top coat urethane can result in the new finish peeling from wax contamination. For the floor that has only been occasionally waxed, urethane finishes will likely perform with diligence to cleaning any gaps. Trowel filling the flooring can isolate wax missed during sanding and help avoid peeling finish.
FACTORY FINISHED FLOORING ALSO CAN PRESENT SANDING AND FINISHING TROUBLE.
Finishes with the ceramic, titanium, etc. additives are very difficult to sand off. Extra cost is involved in the extra abrasive and time required to complete the sanding. Sanding with a finer grit paper may more effectively remove finish. The eased edge products require that the edge be sanded flat or scraped for a new finish to properly adhere.
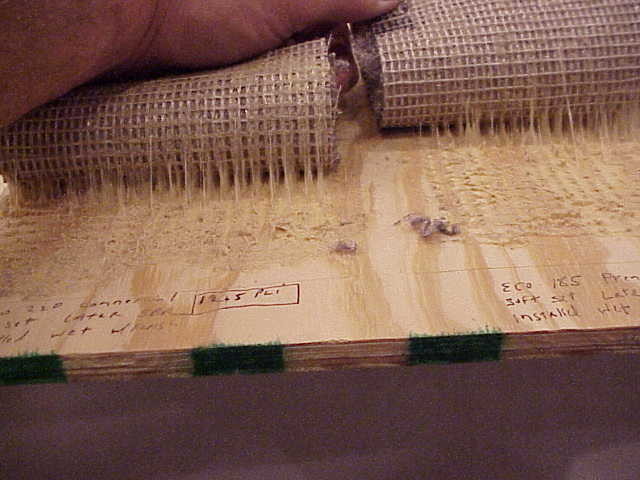
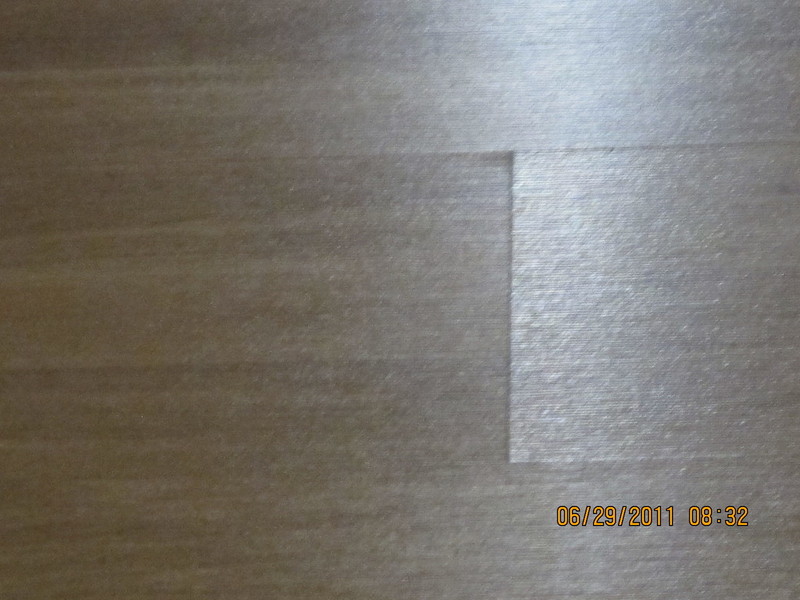
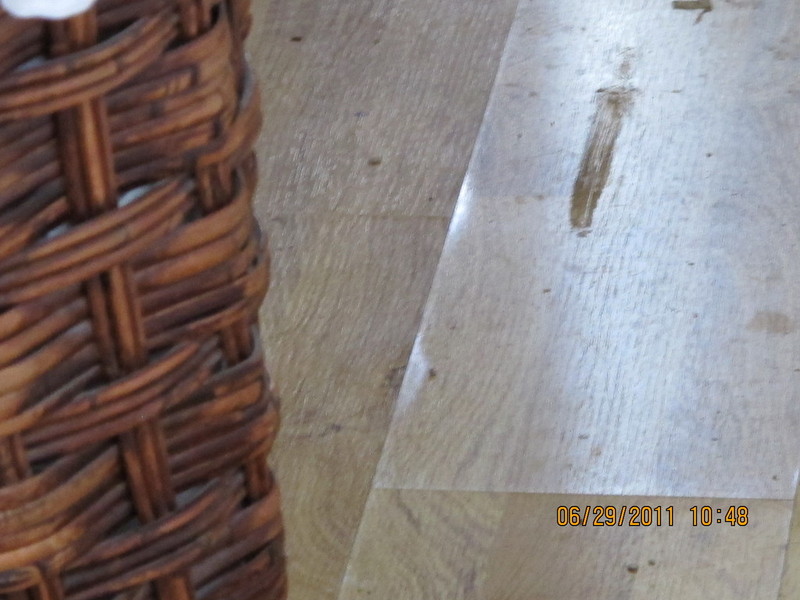
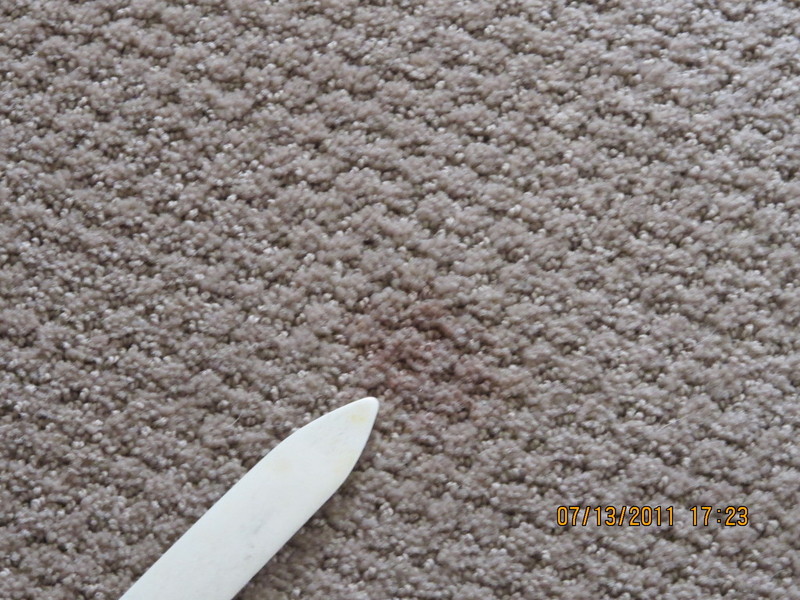
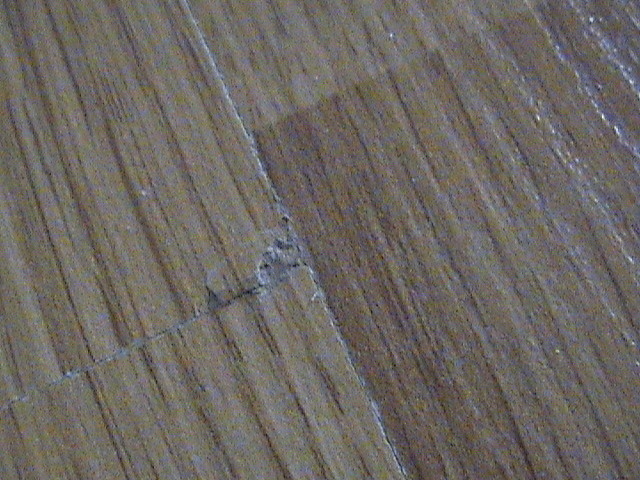
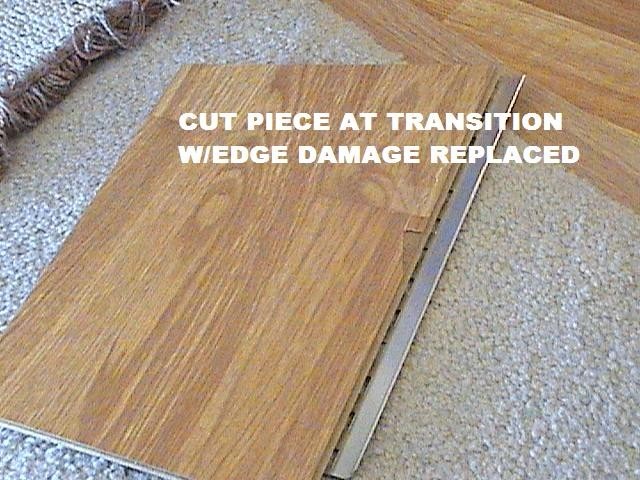
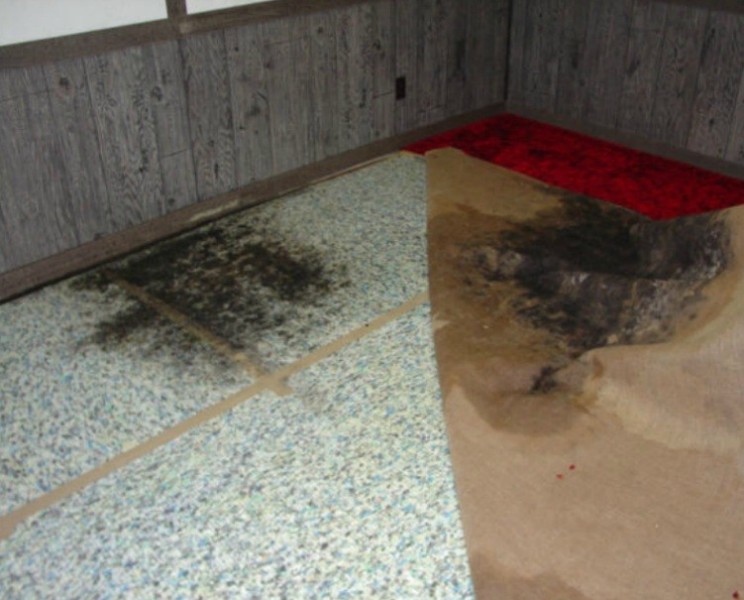
AREAS TO REPAIR OR NOT REPAIR
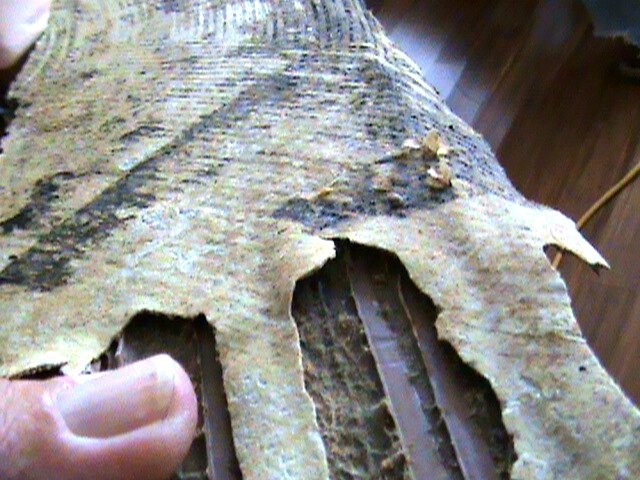
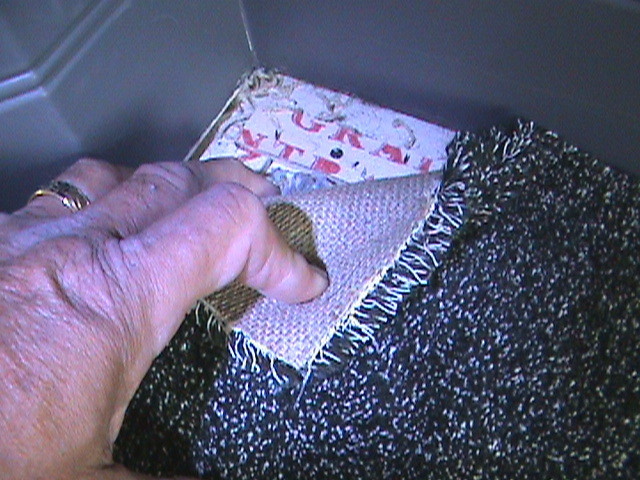
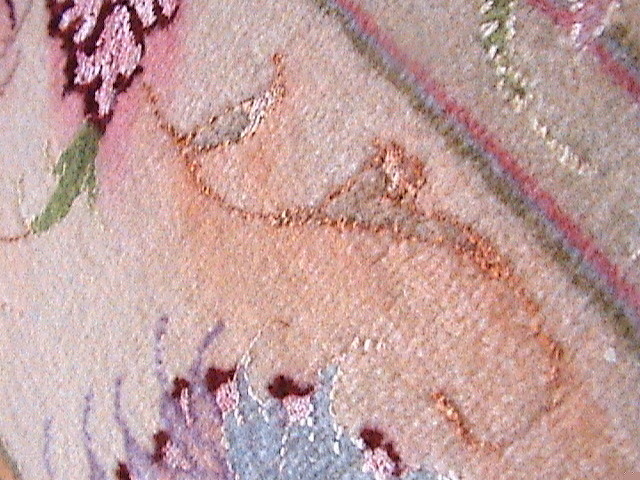
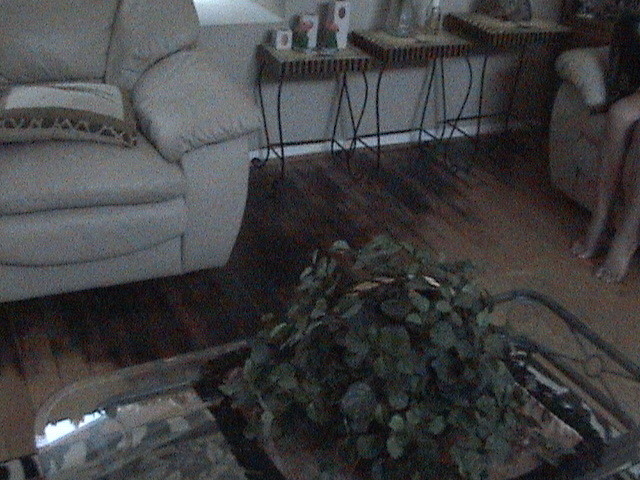
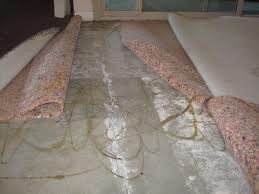
Pet stains, diaper stains, etc. will normally have stained the flooring through the thickness and will not sand out. Don't say you can sand them out until test sanding the area. And if repair is chosen be sure to match with a similar grade, grain pattern, and species. Also, match the general spacing. If there are spaces between every board, add some spaces in the repair. Avoid trouble with as and only decision by sanding a test area and staining with the chosen color and asking the customer to approve the result before completing the sanding operation. Water stains can also be surface stains or penetrate deep into
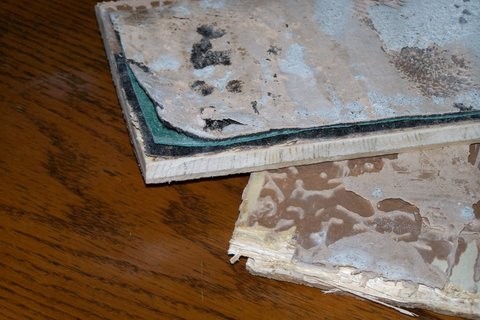
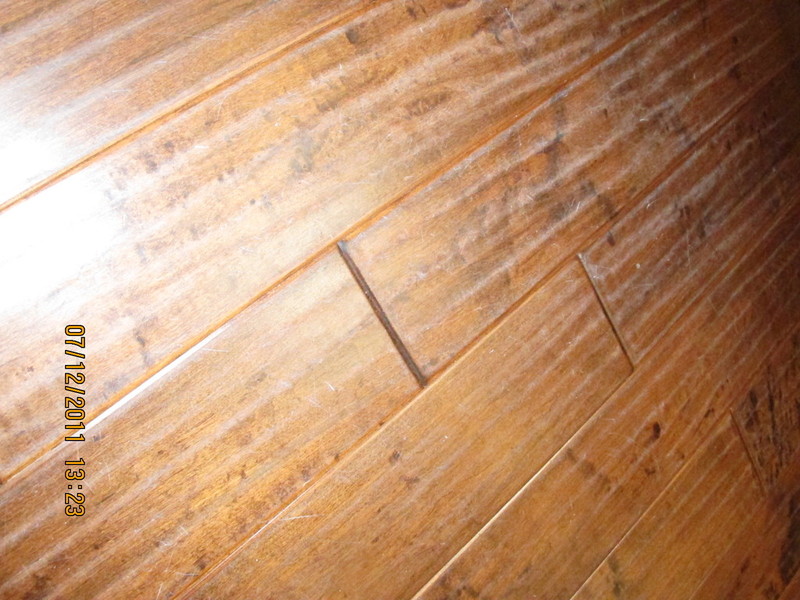
the flooring. Planters that have leaked are likely to require board replacement. Carpet pads can stain flooring either through the chemical plasticizers or from water and the cleaning process. Even an aggressive sanding may not remove the waffle shadow. Sanding a test area is often necessary to advise weather or not the stain or pattern can be removed. It will also determine the amount of sanding necessary and avoid the trouble associated with the request for additional money for the extra work. DENTS,DEEPSCRATCHESANDGOUGESAREVERYDIFFICULTTO REMOVE.
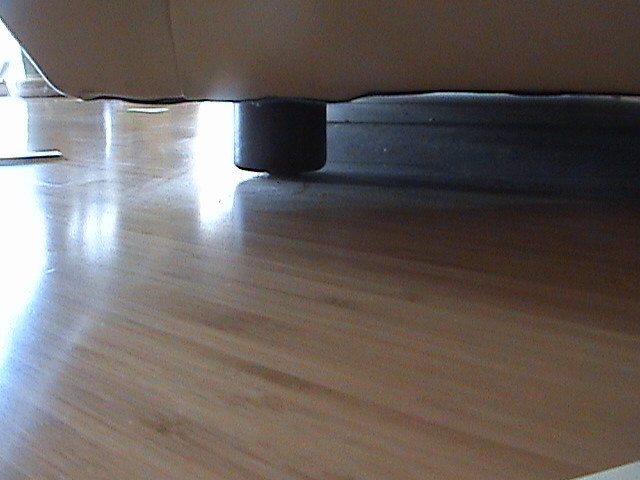
Inform the customer you can: (1)Sand normally and some prominent scratches etc. will remain in the finished floor. (2)Sand aggressively, requiring additional time and materials, to remove most of the item if sufficient thickness is present. (3)Repair the areas with new wood. Dent and gouges from pianos, rocking chairs, chairs with the metal casters, and appliances, will require repair with new wood since excessive sanding will be required in a single area.
LOOSE FLOORING CAN INTERFERE WITH THE PERFORMANCE OF SURFACE FINISHES.
Movement between boards can stretch new finish along the flooring edges or cause the layers or coats of finish to separate resulting in white lines along these edges or peeling finish. So, refastening a loose floor is necessary before finish is applied. Use fasteners that have rough or deformed shanks-flooring cleats, galvanized casing nails, twist or coated flooring nails or trim screws. For the generally loose floor using flooring cleat face nailer through out the floor will likely be necessary. Place the nail in the open grain whenever possible to better hide when filled; 2 or 3 colors of filler to match the surrounding wood color can also help hide the numerous cleats. Noisy floors can generally be fixed in the same ways.
An additional fix is to fasten from underneath, when accessible, with screws. Choose a length that will extend within 1/4"of the flooring face, predrill a pilot hole, and back the screw with a flat washer. Remember to advise that eliminating each and every place of movement or noise is not a realistic expectation.
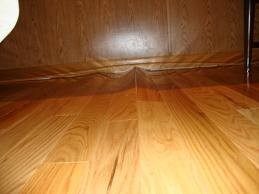
CUPPING
First ask or determine if the cupping is permanent or seasonal. Only sand a cupped floor if it is a permanently cupped floor. If the cupping changes seasonally, first determine the source of moisture causing the cupping and remedy. Then sand the flooring after completing a heating season. The heating season will normalize the flooring. Sand a month or so after heating is discontinued so an average environmental condition is reached and the remaining cupping if present is considered permanent. Advise that sanding a significantly cupped floor removes a lot of the wear surface along the edges and reduces the number of future sandings.
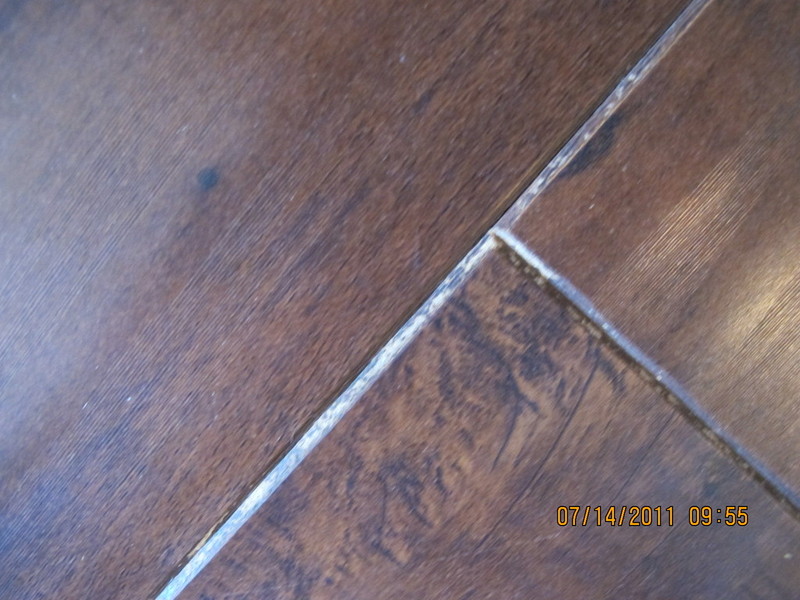
GAPS
First determine if the customer actually wants the gaps filled. Debris etc. in gaps can interfere with filler adhering to the edges of flooring. Proper cleaning may not be possible and result in filler breaking out of the gap. Another problem is that filling normal seasonal gaps can result in cupping or even buckling if the seasonal expansion space is removed. Determine which gaps are seasonal that will not be filled and which gaps are permanent. Permanent gaps can be filled if there is no movement between the boards. Filler in gaps 3/64" and less can be expected to perform for years if the gap is cleaned and completely filled. The occasional gap up to 3/32" wide can be filled, but requires special attention. The gap should be extra clean along the edges and the filler forced down and onto the tongue. A second filler application may be required because of filler shrinkage. Another process is to glue slivers or tapered shims of flooring into the gaps. This is especially effective for the larger gaps. The shim should be selected for color and grain to blend with the adjoining strips. A board repair can also be made with a wider board to fill the larger gaps.
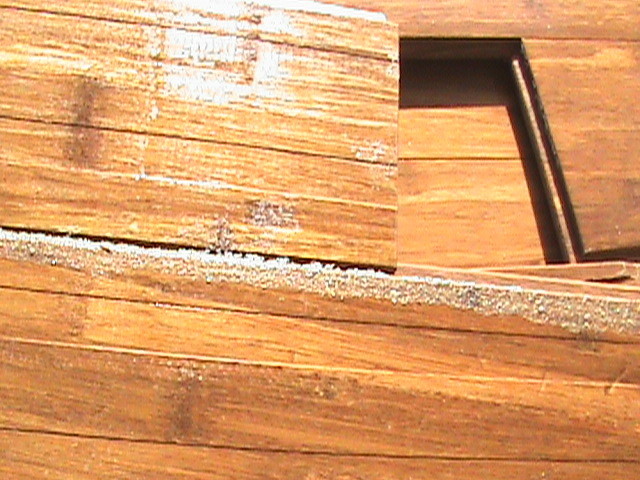
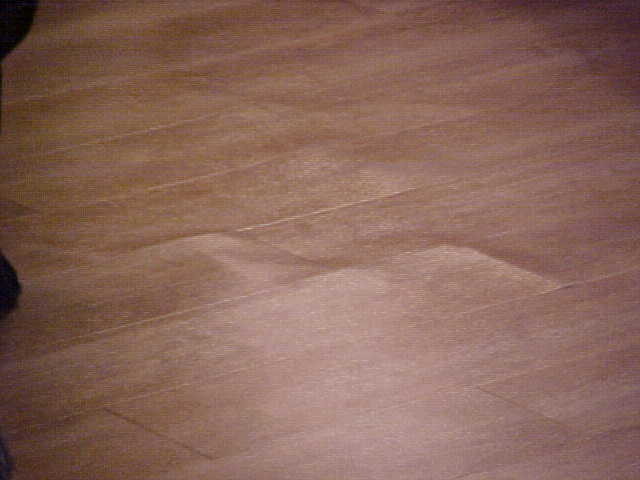
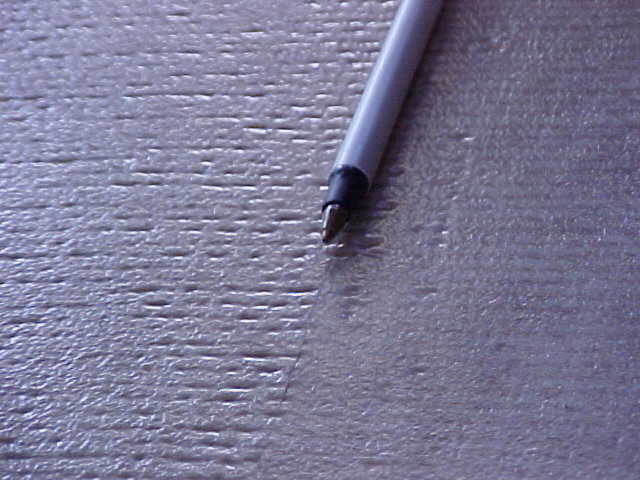
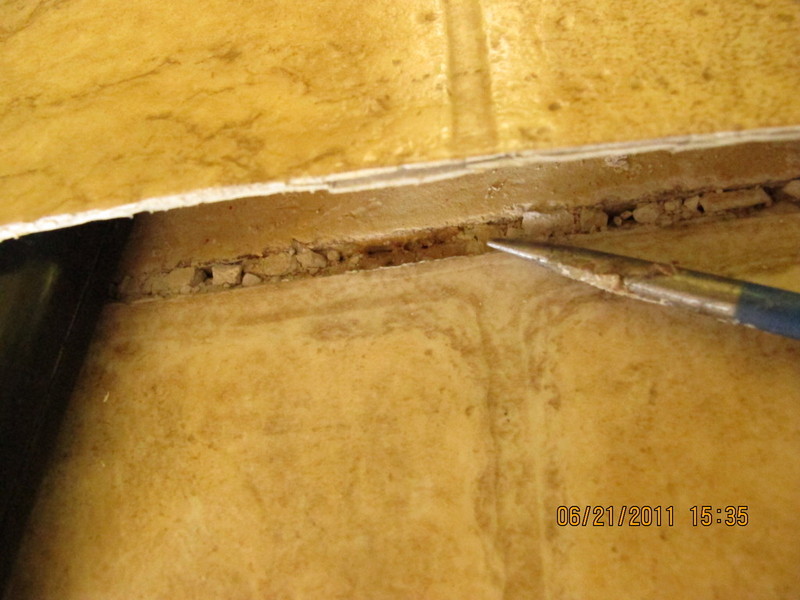
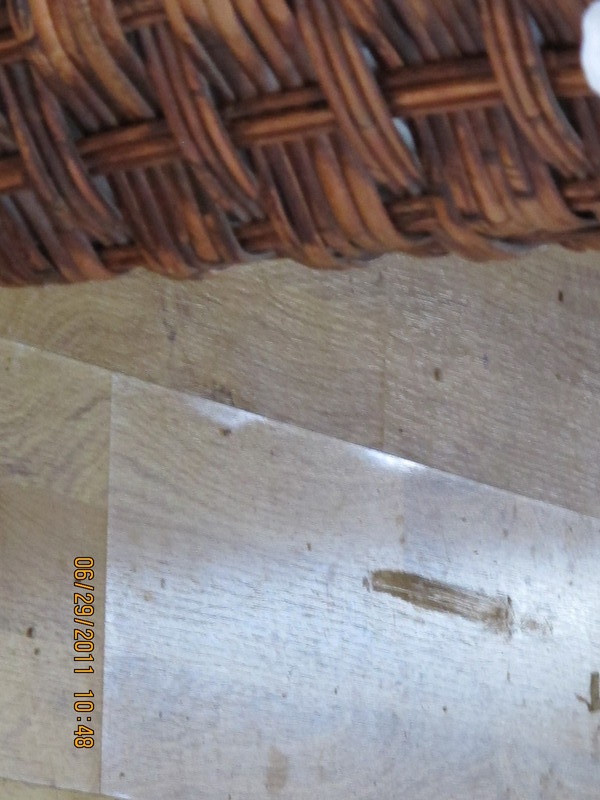
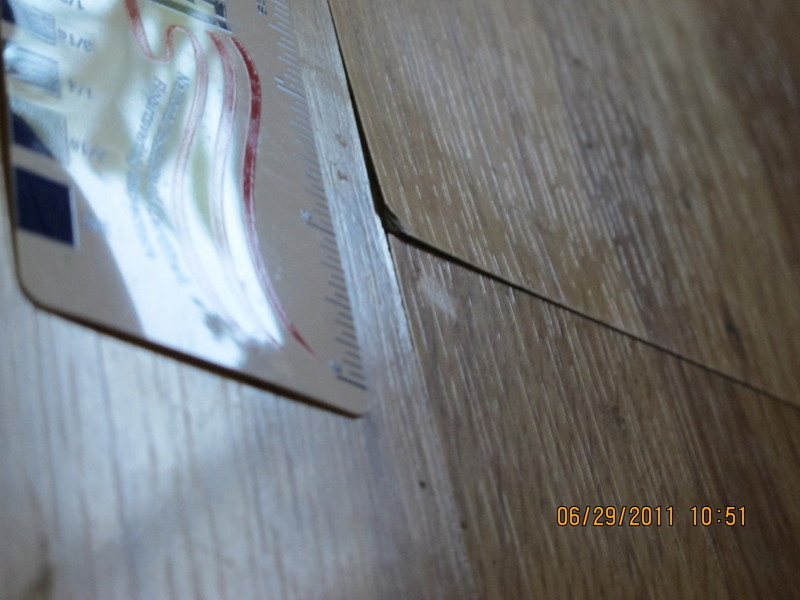
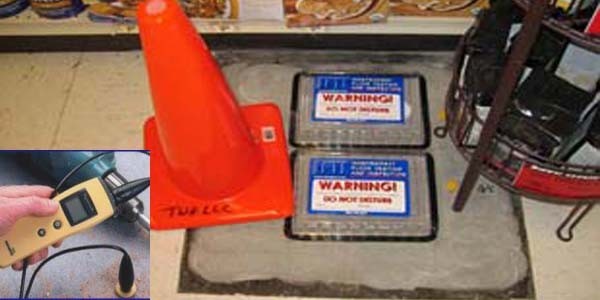
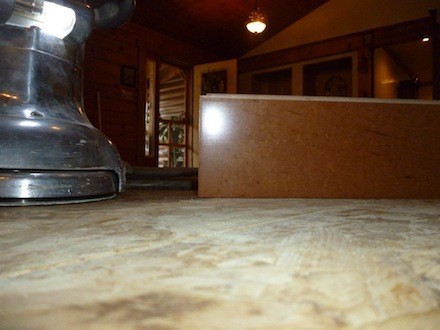
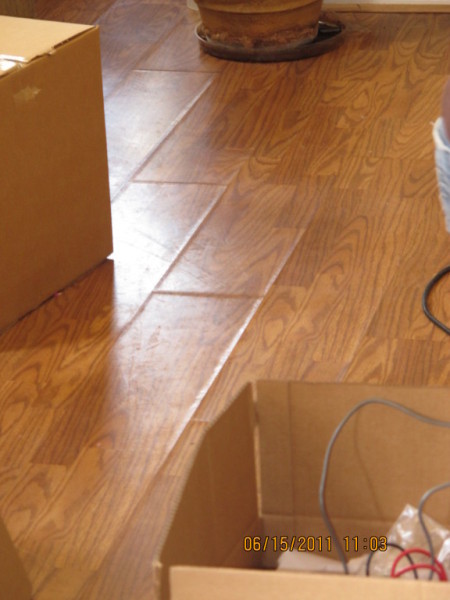
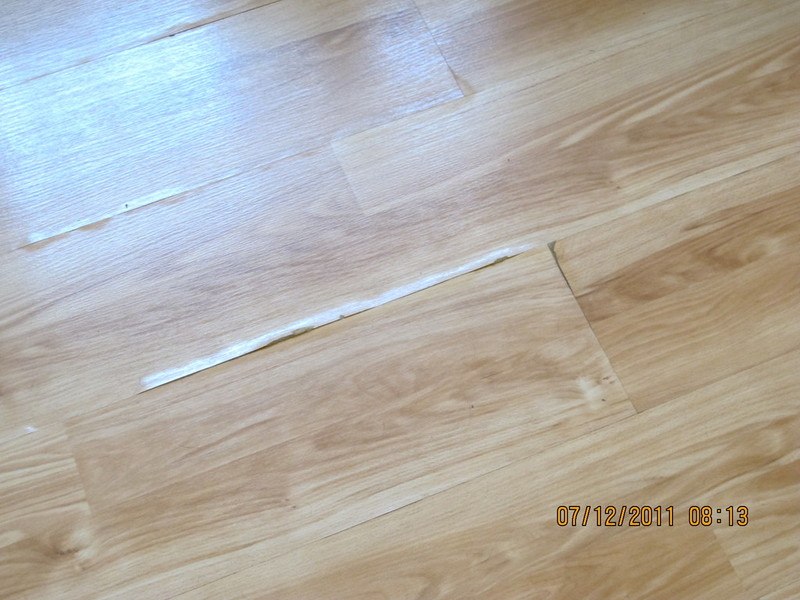
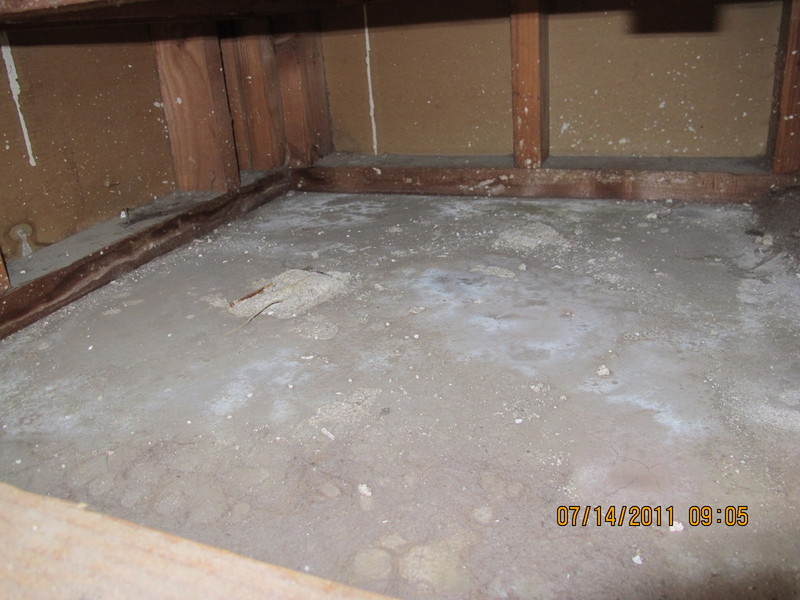
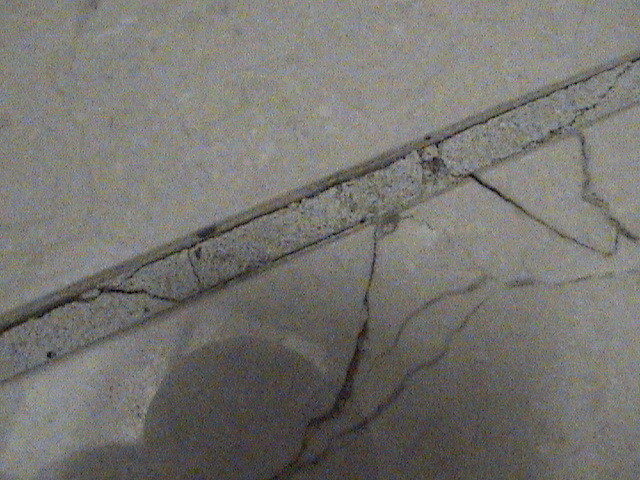
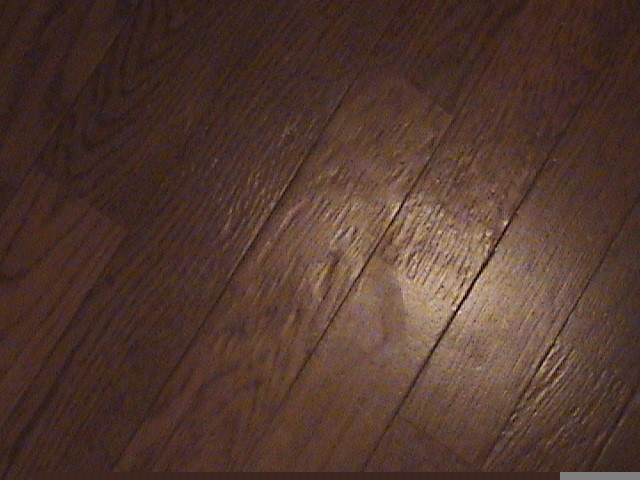
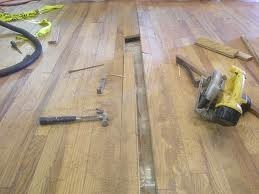
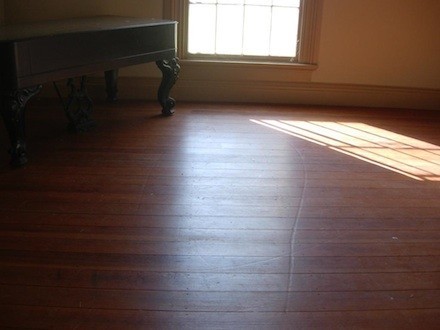
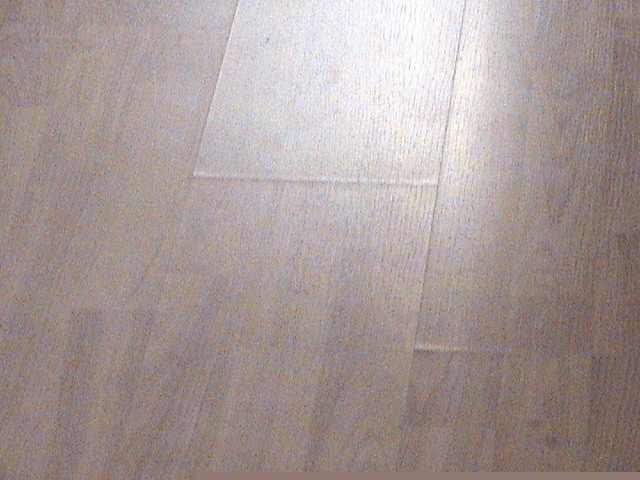
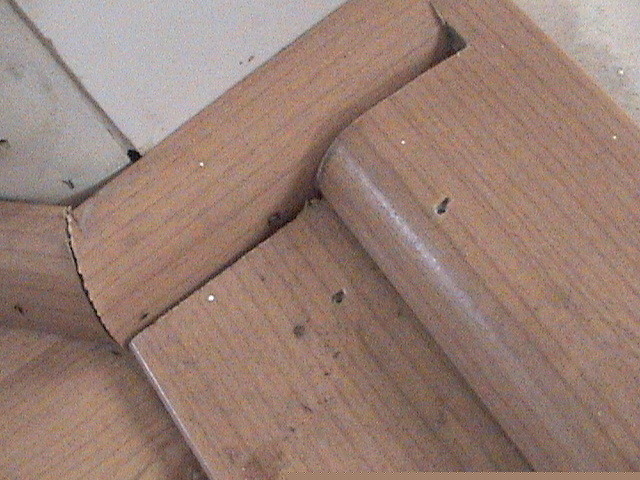
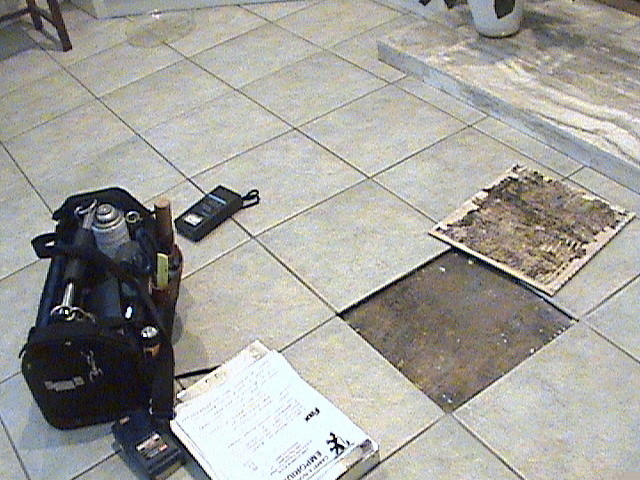
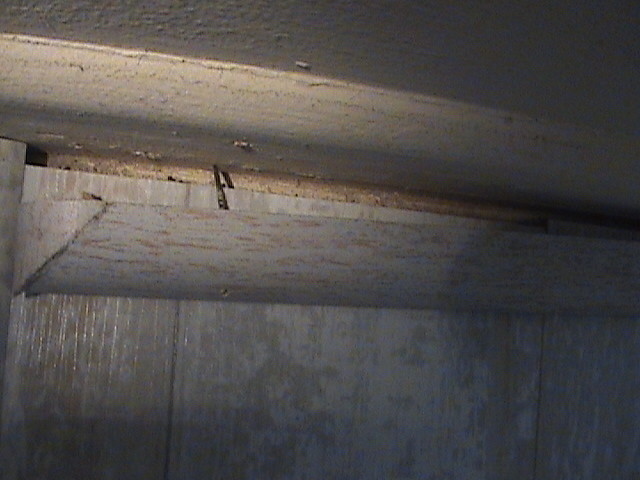
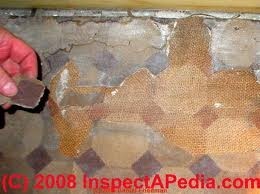
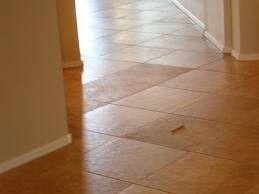
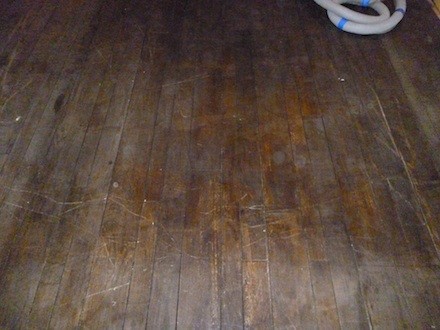
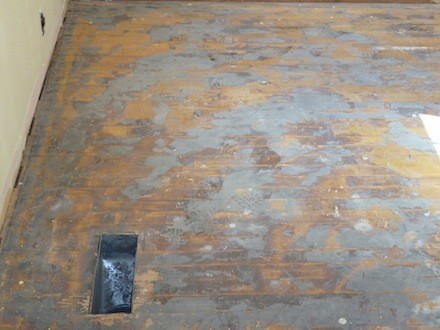
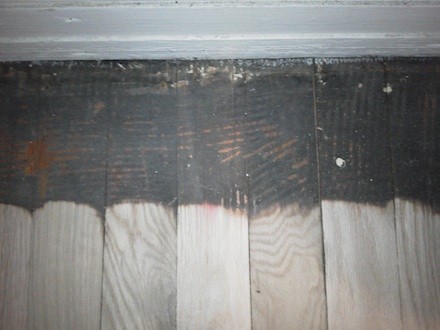
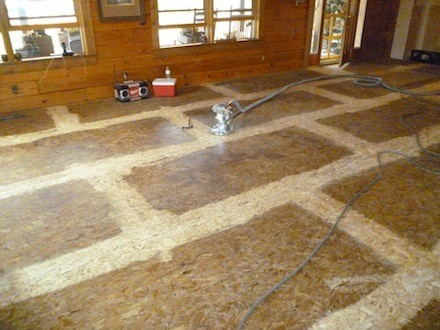
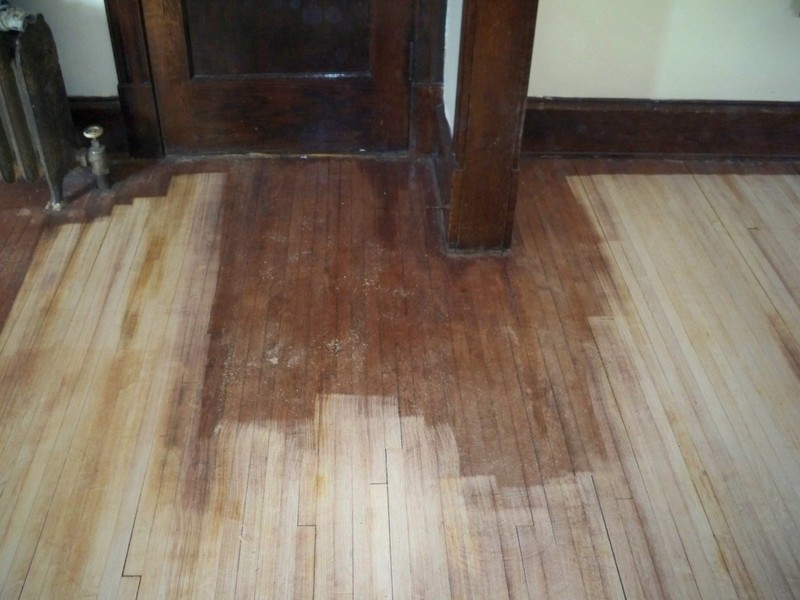
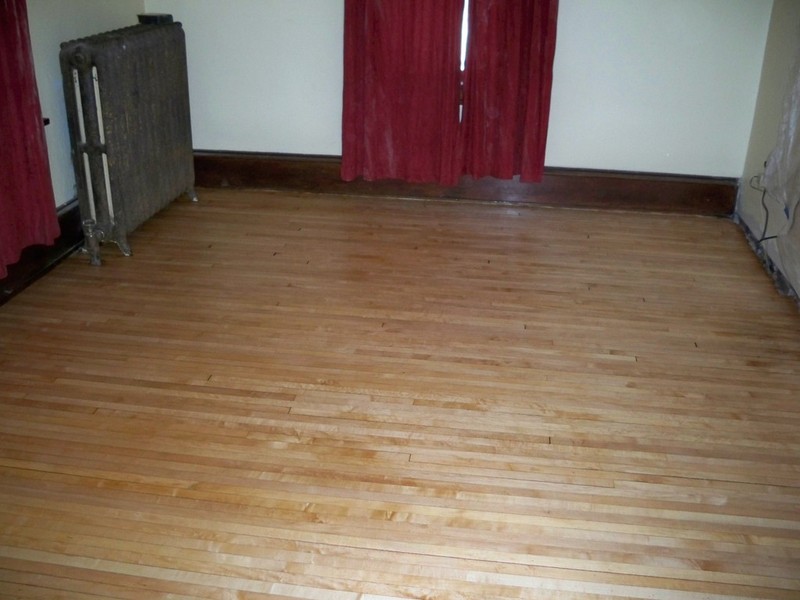
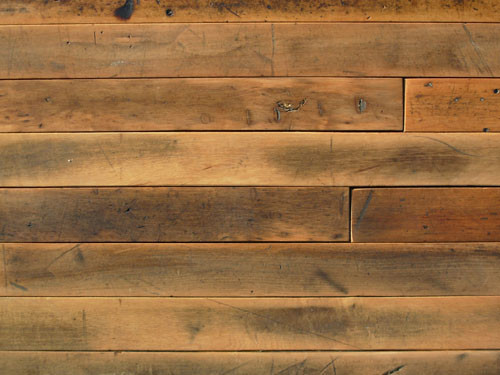
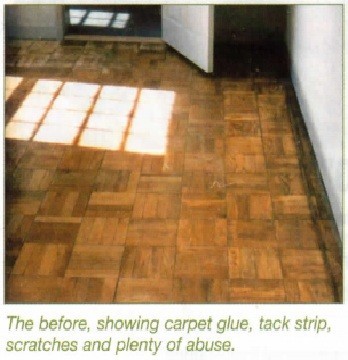
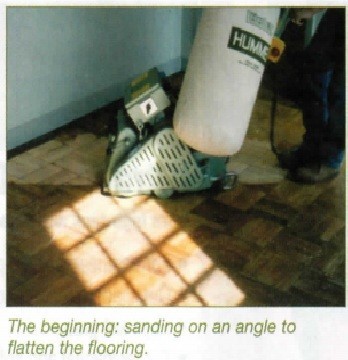
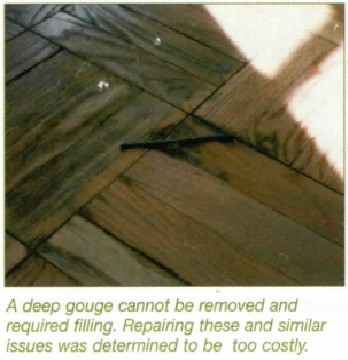
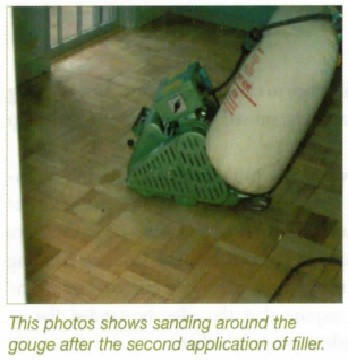
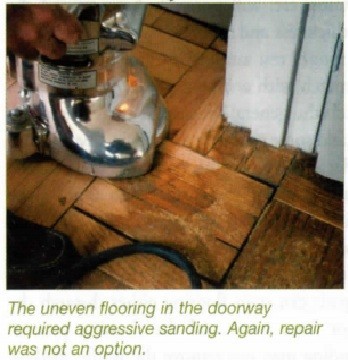
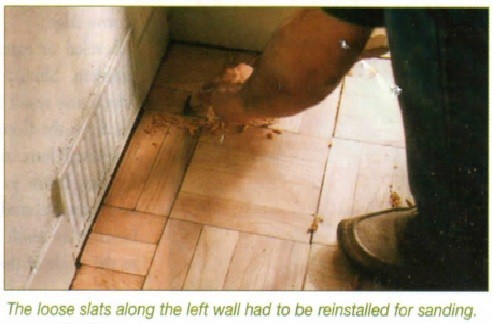
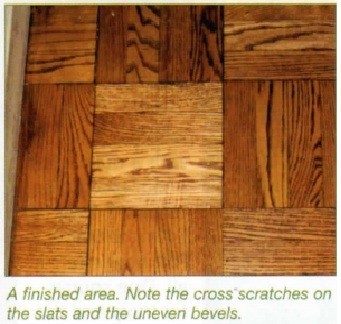
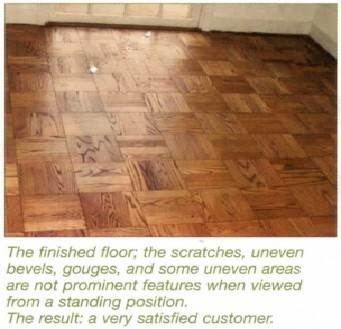
What the customer wants and expects and can be realistically achieved determines what procedures you will use and what risks you will encounter when refinishing a wood floor. The communication between the contractor and customer should result in realistic expectations. Properly communicating options and what to expect will result in a satisfied customer. The photos included in this article are from a very old and abused solid 9"x9" NOFMA parquet floor with bevels and a lot of gaps. The customer was advised the resulting refinish would not be perfect. All the gouges and scratches would not be removed, gaps would not be filled, and some of the bevels would not be uniform. The old floor was probably a seal and wax finish and we advised this would be the best choice for the refinish. The result was a properly performing finish and a very satisfied customer.

8. SANDING "IPE"
IPE Hardwood Floors
IPE HARDWOOD: is an awesome wood for hardwood flooring. Certainly the fact that it has a Janka rating of over 3600 making it one of the densest woods that is typically seen in the hardwood flooring market, suggests that it would be the perfect high traffic floor. In fact it has a long history of use in the industrial world as the ideal product for railway ties and heavy truck bedding for just this reason. Wear would be relatively insignificant in a home. Most daily traffic would have a hard time leaving a scratch. It is ideal for homes with large dogs or rough kids.
FINISH:
Ipe hardwood is a somewhat difficult wood to finish. Its chemical makeup interferes with the drying, adhesion and absorption of wood stains and top coats. Unfinished and attempting to finish in a
home is relatively difficult. Ipe's extreme density prevents most finishes from penetrating below the surface, thus it takes a bit of experience to gain the knowledge for effective
coating.
TOXICITY:
To "house finish", you would first have to sand then coat with some version of a polyurathane, but the sanding is the issue. IPE and its related family of Lapacho and the trade group of Brazilian
Walnut hardwood flooring is known to cause respiratory and contact dermatitis allergic reactions. Best bet is to buy ipe hardwood flooring PRE-finished!
DRYNESS:
Ipe is not so happy in dry climates. It is difficult to dry at the best of times and if it is installed in environments with seasonal low humidity. (ie. under 35%) I has a tendency to crack. It is very difficult for Brazilian manufactures to adequately kiln dry Ipe wood to a relative humidity that works in areas like Northern Ontario, when the tropical rainfall is as high as it is. It is near impossible to acclimate such a dense wood effectively while in a home to respond favorably to low humidity levels.
VIDEO: SANDING "ipe" Brazilian Walnut
NOTICE THAT THERE IS NO CONCERN FOR THE TOXIC DUST.....WOW
9. TAUPE DOPE
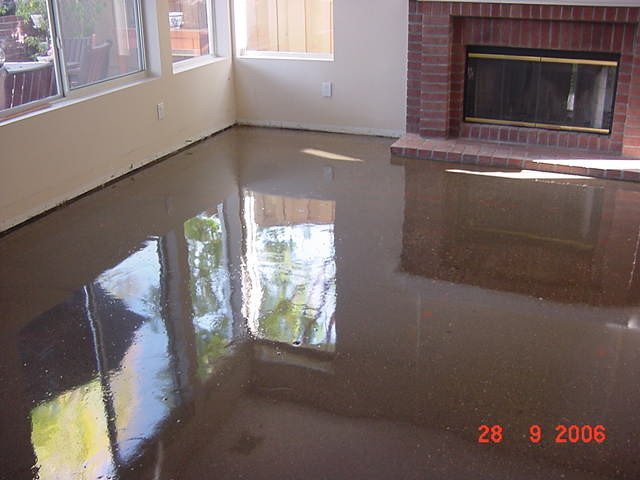
TAUPE DOPE
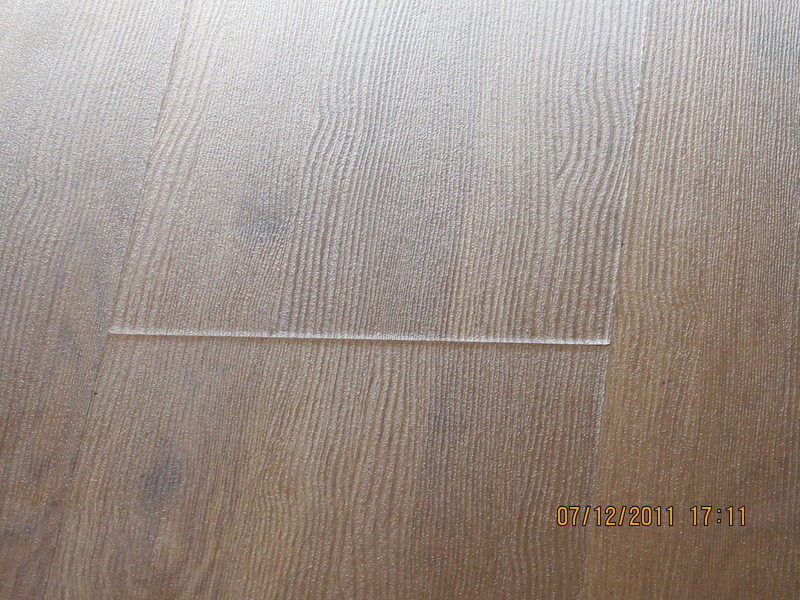
An original white oak
floor was stained a taupe color with a Swedish finish (conversion varnish) and then replaced caused from water damage. Three finish options with the taupe stain were offered: a conversion varnish, a
single-component waterborne finish or a two-component waterborne finish. The single-component waterborne finish was chosen.
Using that single-component finish and white oak can have good success with less concern for dreaded tannin pull. A Taupe stained maple floor done with the single-component finish can work out and
look great.
Taupe is a tricky stain to start with. After sanding the floor, water-popped, and let it dry it was stained. Heavily pigmented stains require longer dry times and this time the stain was left about
36-hours, the sealer put down, left to dry. The dreaded tannin pull marks were all over.
The rep from the stain company stated that with white oak, pastel stains and waterborne finish are not a successful combination. He also stated that the stain did not dry adequately, and that caused
the finish reaction.
Resanding and stained it again the heat was dialed to 75 degrees Fahrenheit and the floor let it dry for a full 72 hours. The floor again was coated with the waterborne finish with the same exact
failure.
No product failed on its own, but all three in combination was a recipe for disaster.
Online forums have wealth of information; the forum at hardwoodfloorsmag.com is a great one, and floormasters.com is another.
10. APPLICATORS

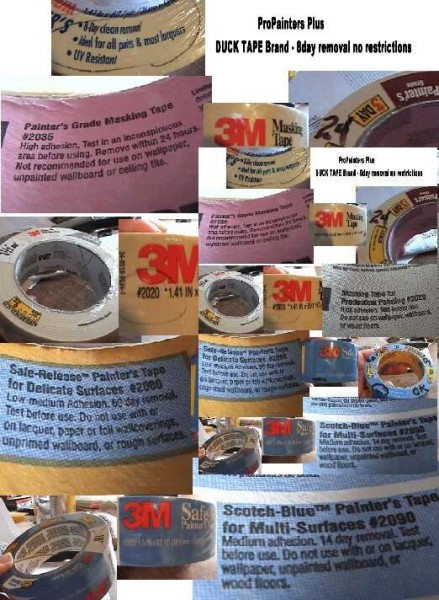
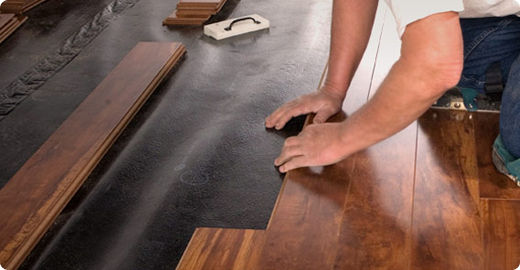
PICKING THE RIGHT FINISH APPLICATOR
Rollers, T-bars, lambswool applicators, brushes and the occasional rag are ways to get the finish on your floor.
Oil-Modified Polyurethane
The trick to oil-modified polyurethane (frequently called "poly") is generally "more is better;" you don't want the finish to puddle, but you want to get as much on the floor as possible and spread it as fast as possible to get the smoothest appearance on the floor. There are old school methods and newer methods to accomplishing this. Many old timers in the industry like to use a China bristle brush. These brushes are made of hog's hair, which are actually hollow inside. The brush sucks up finish, which gets released as you glide the finish onto the floor. Many people claim this is the best method for applying finish, since you're so much closer to the floor and you can see missed spots ("holidays") or blemishes in the finish and correct the problem before it dries. China bristle brushes can be cleaned off with just mineral spirits.
Another old-school applicator for oil-modified is the lambswool applicator on the block, which is made from either 100 percent lambswool or synthetic lambswool. Again, like the China bristle brush, this applicator holds a lot of finish. Natural lambswool tends to hold more finish than synthetic, but the synthetic definitely still does the job and is a little cheaper, which is seen more frequently. With the lambswool on the block, unlike the brush, you're standing upright and away from the floor, which means you should have a little more care as you're applying to make sure not to make any mistakes. Recently purchased natural lambswool applicators tend to shed fibers that get stuck in the finish. Before using one, simply comb out the applicator with a pocket comb or wrap it up in blue tape and remove the tape. Other guys might wash it without detergent and let it dry. This is used for the first coat of finish. For subsequent finishes, use lambswool applicators you've already used on at least 500 to 1,000 feet of finish; this gives a much smoother application. Lambswool applicators need to be stored in either mineral spirits or polyurethane.
Some of the newer applicators are making finish application even easier. A T-bar applicator, especially with tapered ends, is great for applying any finish. It allows you to get around doorjambs, and it puts a lot of finish down faster than a lambswool applicator. Some companies also manufacture a lambswool sleeve that can be slipped onto a T-bar. This speeds up application, and it also holds a lot of finish. Another option is rolling finish on with a ¼-inch or 3/8 -inch roller. This gets the finish down fast and agitates the floor very little (more agitation to the finish makes it look worse).
Waterborne Urethane
All the applicators for water-based urethane are synthetic. Definitely do not use a China bristle brush or lambswool applicator because the two hold a lot of finish and, unlike oil, you don't want all that on the floor; water-based is designed to go down thinner. Synthetic applicators just spread finish; they don't hold any finish in them. Many of the same synthetic applicators, except lambswool, can be used with water-based: a synthetic pad on a block, a T-bar with a synthetic sleeve or a roller. The cut-in pad for the edges should also be synthetic.
Moisture-Cure Urethane
Mostly used on the East Coast this finish tend to be use with a brush—either a 6-inch China bristle or 12-inch brush—as opposed to the T-bar. It's a fast-applying finish, so using a roller also works.
Conversion Varnish
Also called "acid-cure" or "Swedish" finish, is the most efficient way to apply conversion varnish with a brush. Choose between a 6-inch China bristle, or a 12-inch brush. The main point is to get down so you can see the finish being applied. Conversion varnish has a tendency to separate and leave missed spots.. As with many finishes, conversion varnish can also be applied with a roller. Follow the manufacturer's recommendations for which sleeve to use on the roller, and you have to be certain to apply enough finish. Typically the cleanup is more involved, requiring a lacquer thinner.